The Ultimate Homemade Teriyaki Chicken: A Flavor-Packed Journey into Japanese Cooking
Have you ever wondered why restaurant-style Teriyaki Chicken tastes so addictive yet seems impossible to replicate at home? The secret lies not in a special ingredient, but in understanding the perfect balance of sweet, savory, and umami—a hallmark of many Japanese recipes. By preparing this dish yourself, you control the quality of every component, avoid artificial thickeners, and unlock a depth of flavor that takeout simply cannot match. Whether you’re a weeknight cook or a weekend meal prepper, this data-driven guide will walk you through every step, ensuring your Teriyaki Chicken turns out glossy, tender, and restaurant-worthy every time.
—
Ingredients & Kitchen Tools
For the Chicken & Marinade
– Boneless, skinless chicken thighs (1.5 lbs) – Thighs stay juicier than breasts; substitute with chicken breast if preferred (reduce cooking time slightly).
– Soy sauce (¼ cup) – Use low-sodium for better salt control; tamari works for gluten-free.
– Mirin (¼ cup) – Sweet rice wine essential for authentic flavor; substitute with 3 tbsp white wine + 1 tbsp sugar.
– Sake (2 tbsp) – Adds depth; omit or use dry sherry as alternative.
– Brown sugar (2 tbsp) – Light or dark; honey or maple syrup can replace.
– Fresh ginger (1 tbsp, grated) – Bottled ginger paste works in a pinch.
– Garlic (3 cloves, minced) – Fresh is best; jarred minced garlic is acceptable.
– Cornstarch (1 tbsp) – For thickening the sauce; arrowroot powder is a paleo-friendly swap.
Kitchen Tools
– Large skillet or wok – Non-stick or stainless steel; cast iron also works.
– Small bowl – For mixing sauce.
– Whisk – To combine sauce ingredients.
– Tongs – For flipping chicken.
– Cutting board & chef’s knife – For trimming chicken and mincing aromatics.
– Microplane or grater – For ginger and garlic.
– Measuring cups & spoons – Precision matters in Japanese cooking.
—
Prep Time & Cooking Schedule
| Task | Time |
|——|——|
| Prep (trim chicken, grate ginger, mince garlic) | 10 minutes |
| Marinate (optional, but recommended) | 15–30 minutes |
| Cook (sear chicken + simmer sauce) | 15–18 minutes |
| Rest (let chicken rest before slicing) | 5 minutes |
| Total active time | ~25 minutes |
Planning tip: If you’re short on time, skip the marinating step—the sauce will still coat the chicken beautifully during cooking. For deeper flavor, marinate up to 2 hours in the fridge.
—
Step-by-Step Instructions
1. Prepare the sauce – In a small bowl, whisk together soy sauce, mirin, sake, brown sugar, grated ginger, and minced garlic until the sugar dissolves. Set aside.
2. Trim and cut the chicken – Pat chicken thighs dry with paper towels. Cut each thigh into bite-sized pieces (about 1.5-inch chunks). This ensures even cooking and maximum sauce adhesion.
3. Sear the chicken – Heat 1 tablespoon of neutral oil (like avocado or vegetable) in a large skillet over medium-high heat until shimmering. Add the chicken pieces in a single layer (work in batches if needed). Cook without moving for 3–4 minutes, until a deep golden crust forms. Flip and cook another 2–3 minutes. Temperature cue: Internal temperature should reach 165°F for safety, but chicken thighs are forgiving—they stay moist even at 170°F.
4. Add the sauce – Pour the prepared sauce over the seared chicken. Reduce heat to medium-low and let it simmer for 5–6 minutes, stirring occasionally. The sauce will bubble and reduce, coating each piece.
5. Thicken to perfection – In a small cup, mix 1 tablespoon cornstarch with 2 tablespoons cold water to form a slurry. Pour into the skillet while stirring constantly. Simmer another 1–2 minutes until the sauce turns glossy and clings to the chicken. Texture cue: The sauce should coat the back of a spoon without being gluey.
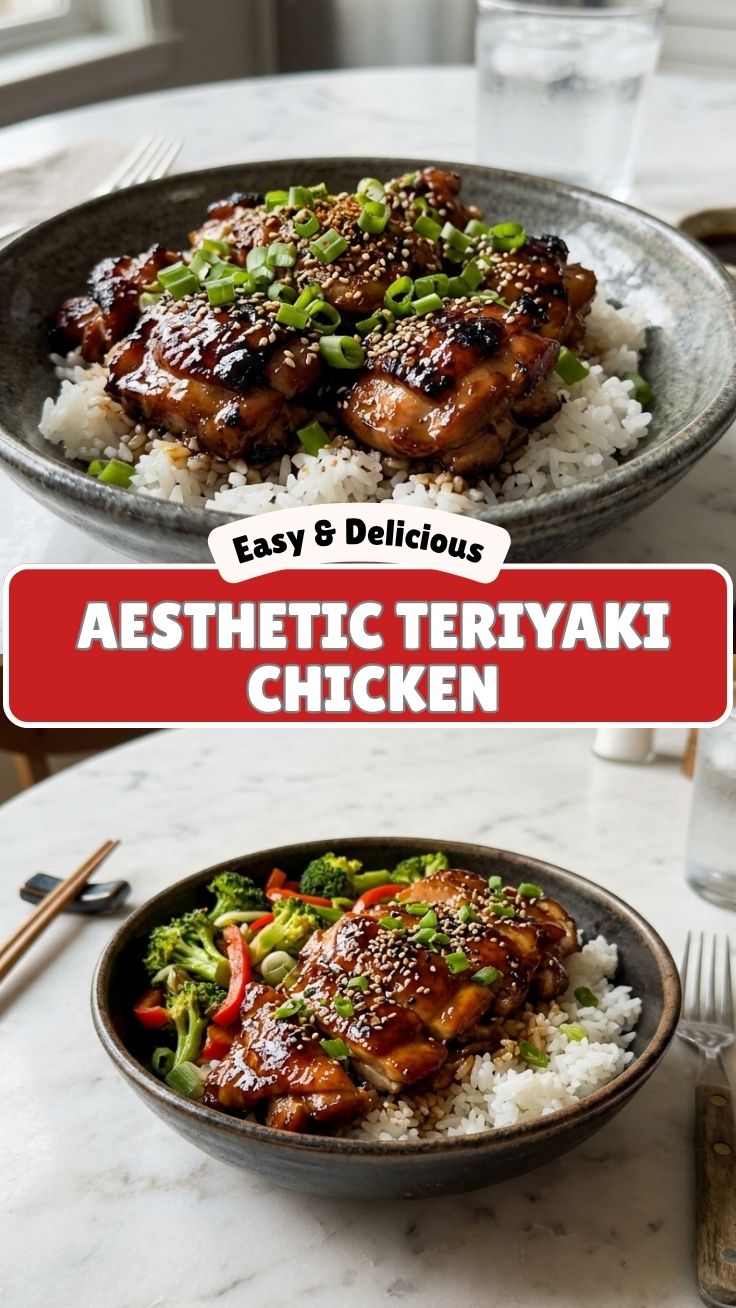
6. Rest and garnish – Remove from heat. Let the chicken rest for 5 minutes (this allows the sauce to set). Sprinkle with toasted sesame seeds and sliced green onions before serving.
> Pro tip: For an authentic finish, drizzle a tiny bit of sesame oil just before serving. This extra touch is common in many Japanese recipes and elevates the aroma. This Teriyaki Chicken pairs beautifully with steamed jasmine rice and a side of quick-pickled cucumber.
—
Nutritional Benefits & Advantages
– High-quality protein – Chicken thighs provide about 24g of protein per serving, supporting muscle repair and satiety.
– Good source of B vitamins – Particularly niacin and vitamin B6, which aid energy metabolism.
– Ginger and garlic – Both contain anti-inflammatory compounds and may support immune function.
– Balanced macronutrients – When paired with rice and vegetables, this dish offers a complete meal with moderate carbs, healthy fats, and lean protein.
– Dietary flexibility – Easily made gluten-free by using tamari and omitting the sake (or using a gluten-free alternative). Dairy-free by nature.
—
Tips, Variations & Cooking Advice
– Flavor twist – Add 1 tablespoon of honey or a splash of pineapple juice to the sauce for a fruity sweetness.
– Spicy kick – Stir in ½ teaspoon of red pepper flakes or a drizzle of sriracha.
– Vegetable boost – Toss in broccoli florets, bell peppers, or snap peas during the last 3 minutes of cooking.
– Alternative cooking methods –
– Oven: Bake at 400°F for 20 minutes, then brush with sauce and broil 2 minutes.
– Air fryer: Cook at 375°F for 12 minutes, shaking halfway, then toss with sauce.
– Dietary adaptations – Use coconut aminos instead of soy sauce for a soy-free version; substitute chicken with firm tofu or tempeh for a plant-based option.
– Portion control – This recipe serves 4. For meal prep, double the sauce and freeze half for later use.
—
Common Mistakes to Avoid
| Mistake | Solution |
|———|———-|
| Overcrowding the pan | Cook in batches to ensure proper searing, not steaming. |
| Adding sauce too early | Sear the chicken first to develop a flavorful crust. |
| Sauce becoming too runny | Simmer longer or add a bit more cornstarch slurry. |
| Chicken turning dry | Use thighs instead of breasts; don’t overcook—165°F is enough. |
| Forgetting to rest | Slicing too early causes juices to run out and sauce to slide off. |
—
Storage & Meal Prep Tips
– Refrigeration: Store in an airtight container for up to 4 days. The sauce will thicken slightly upon cooling.
– Freezing: Transfer cooled chicken and sauce to a freezer-safe bag or container. Freeze for up to 3 months. Thaw overnight in the fridge.
– Reheating: For best texture, reheat in a skillet over medium-low heat with a splash of water or chicken broth to loosen the sauce. Microwave in 30-second bursts, stirring in between, if short on time.
– Meal prep idea: Cook a double batch, portion into containers with rice and steamed broccoli, and grab for quick lunches all week.
—
Conclusion
This homemade Teriyaki Chicken proves that you don’t need a wok or a secret family recipe to create a dish that rivals your favorite takeout. By mastering the sweet-savory glaze and using simple techniques like searing and resting, you’ll unlock a world of flavor that’s both satisfying and versatile. The best part? Once you understand the core method, you can adapt it to countless other Japanese recipes—from teriyaki salmon to glazed tofu. Give it a try this week, tag your creation on social media, and let me know how it turned out. Your kitchen is about to become your new favorite Japanese restaurant.
—
FAQs
1. Can I use chicken breast instead of thighs?
Yes, but reduce cooking time by 2–3 minutes and be careful not to overcook. Pound the breast to an even thickness for uniform results.
2. What if I don’t have mirin?
Mix 3 tablespoons of dry white wine or sake with 1 tablespoon of sugar. This replicates the sweetness and acidity of mirin.
3. Why is my sauce not thickening?
Make sure you’re using a proper cornstarch slurry (1:2 ratio of cornstarch to cold water) and simmering the sauce long enough. Also, check that your pan isn’t too crowded with liquid.
4. How do I make this gluten-free?
Replace soy sauce with tamari or coconut aminos, and ensure your sake is gluten-free (or omit it). All other ingredients are naturally gluten-free.
5. Can I prepare the sauce ahead of time?
Absolutely! Whisk the sauce ingredients together and store in the fridge for up to 5 days. Shake or whisk again before using, as the ginger and garlic may settle.
Quick way to grow Teriyaki Chicken wings
Ingredients
Equipment
Method
- Preheat your oven to 400°F (200°C) and line a baking sheet with parchment paper for easy cleanup.
- In a large bowl, whisk together the soy sauce, honey, rice vinegar, sesame oil, garlic powder, and ginger powder to create the teriyaki marinade.
- Add the chicken wings to the bowl, toss to coat evenly, and then arrange them in a single layer on the prepared baking sheet.
- Bake for 20-25 minutes, or until the wings are cooked through and nicely caramelized.