The Ultimate Guide to Perfect Crispy Orange Chicken at Home
Have you ever wondered why your homemade takeout-style chicken never quite achieves that elusive crispy-yet-sticky perfection? You’re not alone. Mastering the art of cooking crispy, tangy-sweet Orange Chicken at home is a game-changer—it saves money, controls ingredients, and delivers restaurant-quality results from your own kitchen. Whether you’re craving the classic Panda Express copycat or exploring a spicier General Tso Chicken, this guide will walk you through every detail so you can serve up a masterpiece tonight.
Ingredients & Kitchen Tools
For the Chicken:
– 1 lb boneless skinless chicken thighs (or breasts) – Thighs stay juicier; breasts work but watch cooking time.
– 1 cup all-purpose flour – For that signature crispy coating.
– 1/4 cup cornstarch – Adds extra crunch and lightness.
– 1 large egg – Binds the batter.
– 1/4 cup cold water (or soda water) – Carbonation makes coating extra airy.
– 1 tsp salt + 1/2 tsp white pepper – Season the batter well.
– Vegetable oil (for frying) – Use peanut or canola oil with high smoke point.
For the Orange Sauce:
– 3/4 cup orange juice (fresh-squeezed is best) – Bright, natural acidity.
– 2 tbsp soy sauce – Adds umami depth.
– 1/4 cup brown sugar – Balances tartness; honey works as swap.
– 2 tbsp rice vinegar – Key for tangy finish.
– 1 tbsp sesame oil – Nutty aroma.
– 1 tsp ginger (grated) – Fresh, not powdered.
– 2 garlic cloves (minced) – Pungent backbone.
– 1 tbsp cornstarch + 2 tbsp water (slurry) – Thickens glaze.
– Optional: red chili flakes or Sriracha – For heat.
Kitchen Tools:
– Deep skillet or wok (cast-iron or non-stick)
– Thermometer (for oil temperature – crucial!)
– Mixing bowls (2–3)
– Whisk, tongs, slotted spoon
– Paper towels and wire rack for draining
Prep Time & Cooking Schedule
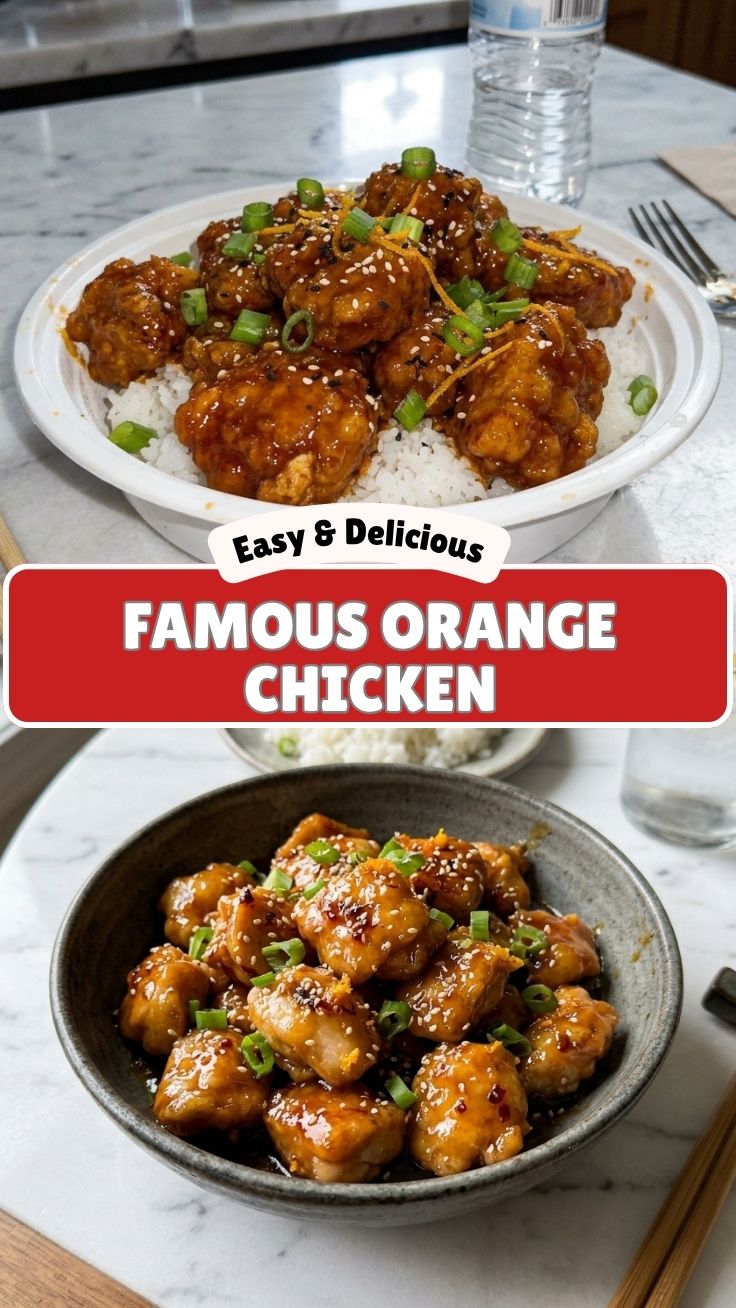
– Prep Time: 20 minutes (chop chicken, mix batter, make sauce)
– Marinating Time: 15 minutes (optional but recommended)
– Cook Time: 12–15 minutes (6–8 min frying + 4–5 min sauce toss)
– Total Time: ~35 minutes
Planning Tip: Start your sauce while the chicken marinates. If frying in batches, keep cooked chicken on a wire rack in a 200°F oven to stay crispy while you finish the rest. This ensures every piece stays crunchy until the final toss with sauce.
Step-by-Step Instructions
1. Prepare the chicken: Cut thighs into 1-inch bite-sized cubes. Pat dry with paper towels – moisture is the enemy of crispiness. Season lightly with salt and pepper.
2. Make the batter: In a bowl, whisk flour, cornstarch, salt, and white pepper. Add egg and cold water; stir until a thick, lumpy batter forms – it should coat the back of a spoon. If too thick, add 1 tbsp more water.
3. Heat the oil: Fill your skillet with 1 inch oil and heat to 350°F (175°C). Use a thermometer! Too low = greasy chicken; too high = burnt exterior, raw inside.
4. Fry the chicken: Working in batches (don’t overcrowd), dip each piece into batter, let excess drip off, then gently place in hot oil. Fry 4–5 minutes until golden brown and internal temp reaches 165°F. Transfer to wire rack.
5. Make the sauce: In a clean pan over medium heat, combine orange juice, soy sauce, brown sugar, rice vinegar, sesame oil, ginger, and garlic. Stir until sugar dissolves (about 2 minutes). Whisk in cornstarch slurry and cook 1 minute until thickened. For a spicy kick, add chili flakes now—this transforms your dish into a fiery variant reminiscent of Orange Chicken with heat, or emulate the complexity of General Tso Chicken.
6. Toss and serve: Add fried chicken to the sauce pan. Toss quickly (30 seconds) – don’t let it sit or it’ll soften. Serve immediately over steamed jasmine rice or fried rice.
Pro Tip: For extra-crispy results, double-fry: Fry once at 325°F for 3 minutes, let rest 2 minutes, then fry again at 375°F for 2 minutes. This technique is used by top Chinese-American restaurants.
Nutritional Benefits & Advantages
This homemade version is significantly healthier than takeout. A typical restaurant serving of Orange Chicken packs ~500 calories per cup, loaded with sodium and MSG. By making it yourself, you control the oil quality (use avocado or coconut oil) and reduce sugar by 30% without sacrificing taste. The General Tso Chicken variant can be lightened by baking the chicken at 425°F instead of deep-frying – spray with oil and bake 15 minutes, flipping halfway.
Key nutrients: Chicken provides lean protein (25g per serving), supporting muscle repair. Orange juice delivers vitamin C (60% DV) and antioxidants that boost immunity. Garlic and ginger offer anti-inflammatory compounds. The sesame oil adds heart-healthy monounsaturated fats.
Tips, Variations & Cooking Advice
– Gluten-Free: Replace flour with rice flour + 1 tbsp tapioca starch. Double-check soy sauce – use tamari or coconut aminos.
– Dairy-Free: This recipe is naturally dairy-free.
– Spice Level: Add 1 tsp sriracha or gochujang to sauce for a Korean twist.
– Vegetarian Option: Use firm tofu (pressed and cubed) or cauliflower florets. Bake cauliflower at 425°F for 20 minutes before tossing.
– Sauce Twist: Swap orange juice with pineapple juice + zest for tropical flair. Or use half orange, half lime juice for a zingy variation.
– Cooking Method: Air fryer – coat battered chicken with oil spray, air fry at 400°F for 12 minutes (shake halfway), then toss with heated sauce.
Common Mistakes to Avoid
1. Soggy coating: Frying at wrong temperature. Always preheat oil to 350°F and check with a thermometer.
2. Too sweet sauce: Over-reducing the sugar. Add brown sugar gradually and taste as you go.
3. Burnt garlic/ginger: Add these after the sugar dissolves, not before – they burn quickly in hot oil.
4. Chicken drying out: Overcooking. Use a meat thermometer – 165°F is perfect. Remove immediately.
5. Uneven cooking: Cutting chicken into uneven sizes. Keep pieces uniform (1-inch cubes).
Storage & Meal Prep Tips
– Refrigeration: Store leftovers in an airtight container for up to 4 days. Keep sauce separate to prevent sogginess.
– Freezing: Freeze fried chicken (without sauce) in a single layer on a baking sheet, then transfer to freezer bags. Lasts 2 months. Reheat in air fryer at 375°F for 5 minutes, then toss with fresh sauce.
– Reheating: Best in a skillet over medium heat with a splash of water or orange juice. Microwave works (1 minute, 30-second intervals) but won’t be crispy. For crunch, reheat in air fryer or oven at 350°F for 8 minutes.
Conclusion
Mastering this dish at home transforms a weeknight dinner into a satisfying, restaurant-worthy experience. From the crispiness of the batter to the perfect balance of sweet and tangy, every step rewards you with a result that rivals any takeout. Whether you’re perfecting the classic Orange Chicken or exploring the spicy depth of General Tso Chicken, the skills you’ve learned here will serve you for many meals to come. I encourage you to try this recipe tonight, share your results with friends, and explore more Asian-inspired recipes on this blog. Your taste buds will thank you.
FAQs
Q: Can I use chicken breast instead of thighs?
A: Yes, but watch cooking time – breasts dry out faster. Cook to 165°F internal temp and consider brining for 30 minutes for extra moisture.
Q: How do I make the sauce thicker?
A: Increase cornstarch slurry to 2 tbsp cornstarch + 3 tbsp water. Whisk in slowly and simmer 2 minutes until it reaches desired consistency.
Q: Why is my batter falling off the chicken?
A: Pat chicken dry before battering. Also, let battered pieces rest 5 minutes before frying – this helps coating adhere.
Q: Can I make this without deep-frying?
A: Absolutely. Bake battered chicken at 425°F for 15 minutes (spray with oil), or air-fry at 400°F for 12 minutes. Texture will be less crispy but still delicious.
Q: How long does the sauce keep in the fridge?
A: Up to 1 week in a sealed jar. Reheat gently on stovetop or microwave before tossing with freshly fried chicken.
Quick way to grow your Orange Chicken
Ingredients
Equipment
Method
- Cut chicken thighs into 1-inch pieces and pat dry with paper towels. In a bowl, toss the chicken with cornstarch, salt, and pepper until evenly coated.
- Heat vegetable oil in a large skillet or wok over medium-high heat. Add chicken in a single layer and cook for 3-4 minutes per side until golden brown and cooked through. Remove chicken from skillet and set aside.
- In a medium bowl, whisk together orange juice, soy sauce, rice vinegar, brown sugar, grated ginger, minced garlic, and red pepper flakes. In a small bowl, dissolve cornstarch in water to create a slurry.
- Pour the orange sauce mixture into the same skillet and bring to a simmer over medium heat. Stir in the cornstarch slurry and cook for 1-2 minutes until the sauce thickens.
- Return the cooked chicken to the skillet, tossing to coat evenly with the orange sauce. Cook for another 1-2 minutes, allowing the chicken to warm through and absorb the sauce.
- Garnish with sesame seeds and sliced green onions, then serve immediately with rice and steamed vegetables.