The Ultimate Guide to Making the Best Tuna Salad at Home
Have you ever opened a can of tuna and wondered why your homemade version never quite tastes like the deli version? The answer lies in the technique, not the ingredients. When you prepare a classic Tuna Salad at home, you gain complete control over texture, flavor, and nutrition. Whether you’re looking for a quick lunch, a protein-packed snack, or a versatile base for meals, mastering a reliable Tuna Salad is a kitchen essential. And if you’re searching for a versatile, high-protein option, this tuna salad recipe offers a creative twist that keeps your pantry staples working for you. In this guide, we’ll break down every step, from ingredient selection to storage, ensuring your homemade tuna salad rivals any restaurant version.
Ingredients & Kitchen Tools
Required Ingredients
– Canned tuna (12 oz): Preferred in water or oil. Oil-packed provides richer flavor, while water-packed is lighter. Drain well.
– Mayonnaise (½ cup): Full-fat for creaminess or Greek yogurt for a tangy, lighter option.
– Celery (2 stalks, finely diced): Adds crunch and freshness. Substitute with jicama or bell pepper.
– Red onion (¼ cup, minced): Soak in cold water for 10 minutes to reduce sharpness. Use shallots for a milder taste.
– Fresh lemon juice (1 tbsp): Balances richness. Bottled juice works but fresh is brighter.
– Dijon mustard (1 tsp): Adds depth. Substitute with yellow mustard or whole-grain mustard.
– Salt and black pepper: To taste. Start with ¼ tsp each.
– Fresh parsley (2 tbsp, chopped): Optional for color and freshness. Substitute with dill or chives.
Optional Ingredient Swaps
– Greek yogurt: Replace half the mayo for lower fat.
– Avocado: Mash ½ avocado as a creamy, dairy-free binder.
– Apple: Diced for sweetness and crunch.
– Capers or pickles: Add briny, tangy notes.
– Hard-boiled eggs: Chopped for extra protein and richness.
Kitchen Tools
– Mixing bowls: One large, one small.
– Fork: For flaking tuna.
– Chef’s knife and cutting board: For dicing vegetables.
– Measuring cups and spoons: For accuracy.
– Fine-mesh strainer: To drain tuna thoroughly.
– Colander: Optional for rinsing beans if using a variation.
Prep Time & Cooking Schedule
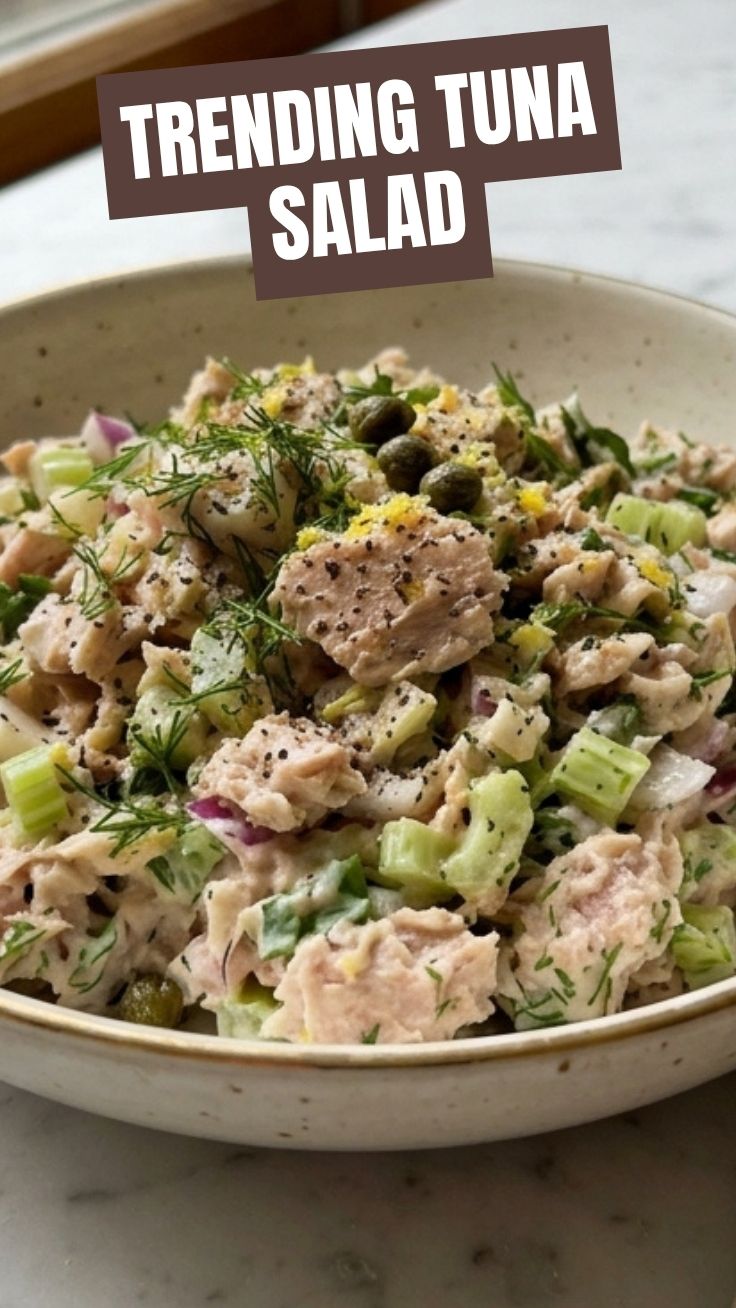
– Prep time: 10 minutes
– Chill time: 30 minutes (recommended) to allow flavors to meld
– Resting time: 5 minutes after mixing for texture to settle
– Total time: 45 minutes (including chill time)
Planning tip: Tuna salad tastes best after resting in the fridge for at least 30 minutes. This allows the flavors to blend and the mayonnaise to soften the vegetables. If you’re short on time, you can serve immediately, but the texture will be slightly more pronounced.
Step-by-Step Instructions
1. Drain the tuna thoroughly: Open the cans and transfer the tuna to a fine-mesh strainer. Press gently with the back of a spoon to remove excess liquid. This step is crucial—excess moisture creates a watery, bland salad.
2. Flake the tuna: Place the drained tuna in a large mixing bowl. Use a fork to break it into small, uniform flakes. Avoid over-mashing, as you want some texture.
3. Prepare the vegetables: Dice the celery and red onion into small, even pieces. For the red onion, soak in cold water for 10 minutes, then drain. This removes the harsh bite while keeping the crunch.
4. Combine the base ingredients: Add the diced celery, minced red onion, fresh lemon juice, and Dijon mustard to the flaked tuna. Stir gently with a fork to combine.
5. Add the mayonnaise: Start with ½ cup of mayonnaise. Fold it in using a spatula or fork. The mixture should be creamy but not soupy. If it seems dry, add 1 tablespoon more at a time.
6. Season and adjust: Add salt and black pepper to taste. Stir in fresh parsley if using. Taste and adjust—add more lemon juice for brightness, more mustard for tang, or a pinch of cayenne for heat.
7. Chill and serve: Cover the bowl with plastic wrap and refrigerate for at least 30 minutes. This step is non-negotiable for the best texture and flavor. When ready, serve on bread, lettuce cups, or crackers.
Pro tip: For the perfect Tuna Salad, control the temperature by using cold ingredients. If your tuna was refrigerated, bring it to room temperature for 5 minutes before mixing. This prevents the mayonnaise from separating. And for a versatile base, this tuna salad recipe works beautifully with a spoonful of Greek yogurt for extra creaminess.
Nutritional Benefits & Advantages
Tuna salad is more than a convenient lunch—it’s a nutrient-dense meal. Here’s why it deserves a regular spot in your rotation:
– High-quality protein: Canned tuna provides about 20-25 grams of protein per 3-ounce serving, supporting muscle repair and satiety.
– Omega-3 fatty acids: Tuna, especially light and skipjack varieties, is rich in EPA and DHA, which support heart and brain health.
– Low in carbohydrates: With minimal carbs from vegetables, tuna salad is ideal for low-carb, keto, and diabetic-friendly diets.
– Vitamin B12 and selenium: Tuna is an excellent source of these essential nutrients, aiding energy metabolism and immune function.
– Customizable for dietary needs: Easily adapted for gluten-free, dairy-free, or paleo diets by choosing appropriate binders and serving options.
Advantage: Preparing tuna salad at home allows you to control sodium levels (canned tuna can be high in salt) and avoid preservatives found in store-bought versions.
Tips, Variations & Cooking Advice
Flavor Variations
– Mediterranean: Add chopped Kalamata olives, sun-dried tomatoes, and crumbled feta cheese.
– Asian-inspired: Mix in sesame oil, soy sauce, grated ginger, and sliced green onions.
– Spicy: Stir in sriracha, diced jalapeños, or a pinch of cayenne pepper.
– Herbaceous: Use fresh dill, tarragon, or basil instead of parsley.
Ingredient Swaps
– Replace mayo: Use mashed avocado, hummus, or full-fat Greek yogurt.
– Add crunch: Crushed almonds, walnuts, or sunflower seeds.
– Boost fiber: Mix in canned chickpeas or white beans for a heartier texture.
Cooking Methods
– Baked version: Spread tuna salad on bread, top with cheese, and broil for 3-5 minutes for a tuna melt.
– Cold salad: Serve on a bed of mixed greens with cherry tomatoes and cucumber slices.
– Stuffed vegetables: Use as filling for bell peppers, tomatoes, or avocado halves.
Dietary Adaptations
– Gluten-free: Serve on gluten-free bread, lettuce wraps, or rice cakes.
– Dairy-free: Use vegan mayonnaise or mashed avocado.
– Low-fat: Replace half the mayo with plain Greek yogurt or cottage cheese.
Common Mistakes to Avoid
1. Overmixing the tuna: Overworking the flakes creates a pasty, unappealing texture. Gently fold ingredients until just combined.
2. Skipping the chill time: Serving immediately results in a watery, bland salad. Allow at least 30 minutes for flavors to meld.
3. Using too much mayonnaise: Start with less than you think you need. You can always add more, but you can’t remove it.
4. Not draining the tuna thoroughly: Excess moisture dilutes the flavor and makes the salad runny. Press firmly with a spoon.
5. Adding vegetables too early: If you’re not serving immediately, add crunchy vegetables just before serving to prevent them from becoming soggy.
Storage & Meal Prep Tips
Refrigeration
– Store in an airtight container for up to 3 days. The flavor improves after 24 hours.
– Keep vegetables separate if meal prepping to maintain crunch. Add them just before serving.
– Do not freeze tuna salad—mayonnaise-based salads separate and become watery when thawed.
Reheating (if needed)
– For tuna melts: Reheat in a toaster oven or under the broiler for 3-5 minutes.
– For cold salads: Serve straight from the fridge. No reheating required.
Meal Prep Strategy
– Make a double batch on Sunday for quick lunches throughout the week.
– Portion into individual containers for grab-and-go meals.
– Store on a bed of lettuce to keep it fresh and prevent sogginess.
Conclusion
Mastering a classic Tuna Salad is about balancing texture, flavor, and freshness. By following this Tuna Salad guide, you’ll avoid common pitfalls and create a versatile dish that works for lunches, snacks, or light dinners. Whether you stick to the traditional version or explore the high-protein tuna salad recipe variation, the key is using quality ingredients and giving the flavors time to meld. This Tuna Salad and its adaptable tuna salad recipe will become a staple in your kitchen, ready to save you on busy days. Try it today, and share your favorite twists in the comments below!
FAQs
1. Can I use fresh tuna instead of canned?
Yes, but you’ll need to cook it first. Grill or pan-sear fresh tuna steak to medium-rare, then flake it. The texture will be firmer and the flavor more pronounced.
2. How long does tuna salad last in the fridge?
Up to 3 days in an airtight container. After that, the vegetables may become soggy and the mayonnaise may separate.
3. Can I make tuna salad without mayonnaise?
Absolutely. Substitute mashed avocado, plain Greek yogurt, hummus, or a mixture of olive oil and lemon juice for a lighter, dairy-free version.
4. Why is my tuna salad watery?
This usually happens from not draining the tuna thoroughly or adding too much moisture from vegetables. Pat the tuna dry with paper towels and blot excess liquid from tomatoes or cucumbers.
5. Can I freeze tuna salad?
Not recommended. Mayonnaise-based salads separate when thawed, resulting in a grainy, watery texture. If you must freeze, consider omitting the mayo and adding it after thawing.
Best way to grow Tuna Salad in 5 minutes. Tuna Salad
Ingredients
Equipment
Method
- In a medium bowl, flake the drained canned tuna with a fork.
- Add mayonnaise, chopped celery, chopped red onion, Dijon mustard, salt, and black pepper to the bowl.
- Mix all ingredients thoroughly until well combined.
- Serve immediately on bread, crackers, or lettuce wraps, or refrigerate for later use.