Master the Art of Homemade Sourdough Bread: A Journey from Flour to Flavor
Have you ever dreamt of pulling a warm, crusty loaf of artisanal bread from your oven, its aroma filling your kitchen with an intoxicating invitation? While the idea of baking Sourdough Bread might seem daunting at first, this comprehensive guide will demystify the process, transforming you into a confident baker. Mastering this ancient craft at home not only provides unparalleled flavor and texture but also offers a rewarding connection to the simple, yet profound, act of creation. With our detailed instructions, even a beginner can cultivate a vibrant Sourdough Starter and bake a loaf that rivals any bakery.
Ingredients & Kitchen Tools
Crafting the perfect sourdough requires just a few basic ingredients and tools. Quality matters here, especially for the flour and water!
- All-Purpose Flour (Unbleached): (500g) The structural backbone of your bread. Unbleached varieties often have better protein content for gluten development.
- Whole Wheat Flour: (50g) Adds depth of flavor and nutrients, and helps feed your starter.
- Active Sourdough Starter: (100g) Your magical leavening agent, active and bubbly.
- Water (Filtered): (350-375g, 70-75% hydration) Tap water can contain chlorine which inhibits yeast activity; filtered is best.
- Fine Sea Salt: (10g) Essential for flavor and controlling fermentation.
- Large Mixing Bowl: For combining ingredients and bulk fermentation.
- Dough Scraper: Invaluable for handling sticky dough and cleaning surfaces.
- Banneton Basket (or proofing bowl lined with a floured cloth): (8-9 inch) Provides support during final proofing and gives the loaf its classic shape.
- Dutch Oven with Lid (or baking stone with a steaming tray): Essential for trapping steam and creating a crispy crust and excellent oven spring.
- Kitchen Scale: Crucial for accurate measurements, especially in sourdough baking.
- Clean Kitchen Towel/Plastic Wrap: For covering dough during fermentation.
Prep Time & Cooking Schedule
Sourdough baking is less about active “cook time” and more about patient “prep time” and “resting time.” The long fermentation is what develops its complex flavor and digestibility.
- Prep Time (active): 30-45 minutes (mixing, folds, shaping)
- Bulk Fermentation: 4-6 hours (at room temperature, depending on ambient temp)
- Cold Proofing: 8-16 hours (in the refrigerator)
- Bake Time: 45-50 minutes
This schedule allows you to fit the active work into a day, followed by an overnight rest, making it perfect for fresh bread in the morning!
Step-by-Step Instructions
1. Feed Your Starter (Morning, Day 1): Ensure your Sourdough Starter is active and bubbly before you begin. Feed it 4-6 hours before mixing your dough. It should have doubled in size and pass the float test (a small spoonful floats in water).
2. Autolyse (Early Afternoon, Day 1): In your large mixing bowl, combine the all-purpose flour, whole wheat flour, and water. Mix until just combined and no dry spots remain. Cover and let rest for 30 minutes to 1 hour. This step, called autolyse, helps hydrate the flour and start gluten development.
3. Mix in Starter & Salt: Add your active Sourdough Starter and salt to the autolysed dough. Mix thoroughly by hand, squeezing the dough between your fingers until everything is evenly incorporated. The dough will be sticky.
4. Bulk Fermentation with Stretch & Folds: Over the next 3-4 hours, perform 3-4 sets of stretch and folds every 30-45 minutes. To do this, moisten your hands, grab a portion of the dough from one side, stretch it upwards, and fold it over itself. Rotate the bowl and repeat for all four sides. This builds strength and elasticity in your dough for a superior Sourdough Bread.
5. Pre-Shape: Gently turn the dough out onto a lightly floured surface. Using a bench scraper, gently shape it into a loose round. Allow it to rest for 20-30 minutes, uncovered.
6. Final Shape: Lightly flour your work surface and banneton. Gently shape the dough into a taut round or oval, building surface tension. Transfer seam-side up into the floured banneton.
7. Cold Proof (Overnight): Cover the banneton with plastic wrap or a clean towel and refrigerate for 8-16 hours. Cold proofing slows fermentation, develops flavor, and makes the dough easier to score.
8. Preheat & Bake (Morning, Day 2): Preheat your oven to 475°F (245°C) with the Dutch oven inside for at least 30 minutes. Carefully remove the hot Dutch oven. Gently invert the cold dough into the Dutch oven. Score the top of the dough with a razor blade or a sharp knife.
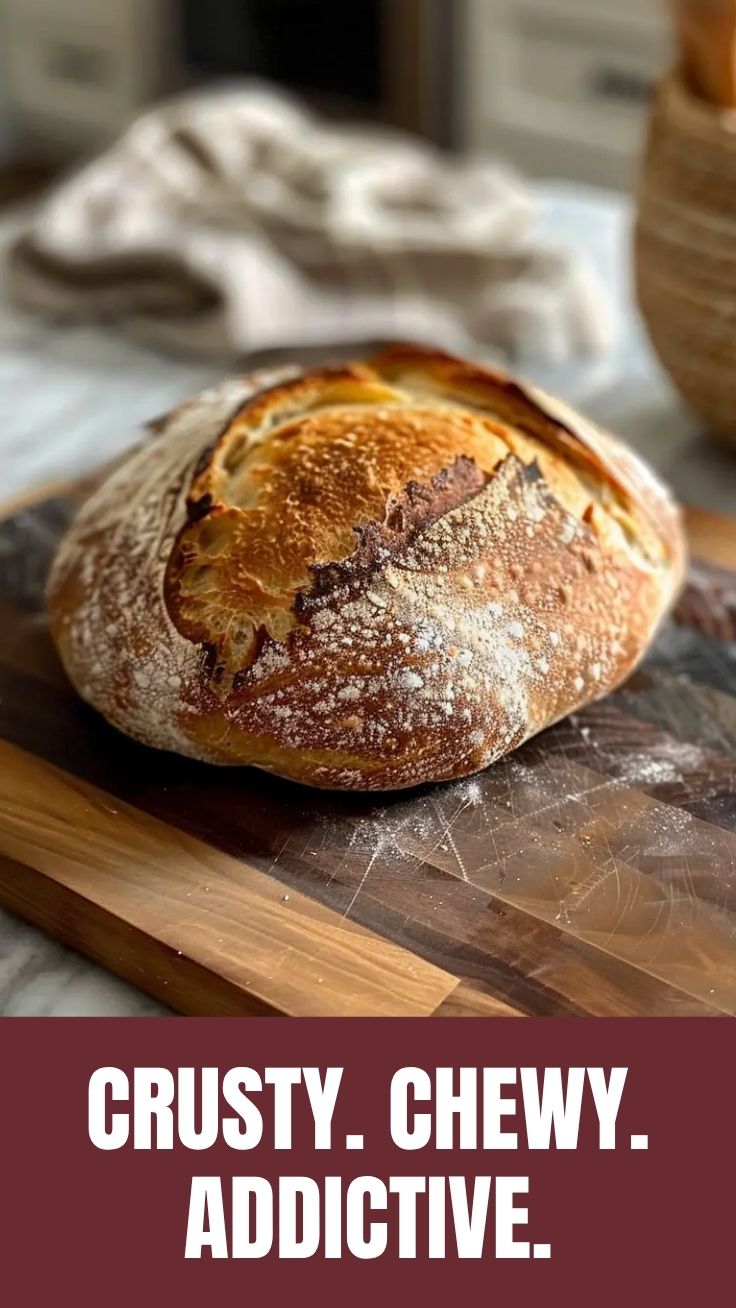
9. Bake with Lid: Bake with the lid on for 20-25 minutes. The trapped steam creates an incredible oven spring and a crispy crust.
10. Bake without Lid: Remove the lid and continue baking for another 25-30 minutes, or until the crust is a deep golden brown and the internal temperature reaches 200-210°F (93-99°C).
11. Cool Completely: Transfer the baked loaf to a wire rack and let it cool completely for at least 1-2 hours before slicing. This is crucial for the crumb to set and the flavors to fully develop.
Nutritional Benefits & Advantages
Homemade Sourdough Bread offers more than just incredible taste. The long fermentation process breaks down complex carbohydrates and gluten, making it often easier to digest for those with gluten sensitivities (though not gluten-free). It’s also a good source of fiber, B vitamins, and minerals like iron and magnesium. The beneficial bacteria from the Sourdough Starter can act as prebiotics, contributing to gut health.
Tips Variations & Cooking Advice
- Hydration: Adjust water slightly based on flour absorption. Wetter doughs are harder to handle but can yield a more open crumb.
- Add-ins: During the second set of stretch and folds, incorporate roasted garlic, herbs, cheese, or dried fruits for delicious variations.
- Flour Blends: Experiment with different ratios of whole grain flours for varied flavors and textures. Rye flour, for instance, adds a distinct tang.
- Scoring: Practice scoring patterns! A good score helps the loaf expand beautifully and prevents blowouts.
- Baking Surface: If you don’t have a Dutch oven, a pizza stone with a pan of hot water on the bottom rack can simulate a similar steamy environment.
Common Mistakes to Avoid
- Weak Starter: Using a sluggish Sourdough Starter is the number one reason for flat loaves. Ensure it’s active and bubbly.
- Under-Proofing/Over-Proofing: Learning to read your dough’s fermentation cues comes with practice. An under-proofed loaf will be dense; an over-proofed one will spread.
- Not Cooling Enough: Slicing into a hot loaf can result in a gummy texture. Patience is key!
- Inaccurate Measurements: Sourdough baking relies heavily on ratios. Use a kitchen scale.
- Not Enough Steam: Without sufficient steam, your crust won’t be as crispy, and your loaf won’t rise as much.
Storage & Meal Prep Tips
Once your Sourdough Bread is completely cool, store it at room temperature in a bread box or a paper bag for 2-3 days for the best crust. For longer storage, slice the cooled loaf and freeze individual slices in an airtight bag for up to 3 months. To reheat, toast directly from frozen or thaw and warm in the oven.
Conclusion
Baking your own Sourdough Bread is a fulfilling and surprisingly approachable culinary adventure. With a little patience, a robust Sourdough Starter, and these detailed steps, you’ll be enjoying artisan-quality loaves right from your kitchen. Don’t be discouraged by initial imperfections; every loaf is a learning experience, bringing you closer to sourdough mastery.
FAQs
Q1: My Sourdough Starter isn’t very active. What should I do?
A1: Try feeding it more frequently (every 12 hours) with a 1:1:1 ratio of starter, water, and flour, and keep it in a warmer spot (75-80°F / 24-27°C). Use good quality, unbleached flour.
Q2: Can I bake sourdough without a Dutch oven?
A2: Yes, you can. Preheat a pizza stone or heavy baking sheet, then place the dough directly on it. For steam, place a pan of boiling water on the bottom rack of your oven for the first 20 minutes of baking.
Q3: Why is my sourdough flat and dense?
A3: This is often due to a weak starter, under-proofed dough, or insufficient gluten development during the stretch and fold stages. Review your starter’s activity and ensure you’re performing enough gentle folds.
Q4: How do I know when my dough is perfectly proofed?
A4: The “poke test” is helpful. Gently press a floured finger into the dough. If it springs back slowly and completely, it’s ready. If it springs back immediately, it’s under-proofed; if it leaves an indent, it might be slightly over-proofed.
Q5: What’s the best way to get a really crispy crust?
A5: Ensure your Dutch oven (or baking environment) is very hot before baking. Baking with a lid for the first half of the bake traps steam, which helps the crust develop. Removing the lid allows it to brown and crisp up.
How to grow sourdough bread Sourdough Bread
Ingredients
Equipment
Method
- On day 1, combine 50g all-purpose flour and 50g warm water in a small, clear jar, mixing well to create a thick batter.
- Cover the jar loosely with a lid or plastic wrap and let it rest at room temperature (around 70-75°F / 21-24°C) for 24 hours.
- On day 2, add another 50g flour and 50g warm water to the jar, stir, cover, and let rest for 24 hours.
- Repeat this feeding process on day 3, adding 50g flour and 50g warm water, stirring, covering, and letting it rest.
- From day 4 onward, discard half of the starter before each feeding, then add 50g flour and 50g warm water, ensuring a consistent feeding schedule.
- Continue feeding daily until your starter is consistently active, bubbly, and doubles in size within 4-8 hours after feeding, which usually takes about 7-10 days.