The Ultimate Juneteenth Red Velvet Cake with Cream Cheese Frosting Guide
Introduction
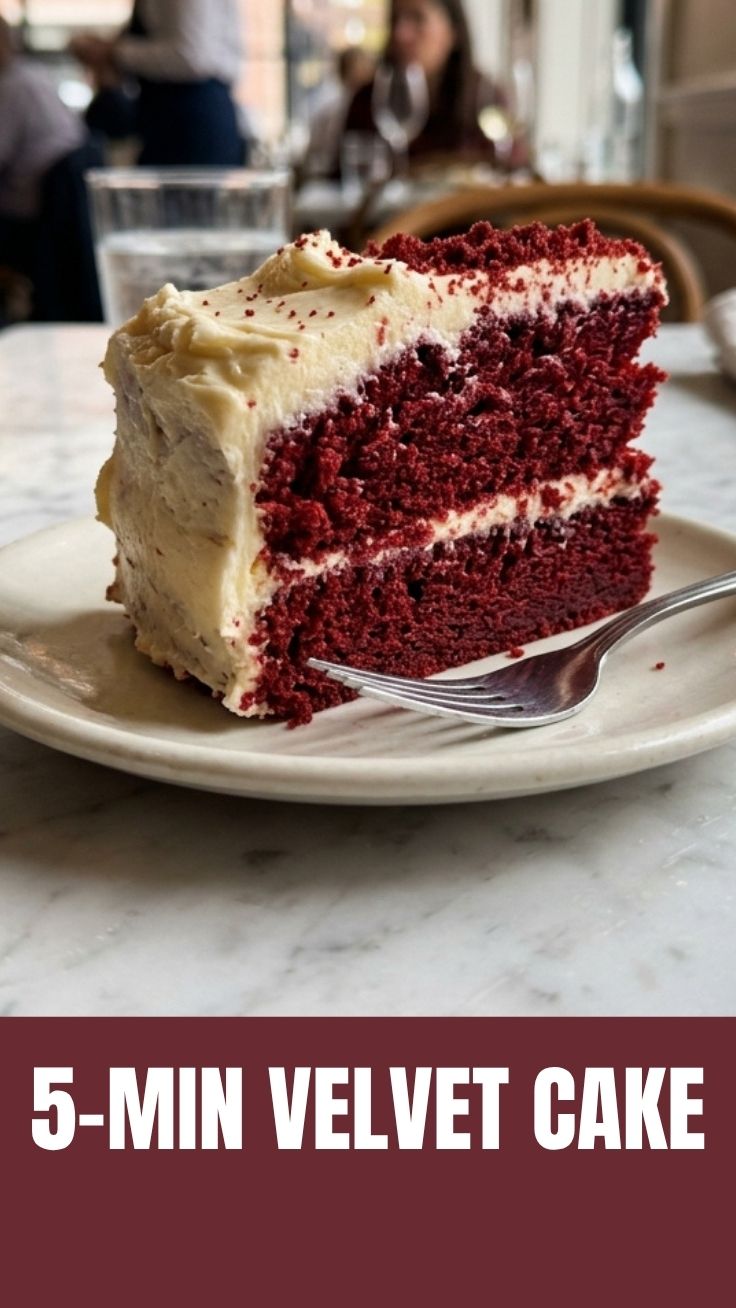
Why is Red Velvet Cake the soulful symbol of Juneteenth celebrations? Its vibrant deep-red hue tells a story of resilience and joy, while the velvety crumb paired with a tangy cream cheese frosting creates one of the most beloved flavor combinations in Southern baking heritage. Preparing this iconic dessert from scratch at home is an incredibly valuable experience—it allows you to honor the deep cultural roots of the holiday, control every ingredient for superior quality, and fill your kitchen with the warm aroma of freedom and tradition. Whether you are a seasoned baker or trying your hand at this classic for the first time, mastering this Juneteenth staple is a delicious way to connect with history.
Ingredients & Kitchen Tools
For the Red Velvet Cake Layers:
– 2 ½ cups cake flour (provides a tender, delicate crumb)
– ½ cup natural unsweetened cocoa powder (not Dutch-process; the acidity is essential for the chemical reaction)
– 1 tsp baking soda
– ½ tsp salt
– ½ cup unsalted butter, softened
– 1 ½ cups granulated sugar
– 2 large eggs, room temperature
– 1 cup buttermilk, room temperature (reacts with cocoa and vinegar for that signature texture)
– 1 tsp vanilla extract
– 1 tbsp white vinegar (activates the baking soda for lift)
– 2–3 tbsp red gel food coloring (gel provides intense color without thinning the batter)
For the Cream Cheese Frosting:
– 16 oz full-fat cream cheese, softened
– ½ cup unsalted butter, softened
– 4 cups powdered sugar, sifted
– 2 tsp vanilla extract
– 2 tbsp heavy cream (adjusts spreadability)
Kitchen Tools Required:
Stand mixer or hand mixer, three 9-inch round cake pans, parchment paper, cooling racks, offset spatula, mixing bowls, digital kitchen scale, and an oven thermometer (ensuring the correct temperature is critical for the chemical leavening to work perfectly).
Prep Time & Cooking Schedule
Planning your time is the secret to a smooth baking experience:
– Prep Time: 20 minutes (measuring ingredients, greasing pans)
– Bake Time: 25–30 minutes (rotating pans halfway through for even baking)
– Cooling Time: 1 hour 30 minutes (the layers must be completely cool before frosting—this is non-negotiable for perfect results)
– Frosting Assembly: 20 minutes plus 30 minutes chill time for the crumb coat
– Total Time: Approximately 2 hours 40 minutes
Pro Tip: Make your cream cheese frosting during the last 15 minutes of baking so it is ready to use as soon as the cakes have fully cooled.
Step-by-Step Instructions
Step 1: Prepare the Oven and Pans
Preheat your oven to 350°F. Grease three 9-inch round cake pans, dust them lightly with flour, and line the bottoms with parchment paper rounds.
Step 2: Mix the Dry Ingredients
In a medium bowl, whisk together the cake flour, natural cocoa powder, baking soda, and salt. Set aside.
Step 3: Cream the Butter and Sugar
In the bowl of a stand mixer fitted with the paddle attachment, beat the softened butter and granulated sugar on medium-high speed until light and fluffy—about 3 minutes. Add the eggs one at a time, beating well after each addition, then scrape down the bowl and mix in the vanilla extract.
Step 4: Alternate Wet and Dry Ingredients
Reduce the mixer speed to low. Add the dry ingredients in three additions, alternating with the buttermilk, beginning and ending with the dry mixture. Mix only until the flour disappears; overmixing at this stage develops gluten and ruins the velvety texture.
Step 5: Activate the Color and Leavening
In a small bowl, stir together the white vinegar and the remaining ¼ teaspoon of baking soda until it fizzes. Immediately fold this mixture into the batter along with the red gel food coloring. This chemical reaction is what gives a true Red Velvet Cake its iconic tender crumb and distinctive color profile.
Step 6: Bake the Layers
Divide the batter evenly among the three prepared pans. Bake for 25–30 minutes, rotating the pans halfway through. The cakes are done when a toothpick inserted into the center comes out clean or with just a few moist crumbs. Let the cakes cool in the pans for 10 minutes, then turn them out onto wire racks to cool completely—this is essential before frosting.
Step 7: Prepare the Cream Cheese Frosting
While the cake layers cool, make the cream cheese frosting. In a clean mixer bowl, beat the softened cream cheese and butter together on medium speed until completely smooth and lump-free—about 2 minutes. Gradually add the sifted powdered sugar, beating on low to avoid a sugar cloud. Add the vanilla extract and heavy cream, then increase the speed to high and whip for 2 full minutes until the frosting is light, airy, and perfectly spreadable.
Step 8: Assemble and Decorate
Place one completely cooled cake layer on your serving plate. Spread an even layer of cream cheese frosting over the top. Repeat with the remaining layers, stacking them carefully. Apply a thin “crumb coat” over the entire cake and refrigerate for 30 minutes to set. Finally, apply a generous final layer of frosting, using an offset spatula to create elegant swirls or a perfectly smooth finish.
Nutritional Benefits & Advantages
While this Juneteenth cake is an indulgent celebratory dessert, making it from scratch offers genuine nutritional advantages over store-bought versions. The cream cheese provides a significant boost of calcium and high-quality protein. Natural cocoa powder is rich in flavonoids—powerful antioxidants that support heart health and reduce inflammation. Using buttermilk adds beneficial probiotics and allows you to achieve a luxuriously moist texture without relying on large amounts of oil. Best of all, baking at home means zero preservatives, hydrogenated oils, or artificial stabilizers often found in commercial bakery cakes.
Tips Variations & Cooking Advice
Flavor Variations
– Add 1 teaspoon of espresso powder to the dry ingredients to deepen the cocoa flavor without adding coffee taste.
– A pinch of cinnamon or a drop of chocolate extract enhances the complexity of the red velvet profile.
Dietary Adaptations
– Gluten-Free: Swap the cake flour for a high-quality 1:1 gluten-free baking blend and add one extra tablespoon of buttermilk for moisture.
– Dairy-Free: Use vegan butter and a plant-based cream cheese alternative. Replace buttermilk with 1 cup of unsweetened almond milk mixed with 1 tablespoon of lemon juice, allowed to sit for 5 minutes.
– Egg-Free: Substitute each egg with a flax egg (1 tablespoon ground flaxseed + 3 tablespoons water, rested for 5 minutes).
Baking Adaptations
– Cupcakes: This batter yields 24 standard cupcakes. Reduce the bake time to 18–20 minutes.
– Sheet Cake: Pour the batter into a greased 9×13-inch pan and bake for 35–40 minutes.
Common Mistakes to Avoid
1. Overmixing the Batter
The number one mistake in red velvet baking is overmixing once the flour is added. This overdevelops gluten and produces a dense, tough cake instead of the signature tender, velvety crumb. Mix only until the flour streaks disappear.
2. Using Cold Cream Cheese
Cream cheese must be fully softened to room temperature (65–70°F). Cold cream cheese will not incorporate smoothly into the frosting, resulting in a grainy, lumpy texture that ruins the silky finish.
3. Frosting a Warm Cake
If the cake layers are even slightly warm, the cream cheese frosting will melt, slide off the sides, and create a messy disaster. Patience is critical—cool the layers completely, then refrigerate them for 15 minutes before frosting for the best results.
4. Using Wrong Cocoa Powder
Dutch-process cocoa is alkalized and lacks the acidity needed to react with the buttermilk and vinegar. Always use natural unsweetened cocoa powder for the proper chemical leavening and classic red velvet flavor.
5. Insufficient Food Coloring
Liquid food coloring requires large amounts to achieve red, which thins the batter and affects texture. Gel food coloring is highly concentrated—just 2 tablespoons gives you a vibrant, stable red hue.
Storage & Meal Prep Tips
Refrigeration: Store the assembled cake in an airtight cake carrier in the refrigerator for up to 5 days. For the best flavor and texture, let the cake sit at room temperature for 30 minutes before serving to soften the cream cheese frosting.
Freezing Unfrosted Layers: Wrap each completely cooled cake layer tightly in plastic wrap, then again in aluminum foil. Freeze for up to 3 months. Thaw overnight in the refrigerator before frosting.
Freezing Frosted Cake: Place the fully assembled cake in the freezer unwrapped for 1 hour until the frosting hardens. Then wrap it in plastic wrap and foil. Thaw in the refrigerator overnight. This method preserves the decorative swirls and prevents smudging.
Leftover Frosting: Store leftover cream cheese frosting in an airtight container in the refrigerator for up to 1 week. Rewhip briefly before using to restore the fluffy texture.
Conclusion
Mastering a homemade Red Velvet Cake paired with a perfectly balanced cream cheese frosting is a deeply rewarding culinary experience that pays homage to Juneteenth traditions and brings people together. From the rich history embedded in every vibrant layer to the luxurious texture of the tangy topping, this classic dessert celebrates resilience, freedom, and the joy of sharing food made with love. We encourage you to bake this cake for your next gathering, share your stunning results on social media, and explore more heritage recipes that tell a story with every bite.
FAQs
1. What makes Red Velvet Cake different from regular chocolate cake?
Red velvet cake has a much milder cocoa flavor, derived from natural cocoa powder. Its defining characteristic is the velvety, tender texture created by the chemical reaction between buttermilk, vinegar, and baking soda—something standard chocolate cakes do not rely on.
2. Can I substitute the cream cheese frosting with something else?
While cream cheese frosting is the classic pairing, you can substitute it with Ermine frosting (also known as heritage or flour frosting), which is less tangy and incredibly smooth. Alternatively, a simple vanilla buttercream works well if you prefer a sweeter, lighter topping.
3. Why did my cream cheese frosting turn out runny?
Runny frosting usually happens when the cream cheese or butter is too warm. Ensure both ingredients are just softened (65–70°F), not melted. If the frosting is still too soft, refrigerate it for 15–20 minutes to firm up, then rewhip briefly before using.
4. How can I get a deeper red color without using artificial dye?
For a naturally vibrant red color, you can use beet powder or red beet juice concentrate. Keep in mind that natural alternatives may impart a subtle earthy flavor. If using artificial dye, gel food coloring is far superior to liquid coloring for achieving a rich hue without altering the batter’s consistency.
5. Can I prepare this Red Velvet Cake in advance for a party?
Absolutely! Bake the cake layers up to 1 day ahead and store them tightly wrapped at room temperature. Make the cream cheese frosting up to 3 days ahead and refrigerate it. Assemble and frost the cake on the day of your event for the freshest presentation and best flavor.
Quick way to grow your Red Velvet Cake
Ingredients
Equipment
Method
- Preheat your oven to 350°F (175°C) and prepare two 9-inch round cake pans by greasing and flouring them.
- In a medium bowl, whisk together the flour, sugar, cocoa powder, baking soda, and salt until well combined.
- In a separate large bowl, beat the eggs, buttermilk, vegetable oil, red food coloring, vanilla extract, and white vinegar until smooth.
- Gradually add the dry ingredients to the wet ingredients, mixing until just combined and a smooth batter forms.
- Divide the batter evenly between the prepared cake pans and bake for 25-30 minutes, or until a toothpick inserted into the center comes out clean.
- Allow the cakes to cool in the pans for 10 minutes before transferring them to a wire rack to cool completely.
- For the frosting, beat the softened cream cheese and butter together in a large bowl until smooth and creamy.
- Gradually add the confectioners' sugar and vanilla extract, beating until the frosting is light and fluffy.
- Once the cakes are completely cool, frost them generously with the cream cheese frosting.