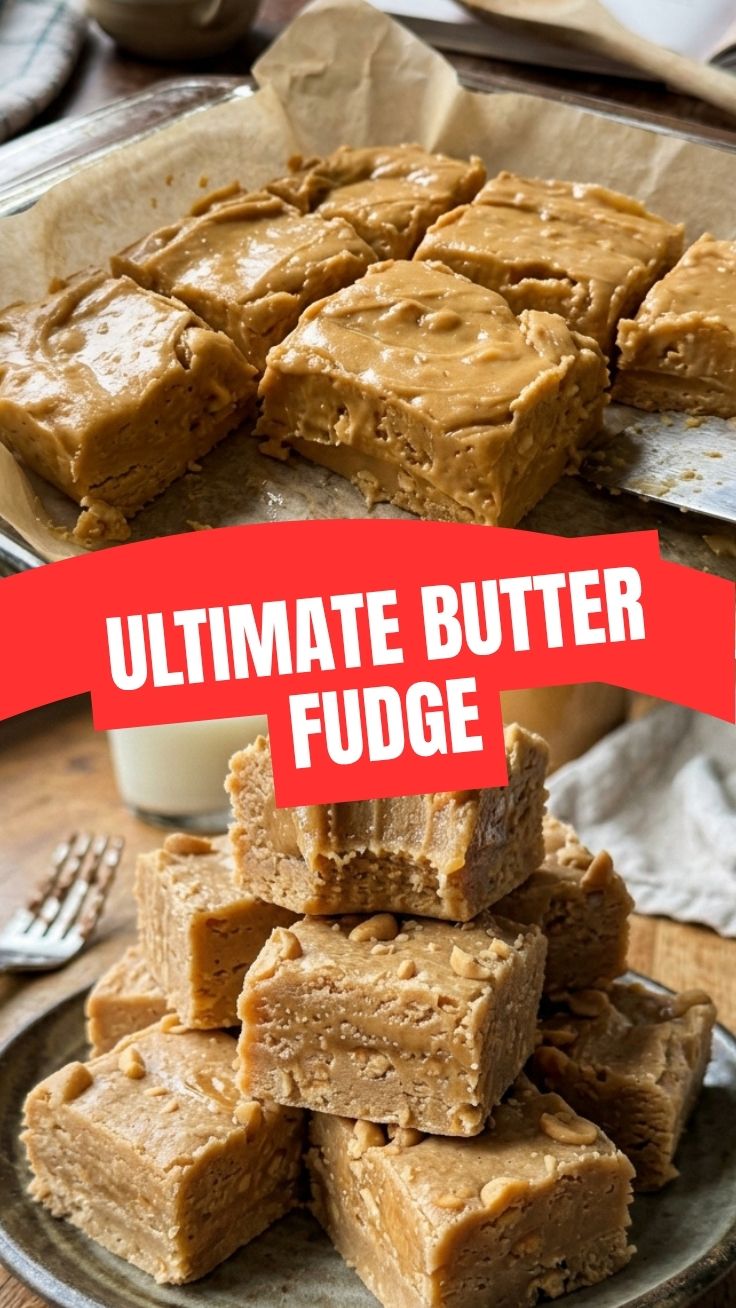
The Ultimate Guide to Making Creamy Peanut Butter Fudge at Home
Have you ever bitten into a slice of store-bought fudge and wondered why it lacks that melt-in-your-mouth richness you crave? The secret lies in making it yourself. Homemade Peanut Butter Fudge delivers a luxurious texture and intense nutty flavor that no packaged version can match. Whether you are a seasoned baker or a curious beginner, this recipe will empower you to create a decadent treat with just a handful of ingredients. In this guide, we’ll dive into the simple steps that turn basic pantry staples into a silky, irresistible dessert. You’ll soon discover why mastering Peanut Butter Fudge is a game-changer for anyone exploring Fudge Recipes. Let’s begin your journey to fudge perfection.
Ingredients & Kitchen Tools
Ingredients
– 1 cup creamy peanut butter – Use a no-stir variety for consistent texture; avoid natural kinds with separated oil.
– ½ cup unsalted butter – Adds richness; salted butter works if you reduce added salt.
– 2 cups powdered sugar – Provides sweetness and structure; sift to avoid lumps.
– 1 teaspoon vanilla extract – Enhances flavor; choose pure extract over imitation.
– ¼ teaspoon salt – Balances sweetness; omit if using salted butter.
Kitchen Tools
– 8×8-inch baking dish – Lined with parchment for easy removal.
– Medium saucepan – For melting butter and peanut butter together.
– Rubber spatula – Helps fold ingredients without overmixing.
– Electric mixer or whisk – Ensures smooth incorporation of powdered sugar.
– Sharp knife – For clean, even cuts after chilling.
Optional Substitutions
– Use almond butter or sunflower seed butter for a nut-free alternative.
– Substitute coconut oil for half the butter to create a dairy-free version.
Prep Time & Cooking Schedule
– Prep Time: 10 minutes – Gather and measure all ingredients.
– Cook Time: 5 minutes – Melt butter and peanut butter on low heat.
– Chill Time: 2–3 hours – Essential for firm, sliceable fudge.
– Total Time: Approximately 3 hours 15 minutes.
Plan ahead: Because the fudge needs several hours in the refrigerator, make it in the morning or the night before serving. The waiting time ensures a creamy yet sturdy texture that holds its shape when cut.
Step-by-Step Instructions
1. Prepare the pan. Line an 8×8-inch baking dish with parchment paper, leaving overhang on two sides for lifting the fudge out later.
2. Melt the base. In a medium saucepan over low heat, combine the peanut butter and butter. Stir frequently until fully melted and smooth. Do not let it bubble or brown — low heat prevents scorching.
3. Mix dry ingredients. In a separate bowl, sift the powdered sugar to remove clumps. This is a critical step for achieving that silky Peanut Butter Fudge texture.
4. Combine wet and dry. Remove the saucepan from heat. Add vanilla extract and salt to the melted mixture. Gradually pour in the sifted powdered sugar, stirring with a rubber spatula. Once partially combined, switch to an electric mixer on low speed or whisk vigorously until no streaks remain. The mixture will be thick and glossy.
5. Transfer and press. Scrape the fudge batter into the prepared dish. Use a spatula to spread it evenly and press into corners. Smooth the top with a wet spatula or your fingers (lightly greased) for a flawless finish.
6. Chill to set. Refrigerate for at least 2 hours, or until firm. For best results, wait 3 hours.
7. Cut and serve. Lift the fudge block out using the parchment overhang. Slice into 1-inch squares with a sharp knife — wipe the blade clean between cuts for neat edges.
Tip: If the fudge becomes too stiff to cut, let it sit at room temperature for 10 minutes. Always test doneness: it should feel firm but not rock-hard. This method works beautifully across countless Fudge Recipes, but Peanut Butter Fudge remains a favorite for its forgiving, foolproof nature.
Nutritional Benefits & Advantages
Peanut butter fudge, when enjoyed in moderation, offers surprising nutritional perks. Peanut butter is rich in healthy monounsaturated fats, which support heart health, and provides plant-based protein (around 8 grams per two-tablespoon serving). It also contains vitamin E, magnesium, and niacin. The butter adds a small amount of vitamin A and healthy saturated fats. By making fudge at home, you control the sugar level — this recipe uses roughly half the sugar of many commercial versions. Additionally, homemade fudge contains no artificial preservatives, emulsifiers, or hydrogenated oils, making it a cleaner indulgence. For a lighter treat, swap white sugar for a monk fruit blend, though texture may vary slightly.
Tips, Variations & Cooking Advice
– Flavor twists: Add ½ cup mini chocolate chips before pressing into the pan for a marbled effect. A sprinkle of sea salt flakes on top elevates the sweet-salty profile.
– Dietary adaptations: Use vegan butter and dairy-free chocolate chips to make this fully plant-based. Gluten-free by nature, but double-check powdered sugar labels for cornstarch (some contain wheat starch).
– Texture modifications: For a crunchier fudge, fold in ¼ cup crushed pretzels or chopped peanuts right before transferring to the dish.
– Alternative cooking methods: Microwave the peanut butter and butter in a large bowl in 30-second bursts, stirring between each, until melted. Continue with the same steps — this is faster but requires careful stirring.
– Portion changes: Double the recipe and use a 9×13 pan; increase chilling time to 4 hours.
Common Mistakes to Avoid
1. Overheating the mixture. High heat causes the fats to separate, leading to greasy fudge. Always melt over low heat and remove from the stove before adding sugar.
2. Skipping the sifting. Lumps of powdered sugar create gritty pockets. Sifting ensures a velvety mouthfeel.
3. Rushing the chill time. Cutting too early results in sticky, messy squares. Patience guarantees clean slices.
4. Using natural peanut butter. The oil separation in natural brands yields a crumbly, unstable fudge. Stick to conventional creamy peanut butter.
5. Pressing too hard. When spreading in the pan, gentle pressure prevents the fudge from becoming overly dense. Aim for a uniform but gentle hand.
Storage & Meal Prep Tips
Store leftover fudge in an airtight container in the refrigerator for up to two weeks. For longer storage, wrap individual squares in wax paper, place in a freezer-safe bag, and freeze for up to three months. To thaw, transfer squares to the refrigerator overnight — do not microwave, as that ruins the texture. If you prefer a softer bite, let refrigerated fudge sit at room temperature for 5 minutes before eating. For gift-giving or meal prep, layer fudge squares between sheets of parchment paper in a tin. The rich flavor actually deepens after a day of chilling, making it an ideal make-ahead dessert.
Conclusion
Creating flawless Peanut Butter Fudge at home is simpler than you think, and the payoff is a creamy, sweet, and salty delight that rivals any bakery version. By following the step-by-step instructions, you gain full control over flavor, texture, and quality. Whether you are new to Fudge Recipes or a seasoned pro, this recipe empowers you to whip up a batch in under fifteen minutes of active work. The magic lies in the low-heat melting, careful sugar incorporation, and adequate chilling time. Now it is your turn — gather your ingredients, invite someone to share the first square, and let us know how yours turned out in the comments. And do not forget to explore more sweet inspirations in our collection of Fudge Recipes to keep your dessert repertoire exciting.
FAQs
1. Can I use crunchy peanut butter instead of creamy?
Yes, but the fudge will have a slightly grainier texture. For a smoother result, choose creamy.
2. Why did my fudge turn out greasy?
This usually happens if the peanut butter and butter were overheated or if you used natural peanut butter with separated oils. Keep heat low and stir constantly.
3. How do I make this dairy-free?
Replace the butter with a vegan butter stick (not spreadable) and ensure your peanut butter contains no dairy. The recipe remains equally rich.
4. Can I reduce the sugar without ruining the texture?
Cutting sugar by more than ¼ cup may result in softer, less stable fudge. Try a powdered erythritol blend as a sugar substitute, but expect a slightly different mouthfeel.
5. My fudge is too soft after 3 hours of chilling. What should I do?
Check if your measurements were accurate — too much peanut butter or butter softens the fudge. You can re-chill for another hour or freeze for 30 minutes before serving. Next time, increase chill time to 4 hours.
Best way to grow 3-lb Peanut Butter Fudge
Ingredients
Equipment
Method
- Combine sugar, milk, and butter in a large saucepan; bring to a rolling boil over medium heat, stirring constantly, and boil for 2 minutes.
- Remove from heat and immediately stir in the peanut butter and vanilla extract until smooth.
- Pour the mixture into a greased 9x13 inch pan and let it cool completely before cutting into squares.