The Ultimate No-Bake Peanut Butter Bars: A 10-Minute Dessert Miracle
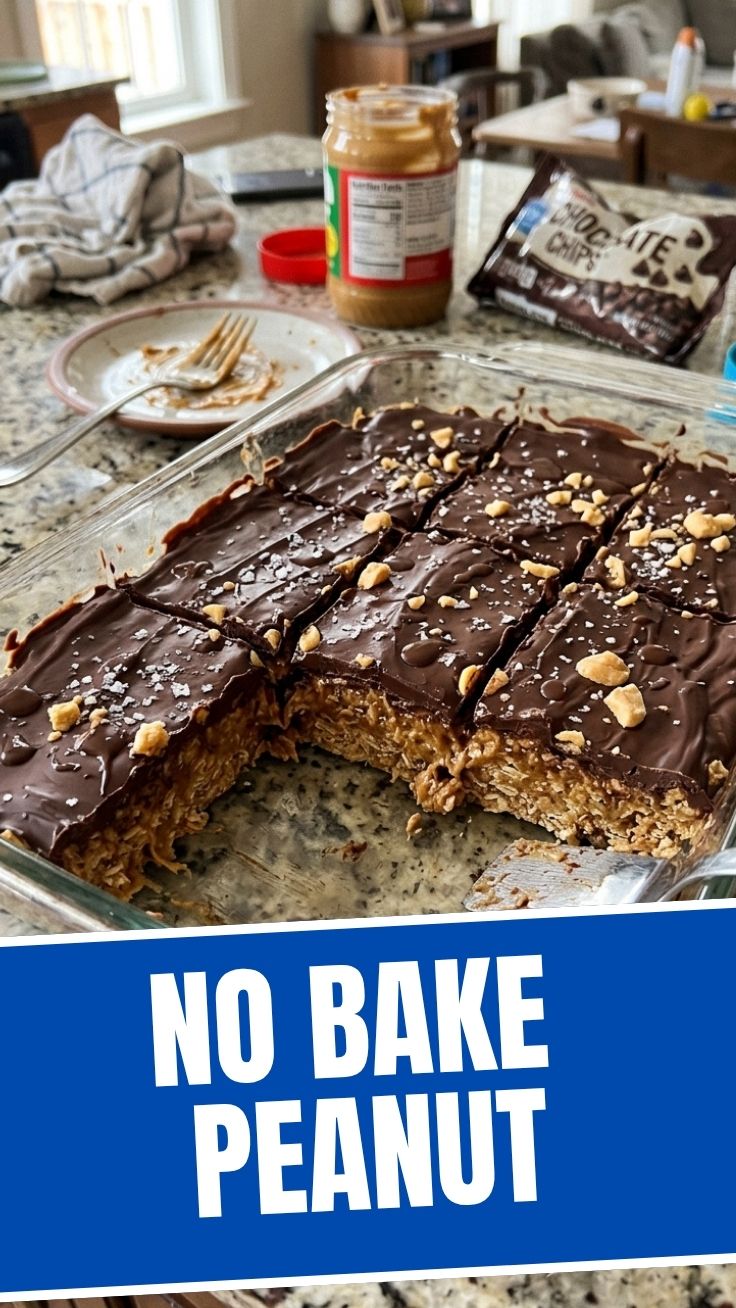
Have you ever craved a rich, decadent dessert but didn’t want to turn on your oven or spend hours in the kitchen? You’re not alone. The No-Bake Peanut Butter Bars recipe is a game-changer for busy home cooks, parents, and dessert lovers alike. This creamy, crunchy, and satisfying treat comes together in minutes using simple pantry staples, making it a valuable addition to your dessert repertoire. Whether you’re meal prepping for the week or need a last-minute party pleaser, mastering this No-Bake Dessert Recipes staple will save you time, energy, and money—all while delivering incredible flavor.
—
Ingredients & Kitchen Tools
Required Ingredients
– 1 cup creamy peanut butter – Use natural, no-stir peanut butter for best texture; avoid sugar-free varieties as they alter consistency.
– ½ cup unsalted butter, melted – Salted butter works, but reduce added salt later.
– 2 cups powdered sugar – Sift before measuring to avoid lumps.
– 1½ cups graham cracker crumbs – For that signature crunchy base; substitute with crushed digestive biscuits.
– 1 cup semi-sweet chocolate chips – Dark or milk chocolate both work well.
– 2 tablespoons coconut oil – Helps chocolate set smoothly; use refined for neutral flavor.
Kitchen Tools
– 8×8-inch baking dish – Line with parchment paper for easy removal.
– Medium microwave-safe bowl – For melting chocolate.
– Large mixing bowl – For combining peanut butter mixture.
– Spatula – Silicone preferred for scraping.
– Sharp knife – For clean cuts after chilling.
Optional Substitutions
– Almond or sunflower seed butter – For nut-free version.
– Coconut sugar or erythritol – For lower-glycemic option (adjust sweetness to taste).
– Gluten-free graham crackers – For celiac-safe bars.
—
Prep Time & Cooking Schedule
| Phase | Time | Notes |
|——-|——|——-|
| Prep Time | 10 minutes | No cooking required; just mixing and assembling. |
| Chilling Time | 2 hours minimum | Overnight chilling yields cleanest slices. |
| Resting Time | 5 minutes | Let bars sit at room temperature after chilling to soften slightly. |
Planning tip: Make these bars the night before serving. They freeze beautifully, so you can batch-prepare for weeks of snacking.
—
Step-by-Step Instructions
1. Prepare the base layer: In a large bowl, combine 1 cup creamy peanut butter and ½ cup melted unsalted butter. Stir until smooth and fully incorporated. Add 2 cups sifted powdered sugar and 1½ cups graham cracker crumbs. Mix with a spatula until a stiff, cohesive dough forms. Temperature tip: If the mixture is too crumbly, add 1-2 teaspoons warm water. If too sticky, add an extra tablespoon of crumbs.
2. Press the base: Transfer mixture to your parchment-lined 8×8 dish. Press firmly and evenly using the back of a measuring cup or your hands (lightly oiled to prevent sticking). Ensure the surface is flat and compact—this prevents crumbling when slicing.
3. Make the chocolate topping: In a microwave-safe bowl, combine 1 cup chocolate chips and 2 tablespoons coconut oil. Microwave in 30-second bursts, stirring between each, until melted and silky (about 1½ minutes total). Texture cue: Chocolate should be glossy and runny, not thick or lumpy.
4. Pour and spread: Immediately pour melted chocolate over the pressed peanut butter base. Tilt the dish or use a spatula to spread evenly to edges. Tap the dish gently on the counter to release air bubbles.
5. Chill to set: Refrigerate uncovered for 2 hours, or until chocolate is firm to the touch. For cleaner slices, chill overnight. This step is crucial for achieving the perfect texture in your No-Bake Dessert Recipes—patience pays off.
—
Nutritional Benefits & Advantages
These homemade No-Bake Dessert Recipes offer surprising nutritional advantages over store-bought alternatives. Peanut butter provides plant-based protein (7-8g per serving) and heart-healthy monounsaturated fats. Graham crackers contribute complex carbohydrates for steady energy release, while dark chocolate (70%+ cocoa) delivers antioxidants called flavonoids that support cardiovascular health.
Compared to baked desserts, no-bake bars retain more natural nutrients since no high-heat cooking occurs. You control sugar levels—using less powdered sugar or swapping for monk fruit sweetener reduces empty calories. Plus, portion control is easier: one 2-inch square (about 120-150 calories) satisfies cravings without derailing dietary goals.
—
Tips Variations & Cooking Advice
Flavor Twists
– Salted caramel: Add ½ teaspoon flaky sea salt to chocolate before pouring.
– Crunchy texture: Fold ½ cup crushed pretzels or toasted peanuts into base.
– Mint chocolate: Add ½ teaspoon peppermint extract to melted chocolate.
Dietary Adaptations
– Vegan: Use vegan butter (e.g., Earth Balance) and dairy-free chocolate chips.
– Gluten-free: Certified gluten-free graham crackers or crushed rice cakes.
– Low-sugar: Replace powdered sugar with erythritol blend and use sugar-free chocolate.
Pro Tips
– Room temperature butter ensures smoother mixing with peanut butter.
– Refrigerate chocolate-dipped knife between cuts for cleaner edges.
– Spray hands with non-stick spray when pressing base layer.
—
Common Mistakes to Avoid
1. Over-melting chocolate: Heating beyond 90°F (32°C) can seize chocolate. Always use low power and stir frequently.
2. Skipping parchment: Bars will stick to dish—always line with parchment leaving overhang for easy lifting.
3. Pressing base unevenly: Thin edges brown faster; use a level to ensure uniform thickness.
4. Rushing chilling time: Warm chocolate will cause base to crumble; minimum 2 hours is non-negotiable.
5. Using oily peanut butter: Natural peanut butter with separated oil makes base greasy—stir thoroughly or use no-stir variety.
—
Storage & Meal Prep Tips
Refrigeration: Store bars in an airtight container with parchment between layers. They stay fresh for up to 1 week. Texture remains firm and creamy when cold.
Freezing: Wrap individual bars in plastic wrap, then place in freezer-safe bag. Freeze for up to 3 months. Thaw in refrigerator overnight, not at room temperature, to prevent condensation.
Reheating: Not typically needed—these are best cold or at cool room temperature. If chocolate is too hard straight from fridge, let rest 5 minutes before slicing.
Meal prep: Double batch and freeze extras. Perfect for school lunches, road trips, or emergency dessert cravings.
—
Conclusion
These irresistible, foolproof No-Bake Peanut Butter Bars prove that gourmet desserts don’t require culinary degrees or hot ovens. By mastering this simple method, you unlock endless possibilities for No-Bake Dessert Recipes that are as versatile as they are delicious. Whether you stick with classic chocolate-peanut butter or experiment with our creative variations, this recipe delivers consistent, crowd-pleasing results every time.
We’d love to hear about your creations! Share your photos, tag us, or leave a comment below with your favorite twist. For more no-fuss sweets, explore our collection of no-bake treats—ready in minutes, devoured in seconds.
—
FAQs
1. Can I use crunchy peanut butter instead of creamy?
Yes! Crunchy peanut butter adds delightful texture, but reduce graham cracker crumbs by 2 tablespoons to maintain proper binding.
2. Why did my chocolate topping crack when I sliced it?
This happens if bars are too cold. Let them sit at room temperature for 10 minutes before slicing. Use a serrated knife and saw gently.
3. Can I make these without a microwave?
Absolutely. Melt chocolate and butter in a double boiler over simmering water—just ensure no water touches the chocolate.
4. How do I know if my base is too dry or too wet?
The base should hold together when pressed between your fingers. If it crumbles, add 1 tablespoon melted butter. If it sticks excessively, add 1 tablespoon graham crumbs.
5. Are these bars safe for kids with peanut allergies?
No—peanut butter is a major allergen. Substitute with sunflower seed butter (sunbutter) and check labels for cross-contamination warnings.
Quick way to grow No-Bake Peanut Butter Bars
Ingredients
Equipment
Method
- Line an 8x8 inch baking pan with parchment paper, leaving an overhang on the sides for easy removal.
- In a large bowl, mix graham cracker crumbs and powdered sugar until well combined.
- Add 1 cup of peanut butter and melted butter to the dry mixture, then stir until fully combined and a dough-like consistency is formed.
- Press the mixture evenly into the prepared baking pan.
- In a microwave-safe bowl, combine chocolate chips and 1/2 cup of peanut butter; microwave it in 30-second intervals, stirring until smooth.
- Pour the chocolate mixture over the peanut butter base and spread it evenly.
- Refrigerate for at least 2 hours or until the bars are firm.
- Lift the bars from the pan using the parchment paper and cut them into squares before serving.