Elevate Your Dinner: Mastering the Perfect Homemade Chicken Parmesan
Tired of ordering takeout when you crave that comforting blend of crispy chicken, rich tomato sauce, and melted cheese? Mastering Chicken Parmesan at home isn’t just about saving money; it’s about crafting an unforgettable culinary experience that rivals any restaurant. This classic Italian-American dish, often served alongside a generous portion of delicious pasta, offers a delightful interplay of textures and flavors. By preparing it yourself, you gain complete control over the quality of ingredients, allowing you to tailor it to your exact preferences and dietary needs. Let’s delve into creating a succulent Chicken Parmesan that will impress without the fuss, perfect for a cozy weeknight or a special gathering.
Ingredients & Kitchen Tools
To embark on your culinary journey, gather these essential items:
- Boneless, Skinless Chicken Breasts (4, about 6-8 oz each): Opt for fresh, plump breasts for the best texture. Can be substituted with chicken thighs for a richer flavor.
- All-Purpose Flour (1/2 cup): For dredging, to create a crisp crust. Gluten-free flour can be used as an alternative.
- Large Eggs (2): Beaten, as a binder for the breadcrumbs.
- Panko Breadcrumbs (1.5 cups): Japanese-style breadcrumbs, offering superior crispiness. Regular breadcrumbs work too, but Panko provides a lighter, airier crunch.
- Parmesan Cheese (1/2 cup, freshly grated, plus more for topping): Provides salty, nutty notes. Freshly grated is always superior to pre-shredded.
- Marinara Sauce (24 oz jar, or homemade): A good quality sauce is crucial for flavor – choose your favorite brand or whip up your own.
- Mozzarella Cheese (8 oz, shredded or sliced): Melts beautifully, providing a creamy, rich topping. Low-moisture fresh mozzarella is ideal.
- Olive Oil (2-3 tablespoons): For pan-frying the chicken. Extra virgin olive oil for flavor.
- Salt & Black Pepper (to taste): Essential seasonings.
- Fresh Basil or Parsley (for garnish): Adds a burst of freshness and color.
- Garlic Powder (1 teaspoon): Enhances the savory notes in the breading.
- Onion Powder (1/2 teaspoon): Adds a subtle depth to the breading.
Kitchen Tools:
- Shallow Dishes (3): For your dredging station (flour, egg, breadcrumbs).
- Meat Mallet or Rolling Pin: For pounding chicken breasts to even thickness.
- Large Skillet (oven-safe preferred): For pan-frying.
- Baking Dish (9×13 inch): For baking the assembled Chicken Parmesan.
- Tongs & Spatula: For handling chicken.
- Grater: For fresh Parmesan cheese.
Prep Time & Cooking Schedule
- Prep Time: 20-25 minutes (includes pounding chicken, setting up dredging station, and assembling).
- Cook Time: 25-30 minutes (pan-frying: 8-10 minutes; baking: 15-20 minutes).
- Total Time: Approximately 45-55 minutes.
This recipe is designed to be streamlined. Get your dredging station ready first, and while the chicken is pan-frying, you can warm your marinara sauce and get your cheese ready. This efficient approach makes it a perfect weeknight meal.
Step-by-Step Instructions
1. Prepare Chicken: Pat chicken breasts dry. Place one breast at a time between two pieces of plastic wrap and pound to about 1/2-inch thickness using a meat mallet. This ensures even cooking. Season both sides with salt and pepper.
2. Set Up Dredging Station: In the first shallow dish, combine flour, garlic powder, and onion powder. In the second, whisk eggs. In the third, combine Panko breadcrumbs and 1/2 cup grated Parmesan cheese.
3. Bread Chicken: Dredge each chicken breast first in the seasoned flour, shaking off excess. Then dip in the beaten egg, ensuring it’s fully coated. Finally, press firmly into the Panko-Parmesan mixture until well-coated on all sides.
4. Pan-Fry Chicken: Heat olive oil in a large skillet over medium-high heat. Once hot, carefully place chicken breasts in the skillet (you may need to do this in batches to avoid overcrowding). Cook for 3-4 minutes per side, or until golden brown and crispy. The chicken doesn’t need to be fully cooked through at this stage, as it will finish baking in the oven.
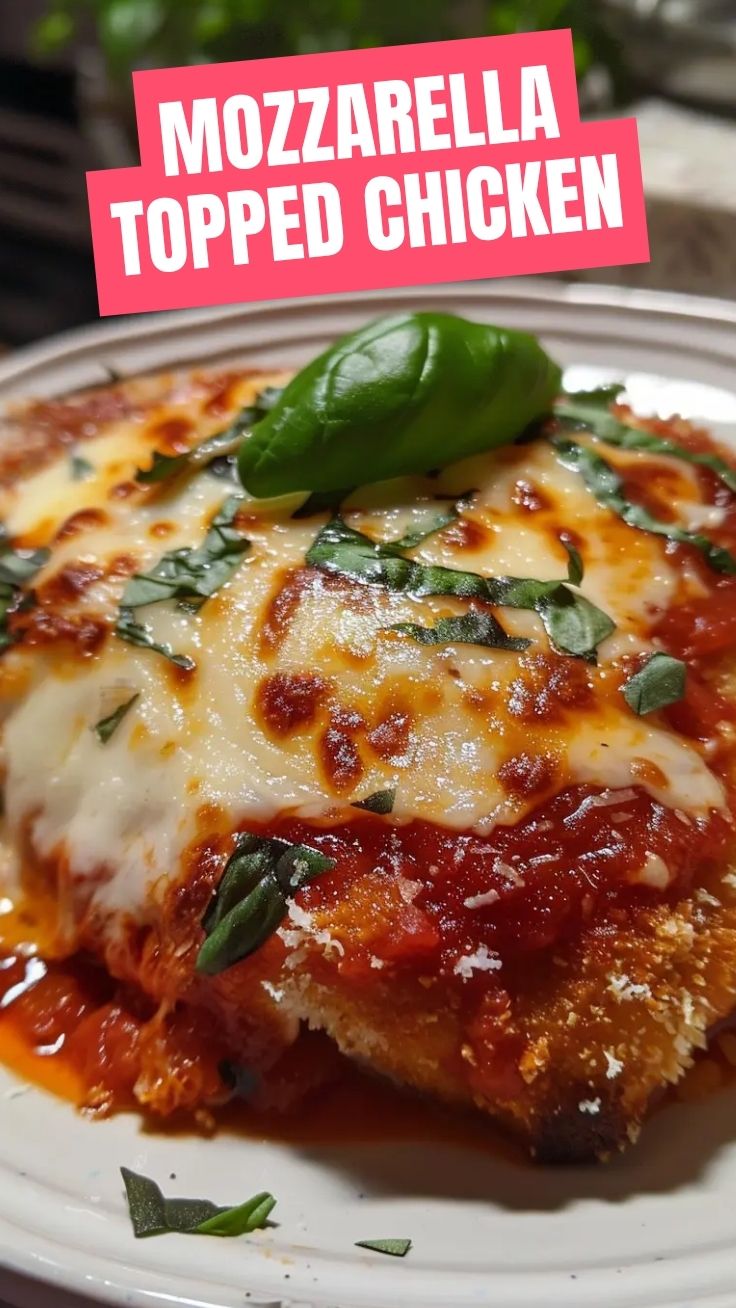
5. Assemble and Bake: Preheat oven to 400°F (200°C). Pour about half of the marinara sauce into the bottom of your baking dish. Arrange the pan-fried chicken breasts over the sauce. Top each piece of Chicken Parmesan with more marinara sauce (about 2-3 tablespoons per breast), then generously sprinkle with mozzarella cheese and a little extra grated Parmesan. Bake for 15-20 minutes, or until the cheese is melted, bubbly, and the chicken is cooked through to an internal temperature of 165°F (74°C).
6. Serve: Let the dish rest for a few minutes before serving. Garnish with fresh basil or parsley. Serve immediately, perhaps alongside your favorite pasta tossed with a little butter or olive oil.
Nutritional Benefits & Advantages
This homemade Chicken Parmesan offers several nutritional perks. Chicken breast is a lean source of protein, essential for muscle repair and satiety. Tomatoes in the marinara sauce are rich in lycopene, an antioxidant linked to various health benefits. Parmesan and mozzarella provide calcium for bone health and additional protein. By preparing it at home, you can control the amount of oil, salt, and type of cheese, making it a healthier alternative to restaurant versions which can be laden with excess fat and sodium.
Tips, Variations & Cooking Advice
- Spice It Up: Add a pinch of red pepper flakes to the breading or marinara sauce for a subtle kick.
- Herbaceous Flavor: Incorporate dried oregano or Italian seasoning into your breading mixture.
- Vegetarian Option: Swap chicken for large slices of eggplant, bread and fry them similarly for Eggplant Parmesan.
- Grilling Option: For a lighter version, grill chicken breasts instead of pan-frying, then proceed with the sauce and cheese.
- Crispier Crust: For an extra crispy crust, toast the Panko breadcrumbs lightly in a dry pan before dredging.
Common Mistakes to Avoid
- Overcrowding the Skillet: This lowers the oil temperature and steams the chicken instead of crisping it, leading to soggy results. Cook in batches if necessary.
- Unevenly Pounded Chicken: Thick and thin spots will cook disparately, resulting in some parts being dry and others undercooked.
- Not Patting Chicken Dry: Moisture prevents the breading from adhering properly and creating a crisp crust.
- Using Pre-Shredded Parmesan: Often contains anti-caking agents that can hinder melting and flavor. Freshly grated is always best.
Storage & Meal Prep Tips
Leftover Chicken Parmesan can be stored in an airtight container in the refrigerator for up to 3-4 days. For optimal freshness, separate chicken from any remaining pasta if you’re storing them together. Reheat gently in the oven at 350°F (175°C) until warmed through, or in a microwave for quicker reheating (though the crust may soften). It also freezes well: portion individual servings in freezer-safe containers for up to 2-3 months. Thaw overnight in the refrigerator before reheating.
Conclusion
Creating a sensational homemade Chicken Parmesan is a rewarding endeavor that brings the warmth of Italian-American cuisine straight to your table. With these detailed instructions and expert tips, you’re well on your way to mastering this beloved dish. The harmonious blend of crispy chicken, flavorful sauce, and gooey cheese, especially when paired with perfectly cooked pasta, promises a meal that’s both comforting and impressive. Don’t hesitate to give this recipe a try; share your culinary triumphs in the comments below!
FAQs
Q1: Can I make this gluten-free?
A1: Yes, absolutely! Simply substitute the all-purpose flour for a gluten-free flour blend and use gluten-free breadcrumbs. Ensure your marinara sauce is also gluten-free.
Q2: My chicken often turns out dry. How do I prevent this?
A2: Pounding the chicken to an even thickness is crucial. Also, be careful not to overcook it during the pan-frying stage, as it will continue to cook in the oven. An internal temperature of 165°F (74°C) is key.
Q3: Can I use different types of cheese?
A3: While mozzarella and Parmesan are traditional, you can experiment with provolone for a sharper flavor or a blend of Italian cheeses.
Q4: How can I make my sauce richer?
A4: Sauté some finely diced onions and garlic before adding your jarred marinara. A splash of red wine or a pinch of sugar can also enhance the depth of flavor.
Q5: What’s the best way to get a really crispy crust?
A5: Ensure your chicken is patted completely dry before dredging. Use Panko breadcrumbs, toast them slightly before use, and don’t overcrowd the pan when frying. Frying in batches ensures even browning and crispness.
Quick way to grow succulent Chicken Parmesan
Ingredients
Equipment
Method
- Preheat your oven to 400°F (200°C).
- Season chicken breasts with Italian seasoning, garlic powder, salt, and pepper.
- Heat olive oil in an oven-safe skillet over medium-high heat. Sear chicken for 3-4 minutes per side until golden brown.
- Pour marinara sauce over the chicken, then sprinkle with mozzarella and Parmesan cheeses.
- Bake for 15-20 minutes, or until chicken is cooked through and cheese is bubbly and golden.
- Remove from oven and let rest for a few minutes before serving. Garnish with fresh basil if desired.