The Ultimate Guide to Making Fudgy Brownies at Home
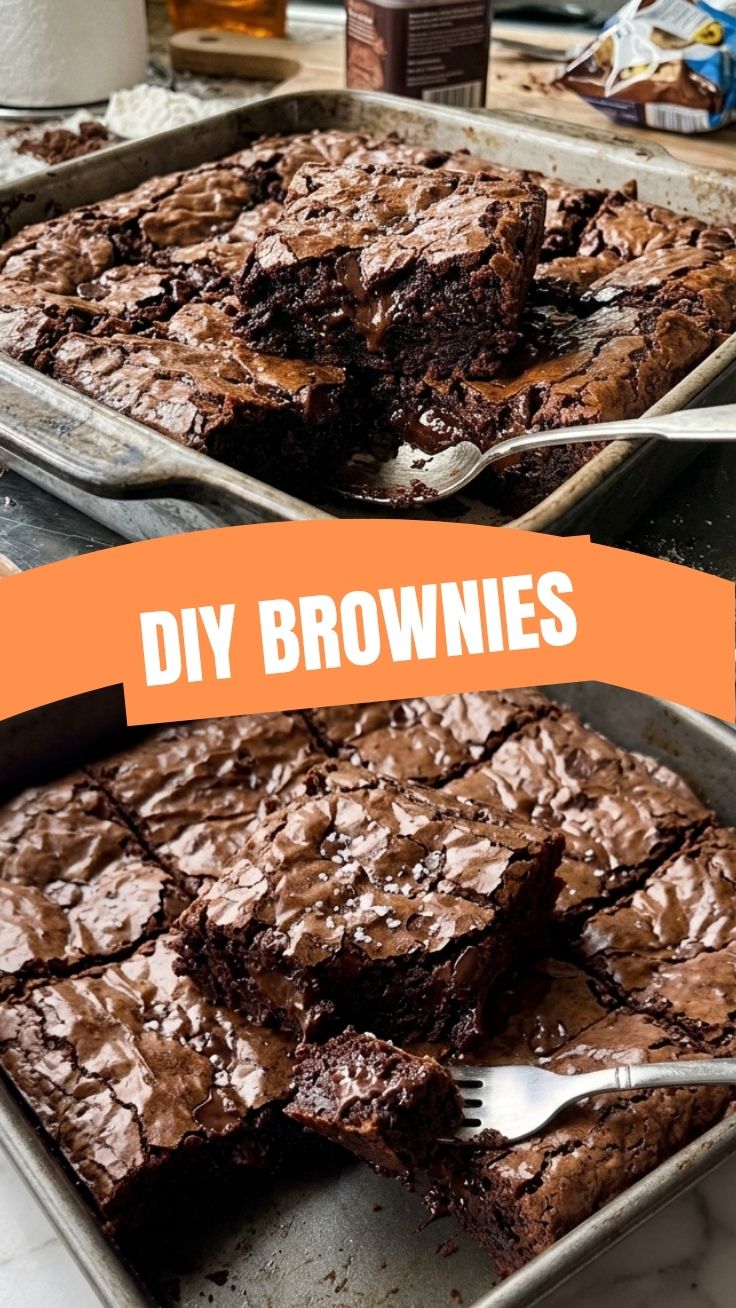
Have you ever bitten into a dry, cake-like brownie and wondered why it didn’t have that rich, melt-in-your-mouth texture you crave? The secret lies in mastering the art of the fudgy brownie—a dessert that balances decadence with simplicity. Preparing this beloved treat at home not only saves you money but also lets you control the quality of every ingredient. Whether you’re a seasoned baker or a beginner, learning how to make perfect Brownies from scratch is a rewarding skill. And if you’re aiming for that dense, gooey center, you’ll want to focus on fudgy brownies—the gold standard for chocolate lovers. Ready to transform your baking? Let’s dive into a recipe that delivers every time.
Ingredients & Kitchen Tools
For the brownies you’ll need:
– Unsalted butter (1 cup, melted) – provides richness and moisture; use salted butter if you reduce added salt.
– Cocoa powder (¾ cup, high-quality Dutch-processed) – gives deep chocolate flavor; natural cocoa works but may alter texture.
– Sugar (1½ cups granulated) – key for structure and sweetness; you can substitute coconut sugar for a deeper flavor.
– Eggs (3 large, at room temperature) – bind ingredients and create the fudgy consistency; flax eggs work for vegan versions.
– Vanilla extract (2 teaspoons) – enhances chocolate notes.
– All-purpose flour (¾ cup) – provides just enough structure; use gluten-free 1:1 blend for a GF version.
– Salt (½ teaspoon) – balances sweetness.
– Optional mix-ins: chocolate chips, nuts, or white chocolate chunks.
Kitchen tools: 9×9-inch baking pan, mixing bowls, whisk, spatula, parchment paper, cooling rack.
Prep Time & Cooking Schedule
– Prep time: 15 minutes
– Cook time: 25–30 minutes
– Resting time: 15 minutes (after baking)
– Total active time: 45 minutes
Plan ahead: brownies taste even better the next day as flavors meld. For best results, let them cool completely before slicing—this prevents crumbling and ensures clean edges. If you’re short on time, you can bake them a day ahead and store them properly.
Step-by-Step Instructions
1. Preheat your oven to 350°F (175°C) and line a 9×9-inch pan with parchment paper, leaving overhang for easy removal.
2. Melt the butter in a large microwave-safe bowl or on the stovetop. Let it cool slightly (warm but not hot) to avoid cooking the eggs.
3. Whisk in the cocoa powder until smooth and shiny. This step is crucial for a deep chocolate flavor.
4. Add sugar and whisk vigorously for about 30 seconds. The mixture should look glossy.
5. Add eggs one at a time, whisking after each addition until fully incorporated. The batter will thicken and become shiny.
6. Stir in vanilla and then fold in the flour and salt until just combined—do not overmix. Overmixing activates gluten and leads to cakey Brownies instead of the desired dense texture.
7. Fold in any mix-ins (chocolate chips, nuts) if using.
8. Pour the batter into the prepared pan, spread evenly, and bake for 25–30 minutes. For true fudgy brownies, test for doneness at 25 minutes: a toothpick inserted in the center should come out with a few moist crumbs, not clean batter.
9. Cool in the pan on a wire rack for 15 minutes, then lift out using the parchment and slice into squares.
Pro tip: For an ultra-shiny top crust, after you add the eggs and sugar, beat the mixture for an extra minute. This aerates the top layer, creating that crackled finish.
Nutritional Benefits & Advantages
Brownies aren’t typically considered health food, but this recipe offers some surprising benefits. Dark cocoa powder is rich in flavonoids, which support heart health and reduce inflammation. Using butter instead of oil provides vitamin A and healthier fats. Additionally, homemade versions let you control sugar and portion sizes—one standard 2-inch square contains roughly 200 calories, 10g fat, and 2g protein. For a more nutrient-dense twist, you can swap half the flour for almond flour to add healthy fats and vitamin E.
Tips Variations & Cooking Advice
– Flavor variations: Add espresso powder (1 teaspoon) to deepen chocolate flavor, or swirl in peanut butter for a salty contrast.
– Dietary adaptations: For gluten-free, use a 1:1 gluten-free flour blend. For dairy-free, replace butter with coconut oil (use refined to avoid coconut taste).
– Alternative methods: Bake in a mini muffin tin for 12–15 minutes to create bite-sized treats—perfect for parties.
– Texture tweaks: For chewy brownies, substitute brown sugar for half the granulated sugar; for cake-like, add an extra egg and increase flour by 2 tablespoons.
Common Mistakes to Avoid
1. Overbaking: The number one culprit for dry brownies. Start checking 3–5 minutes before the recommended time. Remember, remnant heat continues cooking after removal.
2. Using cold eggs: They can seize the butter, resulting in a grainy batter. Always bring eggs to room temperature by placing them in warm water for 5 minutes.
3. Overmixing: This develops gluten and creates a cakey texture. Mix only until flour disappears.
4. Using wrong pan size: A pan that’s too large will make thin, crisp brownies; too small will underbake the center. Stick with 8×8 or 9×9.
5. Skipping parchment: Without it, removing brownies intact becomes a struggle—use parchment overhang for clean lift.
Storage & Meal Prep Tips
Refrigeration: Store brownies in an airtight container at room temperature for up to 4 days. If you need longer, refrigerate for up to a week—but bring to room temperature before serving for best texture.
Freezing: Wrap individually in plastic wrap, then place in a freezer bag. They stay fresh for up to 3 months. To thaw, let sit at room temperature for 20 minutes or microwave for 15 seconds.
Reheating: For that just-baked gooeyness, warm a brownie in the microwave for 10–15 seconds. Avoid overheating, which hardens the chocolate.
Conclusion
Mastering the perfect batch of Brownies is simpler than you think when you follow these precise steps. The key is to balance moisture, temperature, and mixing technique—especially if you’re aiming for fudgy brownies that are dense yet tender. Now it’s your turn: preheat the oven, gather your ingredients, and bake a batch that will earn rave reviews. Share your results in the comments below or tag us on social media—we’d love to see your shiny, chocolatey creations!
FAQs
1. Why are my brownies cakey instead of fudgy?
You likely overmixed the batter after adding flour, or you overbaked them. For fudgy results, stop mixing as soon as flour disappears, and pull them out when a toothpick shows moist crumbs.
2. Can I use butter and oil together?
Yes! Using half butter and half vegetable oil (or melted coconut oil) adds moisture while maintaining flavor. This can help if you find all-butter brownies too greasy.
3. How do I make brownies gluten-free?
Simply replace all-purpose flour with a 1:1 gluten-free baking blend that contains xanthan gum. No other changes are needed.
4. Why did my brownies stick to the pan?
Skipping parchment paper is the main cause. Always line your pan with parchment and lightly grease the sides. If you forgot, run a knife around the edges while warm, then invert.
5. Can I reduce the sugar without ruining the texture?
You can reduce sugar by up to ¼ cup, but note that sugar impacts moisture and structure. For best results, use a natural sweetener like coconut sugar, which retains moisture better than artificial sweeteners.
3-Ingredient Brownies
Ingredients
Equipment
Method
- Preheat your oven to 350°F (175°C) and line an 8x8 inch baking pan with parchment paper, leaving an overhang on the sides.
- In a medium-sized mixing bowl, combine the chocolate spread and eggs, then mix them together until the mixture is smooth and well incorporated.
- Gradually add the all-purpose flour to the chocolate mixture, stirring gently until just combined without overmixing the batter.
- Pour the brownie batter evenly into the prepared baking pan.
- Bake for 20-25 minutes, or until a toothpick inserted into the center comes out with moist crumbs.
- Allow the brownies to cool completely in the pan before lifting them out with the parchment paper and cutting them into squares to serve.