The Ultimate Guide to Making the Perfect Apple Crisp at Home
Have you ever craved a warm, cinnamon-spiced dessert that tastes like autumn in a bowl but takes half the effort of a traditional pie? That’s exactly why mastering a homemade Apple Crisp is a game-changer for any home cook. Unlike fussy pastry crusts, this dessert relies on a simple oat-and-butter topping that bakes into golden, crunchy perfection over tender, caramelized apples. Preparing it at home not only fills your kitchen with an irresistible aroma but also lets you control the sweetness, spice level, and texture. Whether you’re a seasoned baker or a beginner, this Apple Pie -inspired cousin will become your go-to after you see how easy and rewarding it is. In this post, we’ll walk through every detail so you can serve a dessert that rivals any bakery creation.
Ingredients & Kitchen Tools
For the Apple Filling
– 6 medium apples (Honeycrisp, Granny Smith, or a mix) – peeled, cored, sliced ¼-inch thick. Tart apples balance the sweet topping.
– 2 tablespoons lemon juice – prevents browning and brightens flavor.
– ¼ cup granulated sugar – adjust based on apple sweetness.
– 1 teaspoon ground cinnamon – the signature spice.
– ½ teaspoon nutmeg (optional) – adds warmth.
– 1 tablespoon cornstarch – thickens juices during baking.
For the Crisp Topping
– 1 cup old-fashioned rolled oats – not quick oats; they give the best crunch.
– ½ cup all-purpose flour (or gluten-free blend).
– ½ cup packed brown sugar – for deep molasses notes.
– ½ cup cold unsalted butter – cubed; do not soften.
– ½ teaspoon salt – enhances all flavors.
– Optional: ¼ cup chopped pecans or walnuts for extra texture.
Kitchen Tools
– 9×13-inch baking dish (or 10-inch cast-iron skillet).
– Mixing bowls (large + medium).
– Peeler, corer, sharp knife.
– Pastry cutter or two forks for cutting butter into topping.
– Measuring cups/spoons.
– Spatula or wooden spoon.
Substitutions
– Use coconut oil or vegan butter for dairy-free (chill it well).
– Replace oats with almond flour for a low-carb topping (reduce butter slightly).
– Swap brown sugar with maple syrup (reduce liquid in filling).
Prep Time & Cooking Schedule
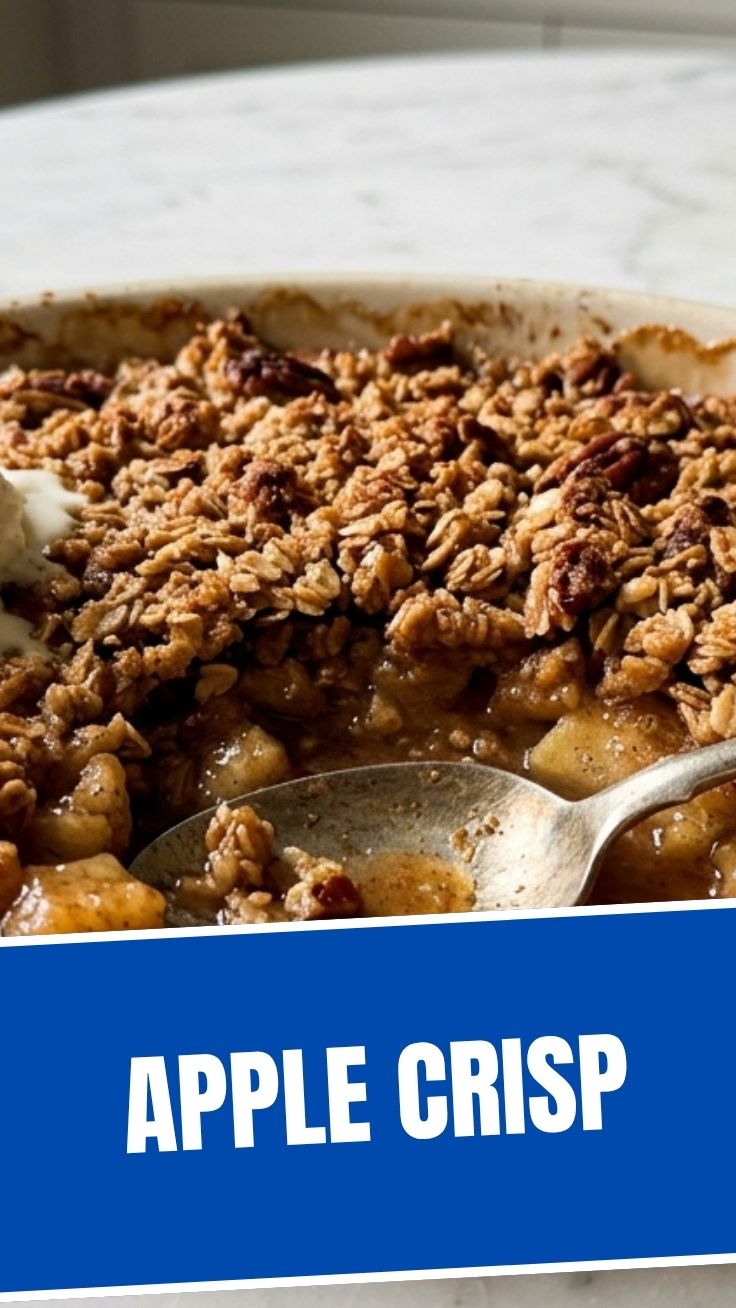
– Prep Time: 20 minutes (peeling, slicing, mixing).
– Cooking Time: 35–40 minutes at 375°F (190°C).
– Resting Time: 10–15 minutes after baking – allows juices to settle and topping to firm.
– Total: about 1 hour 15 minutes.
Plan ahead: You can assemble the crisp up to 24 hours in advance (keep unbaked in fridge). Add 5 minutes to bake time if starting cold. Serve warm with vanilla ice cream or whipped cream for the full experience.
Step-by-Step Instructions
1. Preheat oven to 375°F. Grease your baking dish lightly with butter or nonstick spray.
2. Prepare the apples: In a large bowl, toss sliced apples with lemon juice, granulated sugar, cinnamon, nutmeg, and cornstarch. Let sit 5 minutes while you make the topping – this releases natural juices that create a luscious syrup.
3. Make the crisp topping: In a medium bowl, combine oats, flour, brown sugar, and salt. Add cold cubed butter. Use a pastry cutter or your fingertips to work the butter into the dry mixture until it resembles coarse crumbs with pea-sized butter pieces. Do not overmix; the butter pockets create the “crisp” texture.
4. Assemble: Spread the apple mixture evenly in the dish. Sprinkle the oat topping over the apples in an even layer – don’t press down.
5. Bake: Place dish on a baking sheet to catch any overflow. Bake for 35–40 minutes, until the filling is bubbly around the edges and the topping is deep golden brown. If the topping browns too quickly, tent with foil after 25 minutes.
6. Cool: Let rest on a wire rack for 10–15 minutes. Serve warm. For an extra indulgence, drizzle with caramel sauce.
Tip: For perfectly tender apples, check with a fork after 30 minutes – they should yield easily. If you prefer firmer chunks, reduce bake time by 5 minutes. For a more intense cinnamon kick, add ¼ teaspoon ground ginger or cardamom. Remember, the best Apple Crisp balances sweet and tart, so taste your apples before adding sugar. And if you love the classic American Apple Pie, you’ll notice this crisp delivers the same comforting flavors with a fraction of the work.
Nutritional Benefits & Advantages
Apples are rich in fiber (pectin), vitamin C, and antioxidants like quercetin, which support heart health and immunity. Oats provide soluble beta-glucan that helps lower cholesterol. Using less sugar than many pies and no pastry crust, this crisp can be a lighter dessert option. One serving (1/8 of recipe) contains about 290 calories, 10g fat, 48g carbs, 3g protein, and 4g fiber. Swap butter for coconut oil and use almond flour to make it gluten-free and lower in carbs. The high water content of apples also promotes hydration.
Tips, Variations & Cooking Advice
– Flavor twists: Add ¼ cup dried cranberries or raisins to the filling. Swap cinnamon for pumpkin pie spice.
– Alternative cooking methods: Make individual ramekins (reduce bake time to 25 minutes). Use an air fryer at 350°F for 18–20 minutes (check early).
– Portion changes: Cut recipe in half for an 8×8 dish. Double for a crowd – use a 9×13 dish or two smaller ones.
– Dietary adaptations: Gluten-free: use certified GF oats and oat flour instead of wheat flour. Dairy-free: use cold plant-based butter. Vegan: same swap + use coconut sugar.
– Texture trick: Toast the oats and nuts in a dry pan for 3 minutes before mixing into topping for extra crunch.
Common Mistakes to Avoid
1. Mushy apples: Overcooking or using overripe apples. Stick to firm varieties like Granny Smith or Braeburn.
2. Soggy topping: Using warm butter or overmixing. Keep butter cold until it hits the oven.
3. Bland filling: Skimping on salt or lemon. Salt amplifies sweetness; acid balances.
4. Burnt edges: Not checking oven temp – use an oven thermometer. If edges darken too fast, cover with foil.
5. Runny juices: Forgetting cornstarch or underbaking. Let it rest 10 minutes after baking to thicken.
Storage & Meal Prep Tips
– Refrigerate: Cover leftovers tightly with foil or transfer to an airtight container. Keep for up to 5 days.
– Freeze: Assemble the unbaked crisp (without baking) in a freezer-safe dish, wrap with plastic wrap and foil, freeze up to 3 months. Bake from frozen at 375°F for 50 minutes.
– Reheat: Warm individual portions in the microwave (30–40 seconds) or in a 350°F oven for 10 minutes to restore crispness. Avoid high heat – it dries out apples.
– Meal prep: Pre-slice apples and toss with lemon juice (keeps 2 days in fridge). Store topping separately. Combine just before baking.
Conclusion
There you have it – a foolproof recipe for a warm, comforting dessert that celebrates the best of fall fruit. This Apple Crisp proves that you don’t need a rolling pin or pastry skills to create a stunning dessert. The combination of soft, cinnamon-spiced apples and a buttery, crunchy oat topping delivers every bit of the satisfaction you’d expect from a classic Apple Pie, but in a fraction of the time. Try it with a scoop of vanilla ice cream for the ultimate treat. Share your results in the comments – I’d love to hear how yours turned out! And if you’re hungry for more fruit-forward desserts, check out our recipes for peach cobbler and berry crumble.
FAQs
1. Can I use pre-sliced frozen apples?
Yes, but thaw and drain excess liquid first. Pat dry with paper towels to avoid a watery filling. Increase cornstarch to 1½ tablespoons.
2. Why is my crisp topping not crunchy?
It may be underbaked or the butter was too warm. Bake until deep golden, and let it cool uncovered for 10 minutes. Store leftovers without a tight lid.
3. What’s the best apple variety for apple crisp?
A mix of tart (Granny Smith) and sweet (Honeycrisp) gives the best flavor and texture. Avoid Red Delicious, which turns mushy.
4. Can I make this recipe sugar-free?
Yes, swap granulated sugar for erythritol or monk fruit sweetener (1:1 ratio). Use brown sugar substitute for the topping. The texture may be slightly less caramelized.
5. How do I prevent the filling from boiling over?
Place the baking dish on a foil-lined sheet pan. Don’t overfill – leave ½-inch space below the rim. If using a deep dish, reduce temperature to 350°F and bake longer (45 minutes).
Quick way to grow 5 Apple Crisp apple trees
Ingredients
Equipment
Method
- Choose a sunny location with well-draining soil and ensure proper spacing for each tree (at least 15-20 feet apart). Dig holes that are twice as wide as the root ball and just as deep, breaking up any compacted soil in the process.
- Carefully remove saplings from their containers, gently loosen the roots, and place each sapling in a prepared hole ensuring the graft union is 2-3 inches above ground level. Backfill the hole with a mix of gardening soil and compost, lightly firming around the base to remove air pockets.
- Water thoroughly after planting until the soil is saturated; this helps settle the soil and provides initial moisture. Optionally, you can add mycorrhizal fungi inoculant or a slow-release fertilizer at this stage, following product instructions.
- Install tree stakes next to each sapling, approximately 6-12 inches away from the trunk, and secure the tree to the stake with tree ties to provide support as the tree establishes. Water the trees regularly, especially during dry periods, aiming for deep watering that reaches the root zone.