Why You’ll Never Order Takeout Again After Making This at Home
What if I told you that you could recreate a restaurant‑quality dish in under 20 minutes with simple pantry staples? The next time a craving for sweet‑and‑savory seafood strikes, skip the delivery app and turn to this Honey Garlic Shrimp — a dish that delivers glossy, caramelized shrimp in a luscious sauce that clings to every bite. Not only is it faster than waiting for takeout, but it also costs a fraction of the price and lets you control the quality of ingredients. Paired with steamed rice or noodles, this honey garlic shrimp recipe is about to become your new weeknight hero.
—
Ingredients & Kitchen Tools (H2)
For the shrimp and sauce
– 1 lb large raw shrimp – peeled and deveined (tail‑on or off; tail‑on adds visual appeal).
– 3 tbsp honey – use a runny, mild variety like clover or acacia.
– 4 cloves garlic, minced – fresh is non‑negotiable for pungency.
– 2 tbsp soy sauce (or tamari for gluten‑free).
– 1 tbsp unsalted butter – adds richness; swap with vegan butter or coconut oil.
– 1 tbsp olive oil – for high‑heat searing.
– 1 tsp sesame oil – optional, for a nutty fragrance.
– ½ tsp red pepper flakes – optional heat.
– Salt & black pepper – to taste.
– Garnish – sliced green onions, toasted sesame seeds.
Kitchen tools
– Large skillet (preferably non‑stick or cast‑iron).
– Mixing bowl.
– Garlic press or knife.
– Tongs or spatula.
– Measuring spoons.
Optional substitutions
– Swap shrimp with chicken breast (cut into bite‑size pieces) or firm tofu (pressed and cubed).
– Use maple syrup instead of honey for a vegan version.
– Replace soy sauce with coconut aminos for a soy‑free alternative.
—
Prep Time & Cooking Schedule (H2)
– Prep time: 10 minutes (peel shrimp, mince garlic, mix sauce).
– Cook time: 8–10 minutes total.
– Resting time: 2 minutes after cooking (sauce thickens slightly).
– Marinating time (optional): If you have 15 extra minutes, toss shrimp with 1 tbsp soy sauce and a pinch of salt to infuse flavor.
Why this matters: Shrimp cook very quickly — overcooking turns them rubbery. A tight schedule ensures you’re ready to serve immediately. The entire process from fridge to table fits within a 20‑minute window, perfect for busy evenings.
—
Step-by-Step Instructions (H2)
Step 1: Prepare the shrimp and sauce
Pat the shrimp dry with paper towels (moisture kills searing) and season lightly with salt and pepper. In a small bowl, whisk honey, soy sauce, sesame oil, and red pepper flakes. This is the base of your Honey Garlic Shrimp glaze. Keep the honey garlic glaze aside — you’ll add it later to avoid burning the garlic.
Step 2: Sear the shrimp
Heat olive oil in a large skillet over medium‑high heat until shimmering. Add the shrimp in a single layer (work in batches if needed). Cook for 1.5–2 minutes per side until they turn pink and develop a slight golden crust. Remove shrimp to a plate. Pro tip: The internal temperature should reach 120°F (49°C) — any higher and they’ll toughen.
Step 3: Build the sauce
Reduce heat to medium. Add butter and minced garlic to the same skillet. Sauté for 30 seconds until fragrant — do not let the garlic brown or it will turn bitter. Pour in the prepared honey‑soy mixture and stir constantly for 1 minute until it bubbles and thickens slightly.
Step 4: Combine and glaze
Return the cooked shrimp to the skillet, along with any accumulated juices. Toss everything together for 45–60 seconds until the shrimp are evenly coated and the sauce is sticky. This honey garlic shrimp recipe shines when the glaze clings to each shrimp like a glossy lacquer.
Step 5: Finish and serve
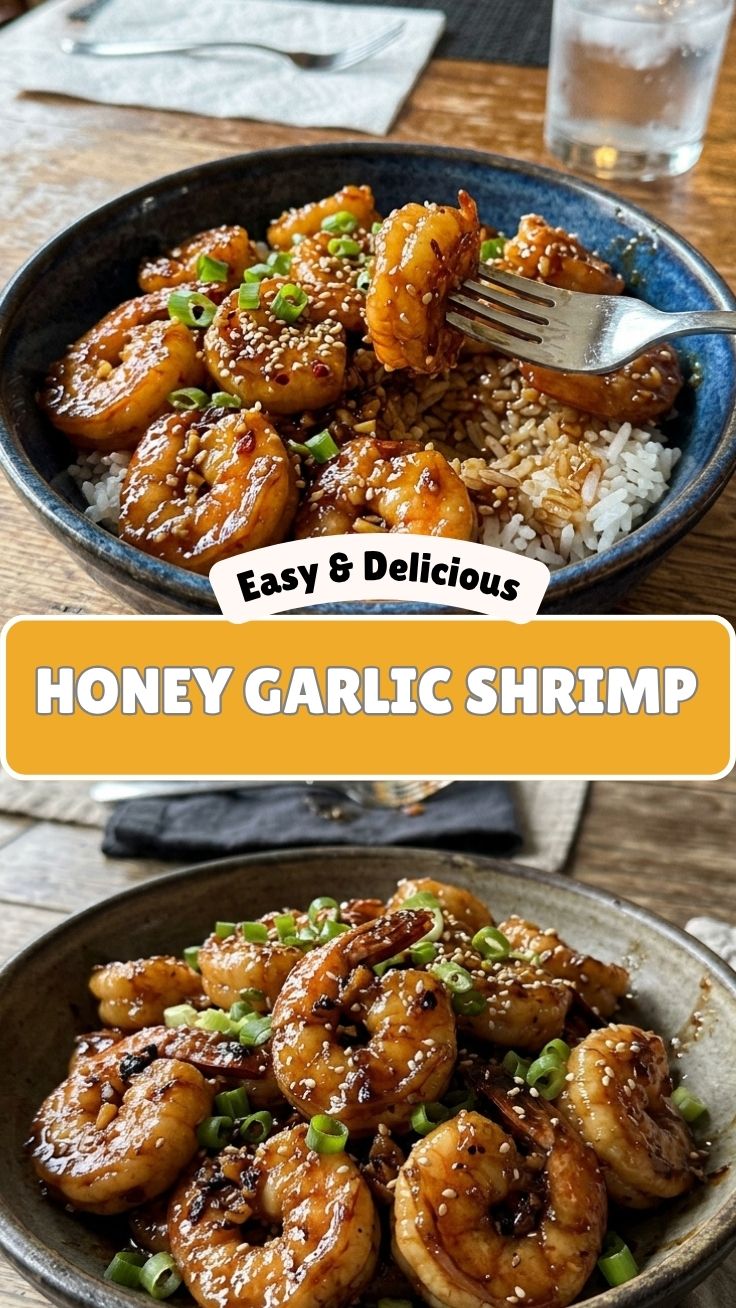
Remove from heat. Garnish with sliced green onions and sesame seeds. Serve immediately over steamed jasmine rice, quinoa, or a bed of sautéed greens.
—
Nutritional Benefits & Advantages (H2)
– High‑protein, low‑carb: Shrimp offers about 20g of protein per 3‑ounce serving with virtually no carbs.
– Rich in selenium and vitamin B12: Supports thyroid function and energy metabolism.
– Garlic’s immune‑boosting properties: Allicin, a compound in fresh garlic, may help reduce inflammation.
– Honey provides quick energy and antioxidants (especially if raw honey is used).
– Healthy fats: The small amount of butter and olive oil aids in absorption of fat‑soluble vitamins.
This dish fits well into paleo, keto, and Whole30 (swap honey for date syrup) eating patterns.
—
Tips, Variations & Cooking Advice (H2)
Flavor twists
– Spicy kick: Add ½ tsp sriracha or a diced Thai chili to the sauce.
– Citrus note: Squeeze 1 tbsp fresh lemon juice over the finished dish.
– Herb infusion: Stir in 1 tsp grated fresh ginger along with the garlic.
Cooking method swaps
– Air fryer: Cook shrimp at 375°F (190°C) for 6–8 minutes, then toss with warm sauce.
– Grill: Thread shrimp onto skewers and brush with glaze after grilling.
Dietary adaptations
– Gluten‑free: Use tamari or coconut aminos instead of soy sauce.
– Dairy‑free: Replace butter with ghee or avocado oil.
– Low‑sodium: Reduce soy sauce to 1 tbsp and add a splash of water.
Portion tips
Double the sauce recipe if you want extra for drizzling over rice.
—
Common Mistakes to Avoid (H2)
1. Overcooking shrimp.
Solution: Shrimp cook in under 3 minutes. Remove as soon as they curl into a “C” shape — an “O” shape means they’re overdone.
2. Burning the garlic.
Solution: Add garlic only after removing shrimp, and cook on medium heat for no more than 30 seconds.
3. Sauce too thin.
Solution: Let the honey mixture boil for 1 full minute before adding shrimp back. The natural sugars will caramelize and thicken.
4. Soggy shrimp from excess moisture.
Solution: Pat shrimp extremely dry with paper towels before searing.
5. Skipping the resting step.
Solution: Let the finished dish sit for 2 minutes so the sauce adheres better.
—
Storage & Meal Prep Tips (H2)
– Refrigeration: Store in an airtight container for up to 3 days.
– Freezing: Shrimp can become rubbery after thawing, but if necessary, freeze the sauce separately and combine with freshly cooked shrimp.
– Reheating: Reheat in a skillet over medium‑low heat with 1 tsp water to loosen the sauce. Microwave in 30‑second bursts at 50% power.
– Meal prep: Cook the shrimp and sauce, store separately, then toss together after reheating to preserve texture.
Do not leave cooked shrimp at room temperature for more than 2 hours.
—
Conclusion (H2)
From its sticky sweet‑savory glaze to its lightning‑fast prep, this Honey Garlic Shrimp proves that homemade can rival any takeout. We’ve walked through every step — from choosing the right shrimp to avoiding common pitfalls — so you can consistently nail that glossy, garlic‑packed finish. Whether you follow the classic honey garlic shrimp recipe or experiment with one of the variations, the result is a dish that feels both indulgent and nourishing. Try it tonight, tag your creation online, or browse our other quick seafood dinners to keep your weeknight rotation exciting.
—
FAQs (H2)
1. Can I use frozen shrimp?
Yes. Thaw them overnight in the fridge or quickly under cold running water. Pat bone‑dry before cooking — frozen shrimp retain extra moisture.
2. How can I make the sauce thicker?
Let the honey mixture boil for 1–2 minutes without the shrimp. You can also stir in a slurry of 1 tsp cornstarch + 1 tbsp cold water.
3. What if I don’t have honey?
Substitute with maple syrup, agave nectar, or brown sugar dissolved in 2 tbsp warm water.
4. How do I prevent the shrimp from being rubbery?
Cook them on high heat for the shortest time possible. Remove from heat the moment they turn pink and curl slightly.
5. Can I add vegetables to this dish?
Absolutely. Sauté bell peppers, snap peas, or broccoli florets first, then proceed with the shrimp and sauce. Adjust cook times accordingly.
Quick way to grow honey garlic shrimp 5 ways
Ingredients
Equipment
Method
- In a bowl, whisk together honey, soy sauce, and minced garlic to create the honey garlic sauce.
- Heat olive oil in a large skillet over medium-high heat.
- Add shrimp to the skillet and cook for 1-2 minutes per side, until pink and cooked through.
- Pour the honey garlic sauce over the shrimp and toss to coat; cook for another 1-2 minutes until the sauce thickens slightly.
- Follow the basic recipe, but add 1/2 teaspoon of red pepper flakes to the sauce for a spicy kick.
- Follow the basic recipe, adding 1 tablespoon of fresh lemon juice and 1 teaspoon of lemon zest to the sauce for a bright, citrusy flavor.
- Follow the basic recipe, incorporating 1 teaspoon of grated fresh ginger into the sauce for an aromatic twist.
- Follow the basic recipe, adding 1 teaspoon of sesame oil and a sprinkle of toasted sesame seeds to the sauce and garnish, respectively.