The Ultimate Guide to Perfectly Crunchy Breadsticks at Home
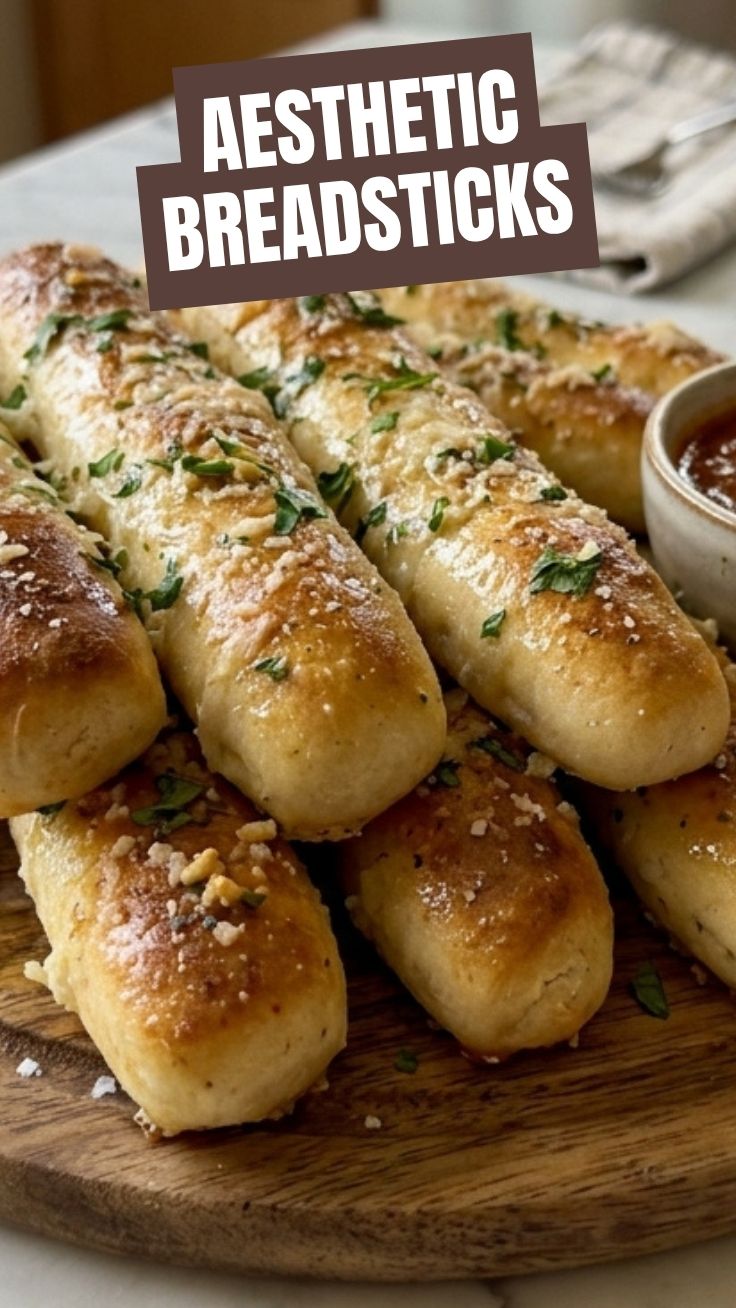
Have you ever bitten into a restaurant-quality breadstick that’s perfectly golden on the outside, pillowy soft on the inside, and wondered how they achieve that irresistible texture? The secret isn’t a special oven or a secret recipe—it’s about mastering a few fundamental techniques that anyone can learn. Preparing homemade breadsticks at home not only fills your kitchen with an intoxicating aroma but also gives you complete control over ingredients, flavors, and freshness. Whether you’re hosting a dinner party, craving a comforting side dish, or simply want to elevate your pasta night, these from-scratch breadsticks will become your new kitchen staple. Let’s dive into the art of creating bakery-worthy breadsticks that will have everyone asking for your recipe.
Ingredients & Kitchen Tools
Essential Ingredients
– 3½ cups all-purpose flour – Provides structure; bread flour works too for extra chew
– 1½ cups warm water (110°F/43°C) – Activates the yeast; too hot kills it, too cold slows it
– 2¼ teaspoons active dry yeast (one packet) – The leavening agent for that airy interior
– 2 tablespoons granulated sugar – Feeds the yeast and adds slight sweetness
– 1½ teaspoons salt – Enhances flavor and controls yeast activity
– 3 tablespoons olive oil (plus extra for brushing) – Adds richness and tenderizes the crumb
– 2 tablespoons melted butter – For that classic glossy, flavorful finish
– 1 teaspoon garlic powder (optional but recommended) – For aromatic depth
Kitchen Tools
– Large mixing bowl
– Wooden spoon or dough whisk
– Clean kitchen towel or plastic wrap
– Baking sheet (rimmed)
– Parchment paper or silicone mat
– Pastry brush
– Sharp knife or bench scraper
– Wire cooling rack
– Measuring cups and spoons
Optional Substitutions
– Gluten-free flour blend – Use a 1:1 baking blend with xanthan gum
– Honey or maple syrup – Replace sugar for a natural sweetener
– Cold-pressed avocado oil – Substitute for olive oil for a milder taste
– Fresh herbs – Add rosemary, thyme, or oregano to the dough
Prep Time & Cooking Schedule
Total Time: 2 hours 15 minutes
– Prep Time: 20 minutes (mixing and kneading)
– Resting Time: 1 hour 30 minutes (first rise) + 15 minutes (second rise)
– Bake Time: 12-15 minutes
Plan accordingly: the dough requires patience, but the active work is minimal. Ideal timeline: mix the dough in the morning, complete the first rise while you work or run errands, then shape and bake fresh for dinner. The resting periods are perfect for preparing sauces, salads, or soups to accompany your breadsticks.
Step-by-Step Instructions
Step 1: Activate the Yeast
In a large bowl, combine warm water, sugar, and yeast. Let stand for 5-10 minutes until foamy. This foam indicates the yeast is alive and active. If no foam appears, discard and start over with fresh yeast.
Step 2: Form the Dough
Add olive oil, salt, and 2 cups of flour to the yeast mixture. Stir vigorously with a wooden spoon until smooth. Gradually add remaining flour, ½ cup at a time, until a soft, slightly sticky dough forms in your homemade breadsticks recipe.
Step 3: Knead to Perfection
Transfer dough to a lightly floured surface. Knead for 8-10 minutes, adding minimal flour as needed. The dough should be smooth, elastic, and spring back when pressed. To test: press a finger into the dough—it should slowly spring back.
Step 4: First Rise
Place dough in a greased bowl, turning to coat all sides. Cover with a damp towel and let rise in a warm, draft-free spot for 1-1½ hours, or until doubled in size. Pro tip: use your oven with the light on and door closed for consistent warmth.
Step 5: Shape the Breadsticks
Punch down the dough gently. Transfer to a floured surface and divide into 12 equal pieces. Roll each piece into a 6-inch rope. Place on a parchment-lined baking sheet, leaving 1 inch between each.
Step 6: Second Rise and Preparation
Cover shaped breadsticks and let rise for 15 minutes while preheating your oven to 400°F (200°C). Meanwhile, melt butter and mix with garlic powder if using.
Step 7: Bake to Golden Perfection
Brush breadsticks with garlic butter mixture. Bake for 12-15 minutes until deep golden brown. For extra crunch, bake 2 minutes longer. Remove from oven and brush with remaining butter for a glossy finish that rivals any Garlic breadsticks you’ve had in restaurants.
Step 8: Cool and Serve
Transfer to a wire rack for 5 minutes before serving. Serve warm for the ultimate texture contrast—crispy exterior, soft interior.
Nutritional Benefits & Advantages
Homemade breadsticks offer surprising nutritional advantages over store-bought versions. The fermentation process breaks down phytic acid, making minerals like zinc, magnesium, and iron more bioavailable. This gentle fermentation also creates beneficial digestive enzymes.
– Calories: ~150 per breadstick (versus 200+ diner-style)
– Carbohydrates: 28g – primary energy source for the body
– Protein: 4g from flour and yeast
– Healthy fats: 4g from olive oil, supporting heart health
– Sodium control: you control salt levels, often reducing sodium by 40% compared to commercial options
The olive oil adds monounsaturated fats that support cardiovascular health, while garlic (if used) offers allicin—a compound with antimicrobial properties. When paired with a fiber-rich soup or salad, these breadsticks create a balanced, satisfying meal component.
Tips Variations & Cooking Advice
Flavor Variations
– Cheese breadsticks: Add ½ cup grated parmesan to the dough
– Spicy twist: Mix in ½ teaspoon red pepper flakes or cayenne
– Herb-infused: Fold in 2 tablespoons fresh chopped basil or oregano
– Sweet version: Skip garlic, add cinnamon sugar after baking
Alternative Cooking Methods
– Air fryer: Cook at 350°F (175°C) for 6-8 minutes, no preheat needed
– Grill: Cook over indirect medium heat for 8-10 minutes with grill marks
– Cast iron skillet: Heat skillet, add breadsticks for an extra-crispy bottom
Dietary Adaptations
– Dairy-free: Use coconut oil instead of butter for brushing
– Vegan: Brush with olive oil and nutritional yeast for a cheesy flavor
– Whole wheat: Substitute half the flour with whole wheat pastry flour
Common Mistakes to Avoid
– Killing the yeast: Water above 120°F kills yeast. Always measure with a thermometer; warm to the touch (not hot) is perfect.
– Skipping the first rise: Don’t rush this step. Under-proofed dough makes dense, heavy breadsticks instead of light, airy ones.
– Over-flouring the dough: Too much flour creates dry, tough breadsticks. The dough should be slightly tacky but not sticky.
– Baking at the wrong temperature: Too hot burns the outside before the inside cooks; too cold makes pale, raw-centered breadsticks. Trust the 400°F standard.
– Skipping the butter wash: This crucial step creates that golden, appetizing crust and locks in moisture.
Storage & Meal Prep Tips
At Room Temperature: Store in an airtight container with a paper towel to absorb moisture for up to 2 days. Avoid plastic bags—they trap humidity and make breadsticks soggy.
Refrigeration: Place in a sealed container for up to 4 days. The texture will soften slightly but remains delicious.
Freezing: For best results, freeze unbaked shaped dough ropes on a parchment-lined tray until solid, then transfer to a freezer bag. Bake straight from frozen, adding 3-5 minutes to baking time.
Reheating: Revive leftover breadsticks in a 350°F oven for 5 minutes, or toast in a skillet with a pat of butter for that fresh-from-the-oven crackle. Avoid microwaving—it creates a rubbery texture.
Meal Prep Strategy: Double the recipe and freeze half of the shaped dough for future meals. Label with date and baking instructions for effortless future dinners.
Conclusion
Mastering homemade breadsticks transforms any meal into a special occasion. With this guide, you’ve unlocked the secrets to creating perfectly crunchy, pillowy-soft breadsticks that rival any restaurant version—including those tempting Garlic breadsticks from your favorite Italian spot. The process, while requiring some patience, is remarkably simple and rewarding. You now have the knowledge to control texture, flavor, and ingredient quality, all while filling your home with an irresistible fresh-baked aroma. Whether you’re a novice baker or seasoned home cook, these breadsticks will become your signature side dish. We’d love to hear how your batch turns out! Share your results in the comments below, tag us in your photos, or explore our other artisan bread recipes for more kitchen inspiration. Happy baking!
FAQs
Why didn’t my dough rise?
Several factors could be at play: inactive yeast (always proof it first), water too hot or cold, cold room temperature, or expired flour. Try proofing fresh yeast in a warm, draft-free area, and ensure your water is around 110°F.
Can I make the dough in advance?
Absolutely! After the first rise, punch down the dough, wrap tightly, and refrigerate for up to 24 hours. When ready to shape, let it sit at room temperature for 30 minutes before proceeding with shaping.
How do I get a crispier exterior?
For extra crunch, brush the breadsticks with butter and bake for the full 15 minutes. You can also brush them with an egg wash (1 egg beaten with 1 tablespoon water) before baking for a very crisp, shiny crust.
What’s the secret to soft, fluffy breadsticks?
The key is proper kneading (8-10 minutes) and not over-flouring. A slightly tacky dough, adequate first rise, and a butter wash immediately after baking ensure those soft, pillowy interiors with golden crispy edges.
Can I add different herbs or spices?
Absolutely! The base recipe is incredibly versatile. Try everything bagel seasoning, za’atar, furikake, or a sprinkle of flaky sea salt and rosemary before baking. The possibilities are endless!
Proven way to grow your own 7 Breadsticks
Ingredients
Equipment
Method
- In a large bowl, dissolve the yeast and sugar in warm water, then let it sit for 5-10 minutes until foamy.
- Stir in the olive oil and salt, then gradually add the flour, mixing until a shaggy dough forms.
- Turn the dough out onto a lightly floured surface and knead for 5-7 minutes until smooth and elastic.
- Lightly grease a clean bowl, place the dough in it, and turn to coat; cover with plastic wrap and let rise in a warm place for 60-90 minutes, or until doubled in size.
- Preheat your oven to 400°F (200°C) and lightly grease a baking sheet.
- Gently punch down the risen dough and divide it into 7 equal pieces.
- Roll each piece into a breadstick shape, about 8-10 inches long, and arrange them on the prepared baking sheet.
- If desired, brush the breadsticks with a little olive oil and sprinkle with garlic powder and Parmesan cheese.
- Bake for 12-15 minutes, or until golden brown and cooked through; serve warm.