The Ultimate Guide to Perfectly Juicy Turkey Breast: A Home Cook’s Masterpiece
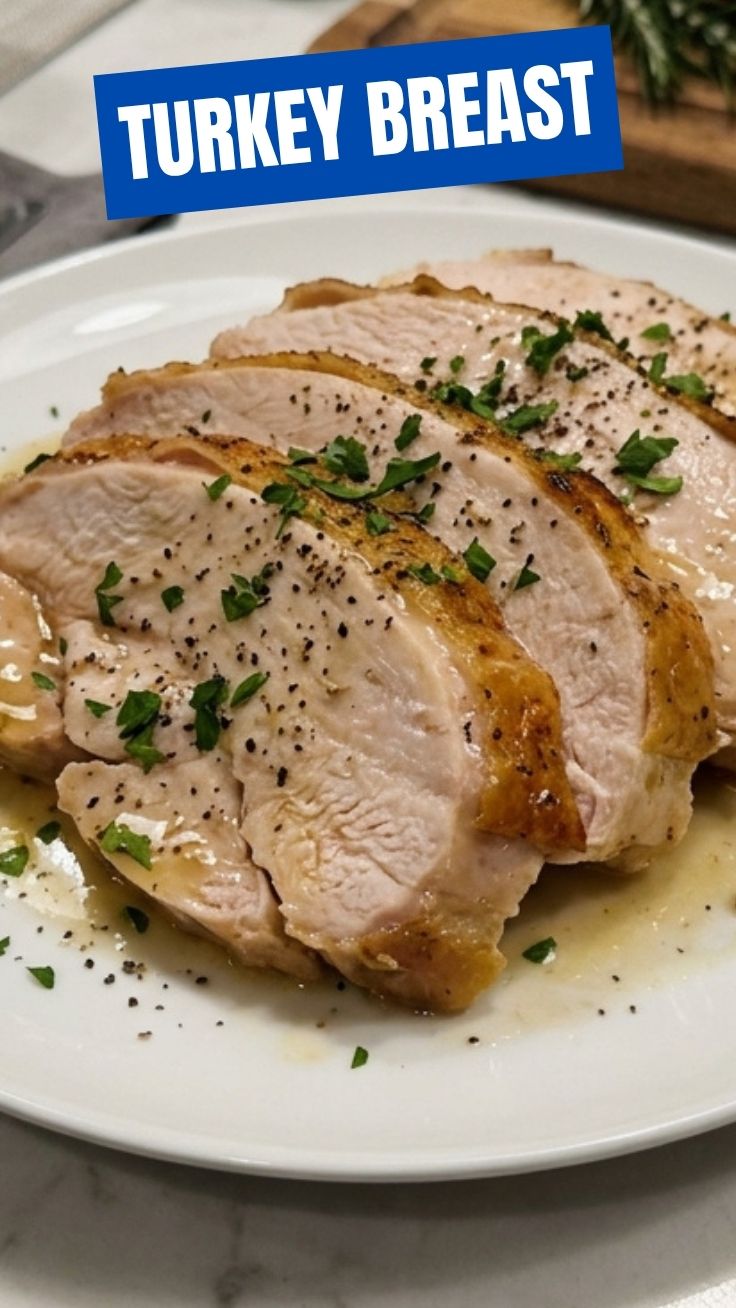
Have you ever pulled a turkey breast out of the oven only to find it dry, bland, or unevenly cooked—while the holiday centerpiece you dreamed of crumbles under the knife? You’re not alone. Mastering a moist, flavorful Turkey Breast at home isn’t just about avoiding kitchen stress; it’s about unlocking a versatile protein that saves you money, cuts out processed additives, and lets you control every herb and spice. Whether you’re planning a Sunday dinner or prepping for a week of hearty lunches—maybe even a gourmet Turkey Sandwich—this recipe transforms a simple cut into something spectacular. Let’s get started.
—
Ingredients & Kitchen Tools (H2)
For the Turkey Breast (serves 4-6):
– 1 bone-in, skin-on turkey breast (5-7 lbs) – Bone-in retains moisture; skin crisps beautifully.
– 3 tbsp unsalted butter (softened) – For richness; substitute with olive oil for dairy-free.
– 2 cloves garlic (minced) – Adds aromatic depth.
– 1 tbsp fresh rosemary (chopped) – Or 1 tsp dried; thyme or sage work too.
– 1 tsp salt – Kosher preferred; adjust to taste.
– ½ tsp black pepper – Freshly ground for best flavor.
– 1 cup low-sodium chicken broth – Keeps pan moist and creates a jus.
– Optional: ½ cup dry white wine – Adds acidity; skip or use extra broth.
Kitchen Tools:
– Roasting pan with rack – Elevates for even cooking.
– Instant-read thermometer – Non-negotiable for perfect doneness.
– Basting brush – Or spoon for butter application.
– Aluminum foil – For tenting during resting.
– Sharp carving knife – Thin, even slices.
—
Prep Time & Cooking Schedule (H2)
– Prep Time: 15 minutes
– Cooking Time: 1 hour 15 minutes to 1 hour 45 minutes
– Resting Time: 20 minutes (essential for juicy meat)
– Total Time: ~2 hours 20 minutes
Pro Tip: Remove the turkey from the fridge 30 minutes before cooking to take the chill off—this ensures even cooking. Plan your side dishes (mashed potatoes, roasted veggies) to finish around the same time.
—
Step-by-Step Instructions (H2)
1. Preheat & Prep: Set oven to 400°F (200°C). Pat the Turkey Breast completely dry with paper towels—moisture is the enemy of crispy skin.
2. Season the Butter: In a small bowl, mix softened butter, minced garlic, rosemary, salt, and pepper until well combined.
3. Apply the Butter: Gently lift the skin (don’t tear it) and rub half the butter mixture directly onto the meat. Spread the remaining butter over the skin. This technique locks in flavor and creates a golden crust.
4. Set Up the Pan: Place the turkey breast skin-side up on the rack in the roasting pan. Pour chicken broth (and wine if using) into the pan, not over the bird.
5. Roast: Cook for 15 minutes at 400°F, then reduce temperature to 350°F. Roast about 1 hour to 1 hour 15 minutes more, basting every 30 minutes with pan juices. The internal temperature should reach 160°F at the thickest part (it will rise to 165°F while resting).
6. Rest & Carve: Remove from oven, tent with foil, and let rest for 20 minutes. Carve against the grain—perfect for piling high on your favorite Turkey Sandwich bread.
—
Nutritional Benefits & Advantages (H2)
Turkey breast is a lean protein powerhouse: a 3-ounce serving provides about 25g of protein with only 1g of saturated fat. It’s rich in B vitamins (B6 and B12), selenium for immune support, and tryptophan without the heavy carb crash myth. Compared to dark meat or processed deli meats, homemade roasted turkey breast contains zero preservatives, lower sodium, and no added sugars—making it a clean, nutrient-dense choice for muscle repair, weight management, and heart health.
—
Tips Variations & Cooking Advice (H2)
– Flavor Swaps: Rub with smoked paprika and cumin for a southwestern twist, or use lemon zest and dill for a brighter profile.
– Cooking Methods: For a faster option, spatchcock (flatten) the breast and reduce cooking time by 20-25 minutes. Or use an air fryer at 360°F for 30-35 minutes (smaller breast).
– Dietary Adaptations: Dairy-free? Use olive or avocado oil instead of butter. Gluten-free? The recipe is naturally GF—just ensure your broth is certified.
– Portion Hack: Cook two smaller breasts instead of one large one—they cook faster and slice more uniformly.
—
Common Mistakes to Avoid (H2)
– Skipping the Thermometer: Guessing leads to dry meat. Always use an instant-read thermometer—165°F is safety but remove at 160°F for carryover cooking.
– Not Drying the Skin: Wet skin steams rather than crisps. Pat until bone-dry before applying butter.
– Overcrowding the Pan: Too much liquid? The meat steams. Keep broth to 1 cup max—add more during basting if needed.
– Carving Too Early: Cutting immediately releases juices. Let it rest 20 minutes, tented, for maximum tenderness.
—
Storage & Meal Prep Tips (H2)
– Refrigerate: Store in an airtight container with a splash of broth (to prevent drying) for up to 4 days.
– Freeze: Wrap slices tightly in plastic wrap, then foil, or use a vacuum-sealer. Freeze for up to 3 months.
– Reheat: For best texture, reheat slices in a 350°F oven with a few tablespoons of broth, covered, for 10 minutes. Microwaving is faster but may toughen the meat—add a damp paper towel over the plate to retain moisture.
—
Conclusion (H2)
Bringing a perfectly roasted Turkey Breast to your table isn’t reserved for holidays—it’s a weekly win that delivers leftovers perfect for a hearty Turkey Sandwich or a quick protein salad. By controlling your seasonings and nailing the temperature, you’ll never settle for dry, bland poultry again. Try this recipe this weekend, snap a photo, and share your results below or tag us on social media. For more foolproof main dishes, explore our roasted chicken and pork tenderloin guides!
—
FAQs (H2)
1. Can I use a boneless, skinless turkey breast?
Yes, but reduce cooking time by 20-30 minutes and check temperature at 155°F (resting will bring it to 160-165°F). Expect less moisture—brine it for 4 hours first if possible.
2. My turkey breast is browning too fast—what do I do?
Tent loosely with foil after 45 minutes of cooking. The butter and sugar in broth can burn; foil slows browning without hindering internal cook.
3. How long should I brine the turkey breast?
A dry brine (salt only, 2-4 hours uncovered in the fridge) enhances flavor and moisture. A wet brine (salt, sugar, herbs in water) works in 6-8 hours—but skip this if your broth or butter is already salty.
4. My cooked turkey breast is dry—can I fix it?
Slice thinly, then simmer slices in warm broth or gravy for 2-3 minutes. The liquid will rehydrate the meat slightly. Prevent in the future by using a thermometer and resting properly.
5. Can I make this recipe gluten-free or dairy-free?
Absolutely. Use olive oil or ghee (dairy-free) instead of butter, and verify your chicken broth is certified gluten-free. All other ingredients are naturally GF.
Best way to grow juicy Turkey Breast
Ingredients
Equipment
Method
- Set up a brooder with a heat lamp, ensuring the temperature is around 95°F for the first week, then gradually reduce it by 5°F each week.
- Provide fresh water and high-protein turkey starter feed (28% protein) at all times, ensuring they are easily accessible to the poults.
- Monitor the poults closely for any signs of illness or stress, adjusting the environment as needed to maintain optimal conditions.
- Transition the poults to a larger enclosure or pasture, ensuring they have ample space to roam and forage.
- Switch to a grower feed (20-24% protein), continuing to provide unlimited access to fresh water and feed.
- Consider offering grit and supplemental greens to support digestive health and natural foraging behaviors.
- Introduce a finisher feed (16-18% protein) to promote muscle development and fat deposition, which contributes to a juicy breast.
- Continue providing fresh water and a clean environment, reducing stress factors to ensure optimal growth.
- Monitor the turkeys' weight and development, harvesting when they reach the desired size and age for optimal meat quality.