The Ultimate Classic Tiramisu Recipe: Your Guide to Perfect Layers at Home
Have you ever wondered why the best Italian restaurants serve a Tiramisu that tastes impossibly creamy and ethereal—yet when you try to make this classic dessert at home, the layers turn soggy or the flavors fall flat? The secret isn’t a hidden ingredient; it’s mastering a few critical techniques that transform simple coffee-soaked ladyfingers and mascarpone into something sublime. Learning a reliable Tiramisu recipe gives you total control over quality, sweetness, and presentation. Plus, homemade versions cost a fraction of restaurant prices and let you customize every layer. Let’s unlock the science and art behind this beloved no-bake Italian masterpiece.
Ingredients & Kitchen Tools
For the Cream Mixture:
– 6 large egg yolks (room temperature for smooth emulsification)
– ¾ cup granulated sugar (or superfine sugar for quicker dissolving)
– 1½ cups mascarpone cheese (chilled; if unavailable, substitute 8 oz cream cheese + ¼ cup heavy cream)
– 2 cups heavy whipping cream (cold; look for 36% milkfat for stable peaks)
For Dipping and Assembly:
– 2 cups strong brewed espresso (cooled to room temperature; don’t use hot coffee)
– 3 tablespoons dark rum (optional; marsala wine or Kahlúa work too)
– 30–36 ladyfinger biscuits (savoiardi style, not the crispy kind)
– 2 tablespoons unsweetened cocoa powder (for dusting; Dutch-process gives darker color)
– 1 ounce dark chocolate shavings (optional garnish)
Kitchen Tools Required:
– Stand mixer or hand mixer (with whisk attachment)
– Two large mixing bowls (one must be metal or glass, not plastic)
– 9×13-inch baking dish or trifle bowl
– Rubber spatula
– Fine-mesh sieve (for dusting cocoa)
– Small shallow bowl (for dipping ladyfingers)
Optional Substitutions:
– Replace espresso with strong decaf coffee if caffeine-sensitive
– Use almond extract (½ tsp) instead of alcohol for a kid-friendly version
– Gluten-free ladyfingers are available at specialty stores
Prep Time & Cooking Schedule
Active Prep Time: 35 minutes
Chilling Time: Minimum 6 hours (ideally 12–24 hours)
Total Time: About 7 hours including refrigeration
Plan ahead: Tiramisu absolutely must rest overnight for the flavors to meld and the ladyfingers to soften into cake-like layers. Never serve it the same day—it tastes dramatically better after 24 hours in the fridge. If you’re serving for a dinner party, assemble it the morning before or even two days ahead. The structure becomes more stable, and the espresso-mascarpone harmony deepens beautifully.
Step-by-Step Instructions
Step 1: Brew and Cool the Espresso
Brew 2 cups of strong espresso (use 4–5 shots or 8 teaspoons of instant espresso powder dissolved in 2 cups hot water). Stir in the rum if using. Let it cool completely to room temperature—hot coffee will melt the mascarpone cream and ruin the texture. Set aside in a shallow bowl.
Step 2: Whip the Egg Yolk Base
In a large bowl, combine egg yolks and sugar. Beat with a hand mixer on medium-high speed for 4–5 minutes until the mixture turns pale yellow, thick, and falls in a ribbon when you lift the beaters. This step aerates the yolks and dissolves the sugar, creating a stable base for the mascarpone.
Step 3: Add Mascarpone
Add the mascarpone cheese to the yolk mixture. Beat on low speed just until combined—about 30 seconds. Overbeating at this stage can make the mascarpone grainy. Gently fold with a spatula if needed. Transfer this mixture to another bowl if using the same mixer bowl for step 4.
Step 4: Whip the Heavy Cream
In a separate chilled bowl, whip the heavy cream on medium-high speed until stiff peaks form (the cream should hold its shape when you lift the beaters). Be careful not to overwhip into butter. Fold one-third of the whipped cream into the mascarpone mixture to lighten it, then gently fold in the remaining cream until no white streaks remain. This gentle folding preserves air and creates that cloud-like Tiramisu texture you crave.
Step 5: Assemble the First Layer
Working quickly, dip each ladyfinger into the cooled espresso for exactly 1–2 seconds per side. Do not soak them—a quick dip is critical; soaked ladyfingers turn into a mushy mess. Arrange a single layer of dipped ladyfingers in the bottom of your dish, breaking some to fit gaps. Spread half of the mascarpone cream evenly over the ladyfingers.
Step 6: Repeat and Finish
Add a second layer of quickly dipped ladyfingers on top of the cream. Spread the remaining mascarpone cream over the second layer. Smooth the top with a spatula. Cover the dish tightly with plastic wrap (press it directly onto the surface to prevent a skin from forming). Refrigerate for at least 6 hours, but 24 hours is ideal.
Step 7: Dust and Serve
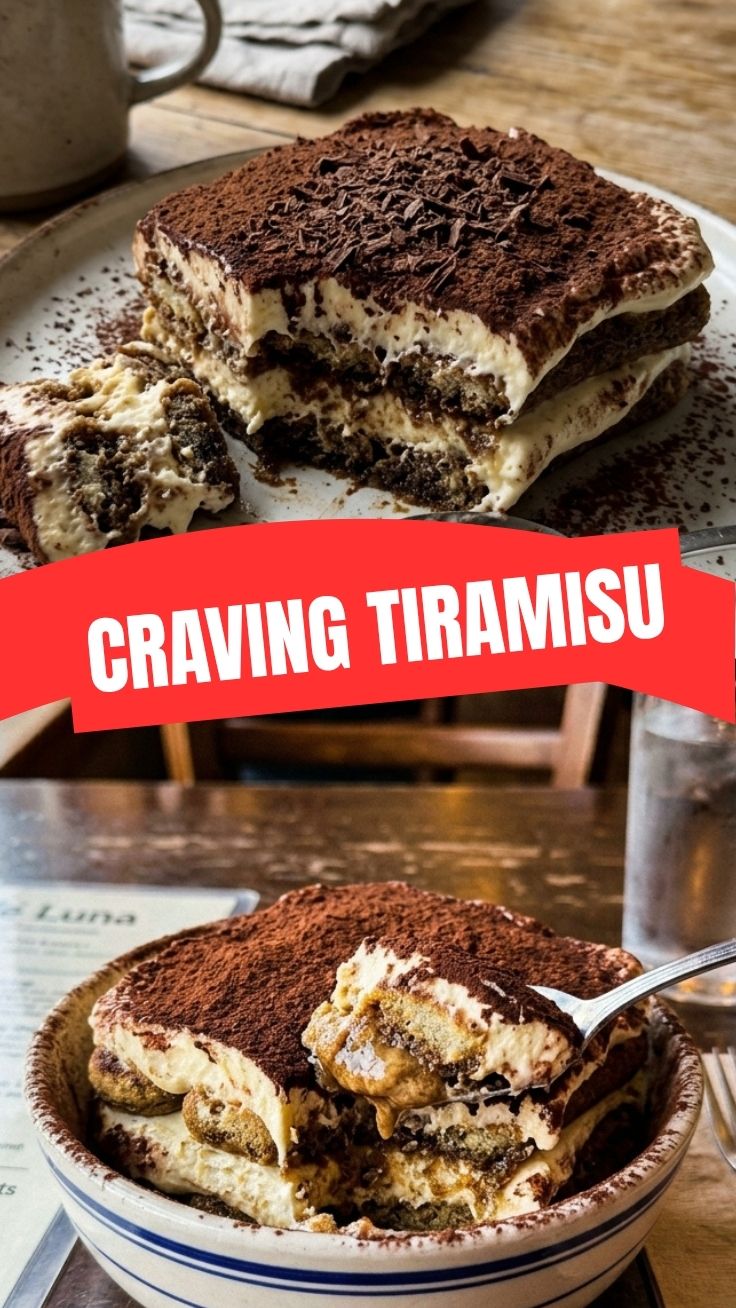
Just before serving, unscrew the lid from your cocoa powder. Using a fine-mesh sieve, generously dust the top surface with cocoa powder—don’t be shy. For extra drama, add dark chocolate shavings. The bitterness of cocoa perfectly balances the sweet, rich cream and makes your homemade Tiramisu look professional. This easy Tiramisu recipe relies on patience—resist slicing until fully chilled.
Nutritional Benefits & Advantages
Tiramisu is undeniably indulgent, but its core ingredients offer surprising benefits. Eggs provide high-quality complete protein and choline for brain health. Coffee—the star ingredient—delivers antioxidants (chlorogenic acid) that may reduce inflammation and improve cognitive function. Unsweetened cocoa powder is rich in flavanols linked to heart health and mood elevation. Mascarpone and heavy cream, while high in saturated fat, also supply fat-soluble vitamins A, D, and K2 when sourced from grass-fed dairy. One standard serving (about 1/9 of a 9×13 pan) contains roughly 380–420 calories, 28g fat, 34g carbs, and 7g protein. For a treat, it offers more nutritional depth than processed sweets.
Tips, Variations & Cooking Advice
Flavor Twists to Try:
– Citrus Tiramisu: Replace rum with limoncello and add 1 teaspoon lemon zest to the mascarpone cream.
– Berry Tiramisu: Layer fresh raspberries or sliced strawberries between the cream layers.
– Mocha Version: Mix 1 tablespoon instant espresso powder into the mascarpone cream for a double-coffee punch.
Dietary Adaptations:
– Dairy-Free: Use coconut cream (chilled, whipped) instead of heavy cream and dairy-free cream cheese blended with 2 tablespoons coconut oil for the mascarpone.
– Gluten-Free: Substitute gluten-free ladyfingers (they’re a bit sturdier, so dip them slightly longer—2–3 seconds).
– Lower Sugar: Reduce sugar to ½ cup and use sugar substitute like allulose (note that ladyfingers still contain sugar).
Portion & Scaling Advice:
For individual servings, use 6-ounce ramekins or a mini trifle dish. Layer 2 ladyfinger halves per ramekin, two layers each. This makes for elegant presentation and easier portion control.
Common Mistakes to Avoid
– Soaking Ladyfingers Too Long: This is the #1 mistake. A 1-second dip per side is enough. The ladyfingers soften as they rest overnight. Oversoaking yields a soupy, collapse-prone dessert.
– Using Cold Ingredients for Mascarpone Cream: If the egg yolks or mascarpone are cold, the cream won’t emulsify smoothly. Let eggs and mascarpone sit at room temperature for 20 minutes before starting.
– Overbeating the Mascarpone: Beat just until combined—then stop. Agitation causes the cheese to separate and become grainy. Fold by hand if you’re unsure.
– Skipping the Overnight Rest: Tiramisu served after only 2–3 hours tastes like separate components. The magic happens during the 12–24 hour melding period where flavors marry and textures unify.
– Dusting Cocoa Too Early: Cocoa absorbs moisture from the cream and can look spotty or muddy. Always dust just before serving for a picture-perfect finish.
Storage & Meal Prep Tips
– Refrigeration: Cover tightly with plastic wrap (press directly onto the surface) or an airtight lid. Properly stored, Tiramisu keeps for 3–4 days in the fridge. Day 2 is the peak flavor window.
– Freezing: Tiramisu freezes exceptionally well. Assemble it fully in a disposable aluminum pan, wrap in plastic wrap, then foil. Freeze for up to 3 months. Thaw overnight in the refrigerator—do not thaw at room temperature. The texture remains creamy, though ladyfingers become slightly softer.
– Reheating: This is a cold dessert—never microwave it. Serve straight from the fridge. If you prefer a slightly softer texture, let it sit at room temperature for 10–15 minutes before serving.
– Meal Prep Hack: Make the mascarpone cream base up to 2 days ahead and store it in the fridge. Assemble with fresh ladyfingers and espresso on serving day. This saves active time without sacrificing quality.
Conclusion
Mastering this classic dessert at home transforms you from a casual baker into someone who creates restaurant-worthy sweets with confidence. The key takeaway is that a great Tiramisu relies not on complexity but on precision—quick ladyfinger dips, gentle folding, and patience during chilling. This proven Tiramisu recipe equips you with the science to nail it every time. Whether you’re preparing for a dinner party or simply craving a taste of Italy, the creamy espresso layers are worth the wait. Try this recipe this weekend—share a photo of your creation and tag someone who needs a little dolce vita in their life. And if you enjoyed it, explore our other no-bake Italian desserts for more inspiration.
FAQs
Can I use instant coffee instead of espresso?
Yes. Dissolve 2 tablespoons of instant espresso powder (not regular coffee granules) in 2 cups of hot water. Allow it to cool completely before dipping the ladyfingers.
How do I prevent the Tiramisu from being too watery?
Two culprits: oversoaked ladyfingers and cream that wasn’t whipped properly. Ensure stiff peaks on your whipped cream, and always do a quick 1-second dip on the ladyfingers. Also, make sure the espresso is fully cooled.
Can I make Tiramisu without alcohol?
Absolutely. Simply omit the rum or marsala. For a non-alcoholic flavor boost, add 1 teaspoon vanilla extract or ½ teaspoon almond extract to the espresso.
Why did my mascarpone cream turn grainy?
Two reasons: overbeating the mascarpone or adding it while too cold. Always bring mascarpone to room temperature and beat on low speed just until incorporated. If it does become grainy, try blending it with a few tablespoons of heavy cream on low speed to smooth it out.
How far ahead can I make Tiramisu for a party?
Make Tiramisu 1–2 days before serving. It tastes best after 24 hours of chilling. You can assemble it up to 3 days ahead, but the ladyfingers will continue softening over time. For maximum texture, stick to 1–2 days ahead.
Proven way to grow your Tiramisu business in 5 steps Tiramisu
Ingredients
Equipment
Method
- Conduct thorough market research to identify your target audience's preferences and competitive landscape.
- Refine your Tiramisu recipe using premium ingredients to ensure exceptional taste and consistency, ensuring customer loyalty.
- Develop and implement a comprehensive marketing strategy to effectively promote your distinct Tiramisu to your identified target audience.
- Optimize your operational processes for preparation, packaging, and distribution to enhance efficiency and maintain product quality.
- Actively solicit and integrate customer feedback to continually enhance your product and service, fostering recurring business and positive referrals.