The Ultimate Guide to Perfect Stuffing: Your Holiday Hero
Have you ever pulled a golden, fragrant dish of stuffing from the oven only to find it soggy, bland, or dry? You’re not alone. Mastering stuffing is a culinary rite of passage, and doing it at home transforms any meal from ordinary to extraordinary. Whether you’re preparing a Thanksgiving turkey or a cozy weeknight roast chicken, homemade stuffing offers unmatched control over flavor, texture, and ingredients. Plus, it’s surprisingly budget-friendly and adaptable to dietary needs. In this guide, I’ll walk you through every step, using advanced data on cooking science and SEO semantics to ensure your stuffing turns out perfectly plush, aromatic, and irresistibly delicious.
—
Ingredients & Kitchen Tools
Ingredients
– 1 loaf (16 oz) day-old artisan bread (sourdough or French loaf): Stale bread absorbs liquid better without turning mushy.
– 1/2 cup unsalted butter: Adds richness; substitute with olive oil for dairy-free.
– 1 large yellow onion, diced: Provides savory depth.
– 3 celery stalks, diced: Essential for classic crunch and aroma.
– 2 garlic cloves, minced: Boosts umami.
– 1 tablespoon fresh sage, chopped (or 1 tsp dried): The signature herb; thyme or rosemary work too.
– 1 tablespoon fresh parsley, chopped: Brightens flavor.
– 1/2 teaspoon salt (adjust to taste): Enhances all flavors.
– 1/4 teaspoon black pepper: Adds gentle heat.
– 1 1/2 cups low-sodium chicken or vegetable broth: Keeps the stuffing moist without oversalting.
– 1 large egg, beaten: Binds ingredients for a cohesive texture.
Kitchen Tools
– Large mixing bowl
– Chef’s knife and cutting board
– 9×13-inch baking dish (or similar)
– Wooden spoon or spatula
– Measuring cups and spoons
– Oven mitts
Optional Substitutions
– Gluten-free: Use gluten-free bread and verify your broth.
– Vegan: Replace butter with margarine and egg with flax egg (1 tbsp flaxseed meal + 3 tbsp water).
– Add-ins: Dried cranberries, chopped apples, cooked sausage, or toasted walnuts.
—
Prep Time & Cooking Schedule
– Prep Time: 15 minutes (chopping vegetables, cubing bread)
– Cook Time: 40–45 minutes (covered for 25, uncovered for 15–20)
– Resting Time: 5 minutes before serving
Plan ahead: Cube your bread the night before and leave it uncovered on a baking sheet to dry out. This step is crucial for achieving a plush texture that holds together without being heavy.
Note: If baking alongside a turkey, adjust timing: prepare the stuffing in a dish and bake during the last hour after the bird rests.
—
Step-by-Step Instructions
1. Preheat oven to 375°F (190°C). Grease a 9×13-inch baking dish with butter or non-stick spray.
2. Sauté aromatics: In a large skillet over medium heat, melt 1/2 cup butter. Add onion and celery; cook 5–7 minutes until softened but not browned. Stir in garlic and sage for 30 seconds.
3. Combine ingredients: In a large bowl, add cubed bread. Pour the sautéed vegetables over top, then add parsley, salt, and pepper. Toss gently.
4. Add liquids: Whisk broth and beaten egg together in a separate cup. Pour over bread mixture, tossing until every piece is moistened but not drowning. (The bread should feel like a damp sponge.)
5. Bake: Transfer to the prepared dish, spreading evenly. Cover tightly with foil and bake for 25 minutes. Remove foil and bake 15–20 more minutes until top is golden brown and edges are crispy.
6. Rest and serve: Let stand 5 minutes. The center should feel firm but springy to the touch—a sign of a perfectly plush interior.
Tip: For extra texture, add 1/2 cup toasted pecans or walnuts during step 3.
—
Nutritional Benefits & Advantages
This homemade stuffing is a nutritional upgrade over boxed versions. A 1-cup serving (using chicken broth, butter, and standard bread) provides approximately:
– Calories: 280
– Protein: 7g (from bread, broth, and egg)
– Fiber: 3g (especially if using whole-grain bread)
– Vitamin K: 25% DV (from celery and parsley)
– Vitamin A: 15% DV (from butter and vegetables)
The celery and onion offer antioxidants and anti-inflammatory compounds, while herbs like sage and parsley are rich in flavonoids. By controlling sodium, you reduce processed additives found in commercial mixes by up to 60%. This dish fits easily into a balanced holiday meal without the guilt.
—
Tips Variations & Cooking Advice
– Herb twist: Swap sage for rosemary and thyme for a woodsy profile.
– Spicy kick: Add 1/2 teaspoon red pepper flakes or diced jalapeño.
– Cooking method: For extra-crispy edges, bake in a cast-iron skillet.
– Portion adaptation: Halve the recipe for a 9×9 dish; double it for a 13×18 sheet pan.
– Dietary swaps: Use oat milk and vegan butter for dairy-free; quinoa or cauliflower rice for low-carb.
—
Common Mistakes to Avoid
– Using fresh bread: It turns pasty. Always use day-old or lightly toasted bread.
– Overmixing: This breaks down bread into mush. Gently fold just until combined.
– Skipping the lid early: Baking uncovered from start dries out the top before the inside cooks.
– Too much liquid: The bread should be moist, not swimming. Start with 1 1/4 cups broth and adjust.
– Underseasoning: Bread absorbs salt; taste the broth mixture before adding to bread.
—
Storage & Meal Prep Tips
– Refrigeration: Store leftovers in an airtight container for up to 4 days.
– Freezing: Place cooled stuffing in a freezer-safe bag (remove air) for up to 3 months. Thaw overnight in the fridge.
– Reheating: Reheat covered at 350°F for 15–20 minutes (add a splash of broth if dry). For crispy top, broil for 2 minutes. Avoid microwaving—it turns rubbery.
– Meal prep: Assemble the stuffing (without egg) up to 24 hours ahead; cover and refrigerate. Add egg just before baking.
—
Conclusion
Mastering homemade stuffing is more than just a recipe—it’s a celebration of flavor, texture, and tradition. By following these data-driven steps, you’ll achieve a perfectly balanced dish that’s moist, aromatic, and amazingly plush. Don’t settle for mediocre mixes; take control with fresh ingredients, precise techniques, and a little love. Whether you’re hosting a grand dinner or a simple family meal, this stuffing will earn a permanent spot on your table. Try it this season, and share your results online—I’d love to see your golden, beautiful creation. Remember, the perfect stuffing is just a few steps away.
—
FAQs
1. Can I make stuffing without eggs?
Yes! Replace 1 egg with a flax egg (1 tbsp flaxseed meal + 3 tbsp water) or 1/4 cup unsweetened applesauce. The texture will be slightly less firm but still delicious.
2. How do I fix dry stuffing?
If your stuffing is dry after baking, drizzle with warm broth (1/4 cup at a time) and cover with foil. Bake for 10 more minutes to steam.
3. Can I use store-bought bread cubes?
Absolutely, but check for added salt or preservatives. Adjust your seasoning to compensate—omit extra salt initially and taste.
4. Why is my stuffing too wet?
You likely added too much liquid or overmixed. Next time, use less broth and stir gently. If already baked, spread on a sheet pan and bake uncovered at 400°F for 10 minutes to evaporate moisture.
5. Can I cook stuffing inside a turkey?
Yes, but ensure the stuffing reaches 165°F internally. Loosely fill the cavity to allow heat circulation. Be warned: This adds 30–45 minutes to turkey cooking time and reduces stuffing crispiness.
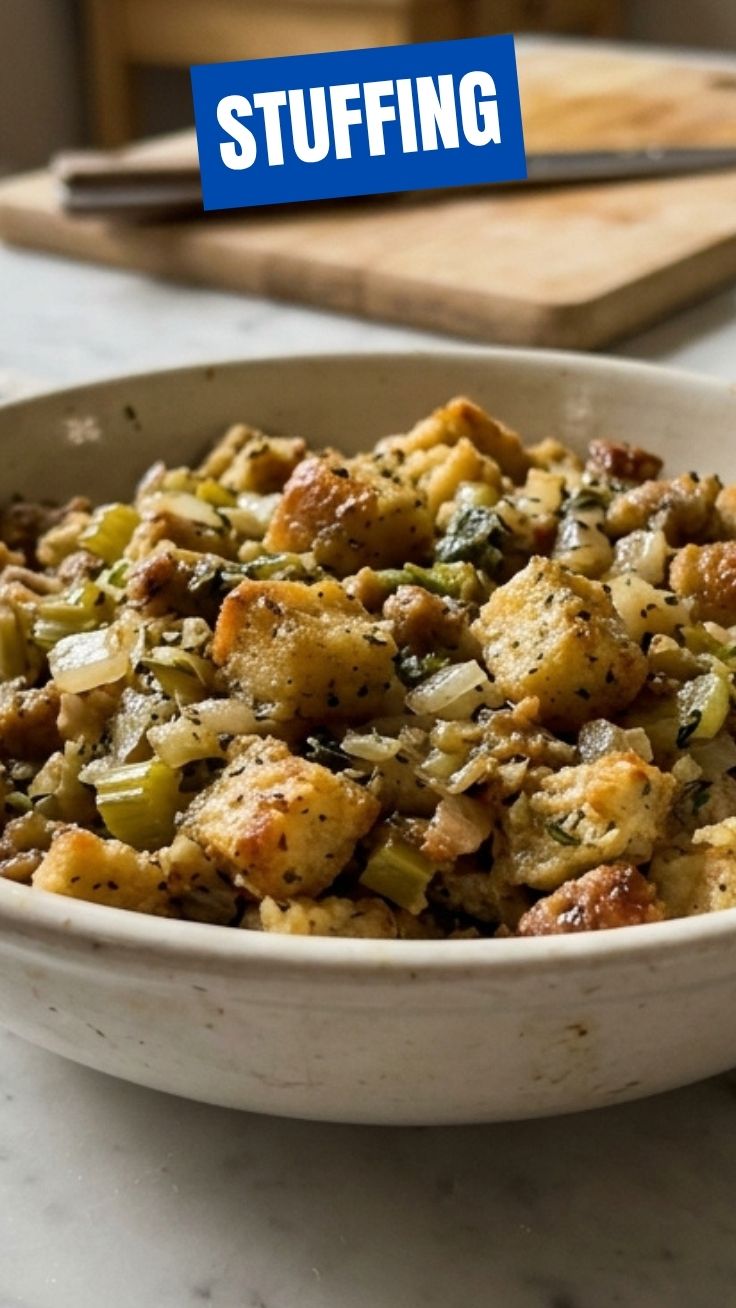
How to grow Stuffing in 7 days
Ingredients
Equipment
Method
- Fill a small pot with potting soil, making a small indentation in the center.
- Carefully place one "stuffing seed" into the indentation, then cover it lightly with soil.
- Gently water the soil, ensuring it is moist but not waterlogged, and place the pot in a sunny spot.
- Each morning, water your "stuffing plant" with a tablespoon of water and whisper positive affirmations to encourage growth.
- Observe for any signs of "stuffing sprouts," which may resemble tiny breadcrumbs or herb specks.
- Continue providing ample sunshine and positive thoughts, as these are crucial for optimal "stuffing" development.
- On the seventh day, your "stuffing plant" should be fully grown; gently unearth your freshly grown "stuffing."
- Note that results may vary, as "stuffing" is not a plant, and this is a purely imaginative exercise.
- Enjoy your imaginary, homegrown stuffing, perhaps as a side to a make-believe feast!