The Ultimate Guide to Homemade Stuffing: A Flavorful Thanksgiving Essential
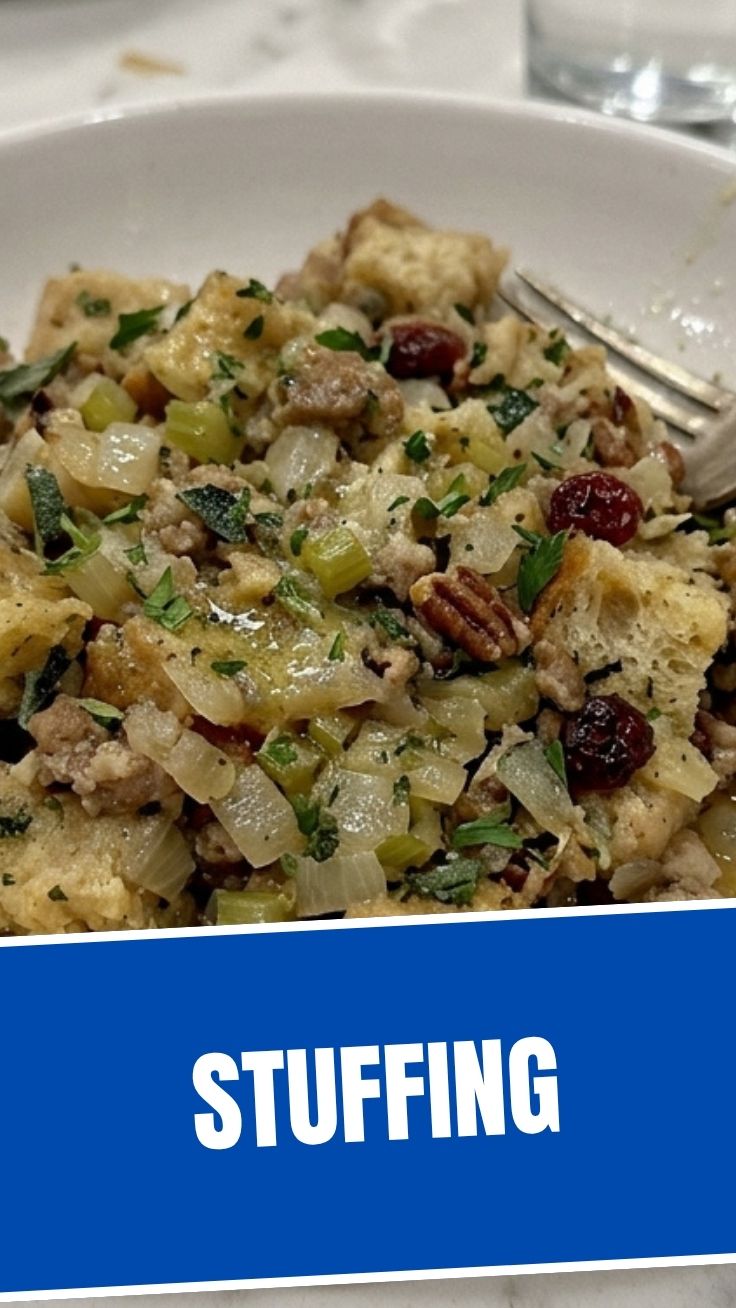
Have you ever wondered why some Thanksgiving Stuffing turns out perfectly golden and moist while others end up dry or soggy? The secret lies in a few simple techniques that transform basic ingredients into a memorable side dish. Preparing stuffing at home not only allows you to control the quality of ingredients but also saves money and satisfies your guests with a personalized touch. Whether you are a seasoned cook or a first-timer, this comprehensive guide will help you master this classic dish. Let’s dive into why homemade stuffing is worth the effort and how you can create a delicious version that complements any holiday meal. This recipe focuses on achieving the perfect balance of texture and flavor, making it a standout centerpiece. For those with dietary restrictions, consider using a gluten-free bread alternative to ensure everyone at your table enjoys this comforting dish.
Ingredients & Kitchen Tools
Ingredients:
– 1 loaf of day-old bread (cubed; use sourdough or French bread for best texture)
– 1 cup unsalted butter (for richness; substitute with olive oil for dairy-free)
– 2 cups diced yellow onion (adds sweetness and depth)
– 2 cups diced celery (provides crunch and aroma)
– 4 cloves garlic (minced; enhances savory notes)
– 1 cup chicken or vegetable broth (adjust for moistness; use low-sodium)
– 2 large eggs (beaten; binds the stuffing together)
– 2 tablespoons fresh sage (chopped; essential for earthy flavor)
– 1 tablespoon fresh thyme (leaves only; complements sage)
– 1 teaspoon salt (adjust to taste)
– ½ teaspoon black pepper (freshly ground preferred)
– Optional: ½ cup dried cranberries or Stuffing mix-ins like cooked sausage, mushrooms, or apples
Kitchen Tools:
– Large skillet (for sautéing aromatics)
– 9×13-inch baking dish (for baking the stuffing)
– Mixing bowls (one large, one small)
– Chef’s knife (for chopping vegetables)
– Measuring cups and spoons
– Wooden spoon or spatula
– Aluminum foil (to cover while baking)
Optional Substitutions:
– For a gluten-free version, use certified gluten-free bread. For a vegan option, replace eggs with flax eggs and butter with vegan butter.
Prep Time & Cooking Schedule
– Prep Time: 20 minutes (including chopping veggies and cubing bread)
– Cook Time: 45–50 minutes (baking until golden and set)
– Resting Time: 10 minutes (allows flavors to meld)
Context for Planning: Start this recipe 1 hour and 15 minutes before serving. If you prepare the bread cubes a day in advance, the prep time reduces to 10 minutes. This dish also freezes well, so you can make it up to a month ahead—perfect for busy holiday schedules.
Step-by-Step Instructions
1. Preheat oven to 375°F (190°C). Grease a 9×13-inch baking dish with butter or non-stick spray.
2. Toast the bread cubes. If using fresh bread, spread them on a baking sheet and bake for 5–7 minutes until lightly dried. This prevents sogginess.
3. Sauté aromatics. In a large skillet, melt 1 cup butter over medium heat. Add onion, celery, and garlic. Cook for 8–10 minutes until soft and fragrant. Transfer to a large mixing bowl.
4. Combine dry ingredients. Add the toasted bread cubes, fresh sage, thyme, salt, and pepper to the bowl. Toss gently to distribute herbs evenly. This is where you add optional mix-ins like cranberries or cooked sausage.
5. Prepare liquid mixture. In a separate small bowl, whisk together beaten eggs and broth. Pour over the bread mixture. Stir gently until all bread is moistened but not soaking—the texture should feel like damp sand. If you prefer a moister result, add an extra ¼ cup broth.
6. Bake. Transfer the mixture to the prepared dish. Cover with foil and bake for 30 minutes. Remove foil and bake for an additional 15–20 minutes until the top is golden and the Stuffing is set. A knife inserted in the center should come out clean. For a crispier top, broil for 2–3 minutes at the end.
7. Rest and serve. Let the stuffing sit for 10 minutes before serving. This allows the steam to redistribute and flavors to settle. If you are preparing a gluten-free version, check that the bread cubes are fully cooked through—gluten-free bread tends to absorb liquid differently.
Tip: Avoid overmixing after adding broth, as this can break the bread cubes and create a mushy texture.
Nutritional Benefits & Advantages
Homemade stuffing offers several nutritional advantages over store-bought mixes. The base provides complex carbohydrates from whole-grain bread (if chosen), which deliver sustained energy. Onions and celery add vitamin C and fiber, supporting immune health and digestion. The use of fresh herbs like sage and thyme contributes antioxidants that reduce inflammation. When made with low-sodium broth, this dish is also lower in sodium than many packaged versions. For added protein, consider mixing in cooked turkey sausage or mushrooms. This recipe is naturally customizable to fit dietary needs, making it a healthy addition to any meal.
Tips Variations & Cooking Advice
– Flavor Variations: Add ½ cup dried apricots or apples for a sweet-tangy twist. Swap sage for rosemary for a different herbal profile. For a smoky flavor, use andouille sausage.
– Ingredient Swaps: Use brown rice or quinoa instead of bread for grain-based stuffing. For a dairy-free version, substitute butter with coconut oil or vegan butter.
– Alternative Cooking Methods: Try slow-cooking this stuffing on low for 3–4 hours in a greased crockpot. For outdoor cooking, bake in a cast-iron skillet over a campfire.
– Dietary Adaptations: For a low-carb option, use cauliflower rice as the base. For a vegan version, replace eggs with a flax egg (1 tablespoon flaxseed meal + 3 tablespoons water per egg) and use vegetable broth.
– Portion Changes: This recipe serves 8–10 people. Halve the ingredients for a smaller gathering or double for a large crowd.
Common Mistakes to Avoid
1. Using fresh bread without drying it first. This leads to soggy stuffing. Always toast or leave bread out overnight to stale.
2. Overcrowding the baking dish. Use a dish that allows even heat distribution. Crowding can cause uneven cooking.
3. Adding too much liquid. Start with the recommended amount and add more only if needed. The stuffing should be moist but not sloshy.
4. Skipping the resting time. Cutting into the stuffing too early releases steam and dries it out. Let it rest for 10 minutes.
5. Overmixing after adding liquid. Gently fold to keep bread cubes intact.
Storage & Meal Prep Tips
– Refrigeration: Store leftover stuffing in an airtight container for up to 4 days. Reheat in a 350°F oven for 15 minutes, covered with foil to retain moisture.
– Freezing: Cool the stuffing completely, then transfer to a freezer-safe container. Freeze for up to 3 months. Thaw overnight in the refrigerator before reheating.
– Reheating: For best texture, reheat in the oven rather than the microwave. Add a splash of broth if the stuffing seems dry. Avoid reheating more than once to prevent sogginess.
– Meal Prep: Assemble the stuffing up to 2 days in advance (without baking). Store covered in the refrigerator, then bake as directed on the day of serving.
Conclusion
Mastering homemade Stuffing is about balancing moisture, flavor, and texture. By following these step-by-step instructions, you can create a dish that is both comforting and impressive. Whether you stick to the classic recipe or explore variations like a gluten-free version, this guide ensures consistent results. Don’t forget to let the stuffing rest before serving—it makes a difference! Try this recipe for your next holiday meal, and share your results with us. For more tips, explore our collection of Thanksgiving sides. Happy cooking!
FAQs
Q1: Can I make stuffing without eggs for a vegan version?
Yes, replace each egg with a flax egg (1 tablespoon flaxseed meal + 3 tablespoons water). Let it sit for 5 minutes to thicken before adding to the mixture.
Q2: My stuffing came out dry. What went wrong?
This often happens from overdrying the bread or not adding enough broth. Next time, increase the broth by ¼ cup and ensure the bread is only lightly toasted. Also, avoid overbaking.
Q3: Can I use a microwave to reheat leftover stuffing?
While possible, the microwave can make stuffing rubbery. For best results, reheat in the oven at 350°F for 10–15 minutes, covered with foil. Add a tablespoon of broth if needed.
Q4: How do I prevent stuffing from being too salty?
Use low-sodium broth and unsalted butter. Taste the sautéed vegetables before adding broth and adjust salt accordingly. If using salty add-ins like sausage, reduce the added salt.
Q5: Can I cook stuffing inside the turkey?
Cooking stuffing inside the turkey is not recommended for food safety reasons, as it must reach 165°F internally. Instead, bake it separately for even cooking and better texture.
Best way to grow 10 Stuffing recipes
Ingredients
Equipment
Method
- This is a placeholder instruction. In a real recipe, you would describe the preparation steps here.
- Continue with additional preparation steps as needed for actual stuffing recipes.
- This is a placeholder instruction for cooking. Detail the cooking process for your stuffing recipes here.
- Ensure all cooking steps are clearly outlined and easy to follow.