Why This Classic Comfort Dish Deserves a Spot in Your Weekly Rotation
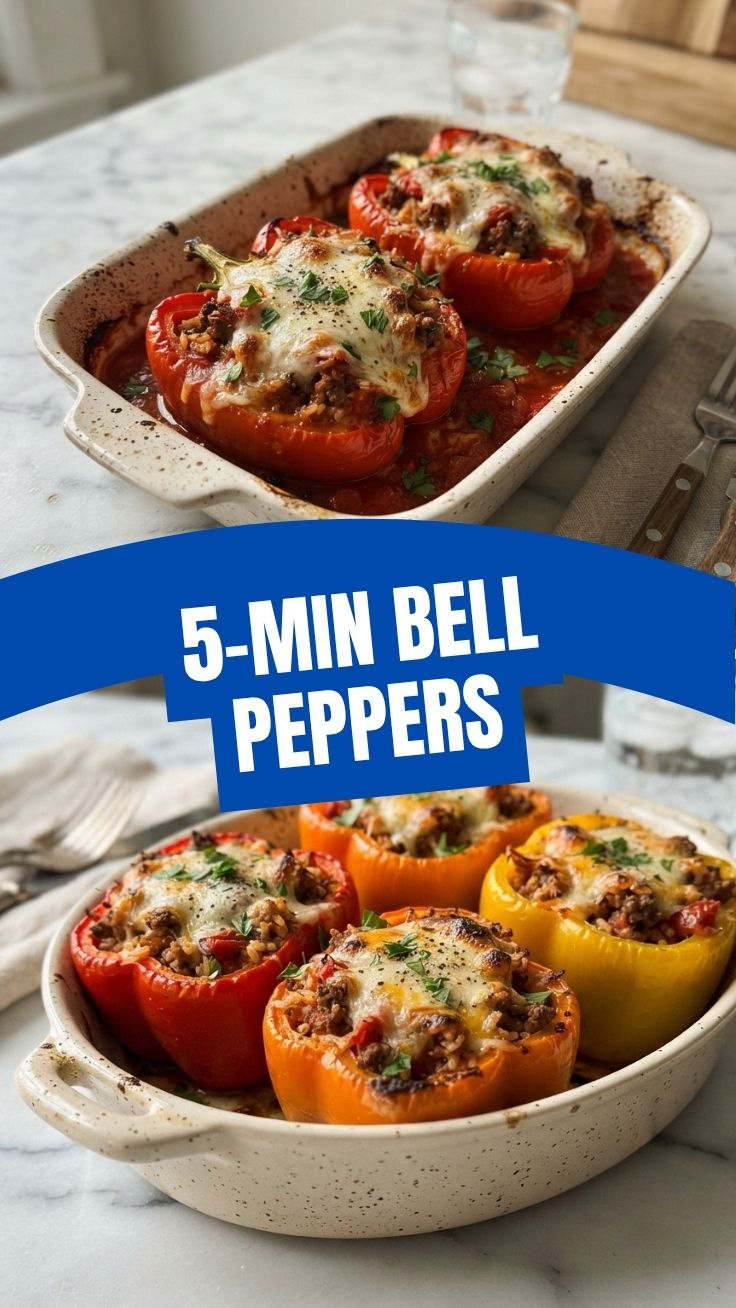
Have you ever wondered why some meals feel like a warm hug on a plate? Stuffed Bell Peppers deliver exactly that—a perfect balance of hearty protein, tender vegetables, and rich flavors all baked into one colorful package. Preparing this dish at home isn’t just about saving money; it’s about controlling every ingredient, tailoring the seasoning to your family’s taste, and creating a meal that fills your kitchen with an irresistible aroma. When you explore different bell pepper recipes, you quickly realize how versatile this humble vegetable can be. But the classic Stuffed Bell Peppers remain a crowd-pleaser for good reason—they’re forgiving, customizable, and perfect for meal prep. Whether you’re a seasoned cook or a beginner, this recipe will help you create a satisfying, nutrient-dense dinner with minimal fuss.
—
Ingredients & Kitchen Tools
For the Filling
– 1 lb ground beef or turkey – 80/20 blend for juiciness; leaner meat works but add a splash of oil.
– 1 cup cooked rice – White, brown, or cauliflower rice for a low-carb twist.
– 1 medium onion, diced – About 1 cup; adds sweetness and texture.
– 2 cloves garlic, minced – Fresh is best; jarred minced garlic works in a pinch.
– 1 can (15 oz) diced tomatoes – Fire-roasted adds depth; drain slightly to avoid soggy filling.
– 1 cup shredded cheese – Cheddar, mozzarella, or a Mexican blend; reserve half for topping.
– 1 tsp dried oregano – Or 1 tbsp fresh; Italian seasoning is a fine substitute.
– 1 tsp salt + ½ tsp black pepper – Adjust to taste; soy sauce can add umami instead.
– 1 tbsp olive oil – For sautéing; avocado oil works too.
For the Peppers
– 4 large bell peppers – Any color; red and orange are sweetest, green are more bitter.
– 1 cup tomato sauce or marinara – For the base of the baking dish; keeps peppers moist.
Kitchen Tools
– Large skillet – For sautéing filling; non-stick or stainless steel.
– Sharp knife + cutting board – To halve peppers cleanly; a serrated knife helps.
– Mixing bowl – For combining filling ingredients; glass or stainless steel.
– 9×13 baking dish – Or any oven-safe dish that fits peppers snugly.
– Aluminum foil – To cover during baking; prevents drying out.
– Measuring cups & spoons – Accuracy matters for seasoning balance.
Optional substitutions: Use quinoa instead of rice, add chopped spinach for extra greens, or swap cheese for dairy-free alternatives.
—
Prep Time & Cooking Schedule
– Prep time: 20 minutes – Includes washing peppers, dicing onions, mincing garlic, and cooking rice.
– Cook time: 35–40 minutes – Covered for 25 minutes, then uncovered for 10–15 minutes to brown cheese.
– Resting time: 5 minutes – Critical for structure; cutting too early causes filling to spill.
– Total time: Approximately 1 hour – Perfect for a weeknight if you cook rice ahead.
Plan ahead: Cook rice up to 3 days in advance and store in the fridge. You can also prep the filling the night before and assemble just before baking.
—
Step-by-Step Instructions
1. Preheat the oven to 375°F (190°C). While it heats, bring a large pot of salted water to a boil.
2. Prepare the peppers – Cut each bell pepper in half vertically through the stem, then remove seeds and membranes. Blanch in boiling water for 3 minutes, then transfer to an ice bath. This softens them slightly and reduces bitterness. Drain and set aside.
3. Sauté the aromatics – Heat 1 tbsp olive oil in a large skillet over medium heat. Add diced onion and cook for 3–4 minutes until translucent. Stir in minced garlic and cook for 30 seconds until fragrant.
4. Cook the meat – Add ground beef or turkey to the skillet. Break it apart with a wooden spoon and cook until browned, about 5–6 minutes. Drain excess fat if needed (leave about 1 tbsp for flavor).
5. Combine the filling – Remove skillet from heat. Stir in cooked rice, diced tomatoes (drained), ½ cup shredded cheese, oregano, salt, and pepper. Mix until evenly distributed. Taste and adjust seasoning—this is your chance to dial in the flavor.
6. Assemble the dish – Spread ½ cup tomato sauce across the bottom of a 9×13 baking dish. Arrange pepper halves cut-side up. Spoon the filling evenly into each pepper, mounding slightly. Top with remaining tomato sauce and the rest of the shredded cheese.
7. Bake covered – Cover the dish tightly with aluminum foil. Bake for 25 minutes. This steams the peppers and melds the flavors.
8. Bake uncovered – Remove foil and bake for another 10–15 minutes, until cheese is bubbly and golden brown. For extra browning, switch to broil for the final 2 minutes—watch closely to avoid burning.
9. Rest and serve – Let the dish rest for 5 minutes. This allows the filling to set, making it easier to serve. Garnish with fresh parsley or cilantro if desired.
When you’re following bell pepper recipes like this one, remember that the key to perfect Stuffed Bell Peppers lies in not overstuffing—leave a little room for the filling to expand as it cooks.
—
Nutritional Benefits & Advantages
Stuffed Bell Peppers are a nutritional powerhouse. One serving (two halves) provides approximately:
– 350–400 calories – Balanced for a main dish; adjust rice and meat portions for calorie control.
– 25–30g protein – Supports muscle repair and satiety; ground turkey or plant-based crumbles offer leaner options.
– 15–20g carbohydrates – Mostly from rice and peppers; quinoa or cauliflower rice lowers the carb count further.
– 8–10g fiber – Bell peppers are rich in vitamin C (150% of daily needs per pepper) and antioxidants like beta-carotene.
– Healthy fats – From olive oil and cheese; essential for vitamin absorption.
The combination of protein, fiber, and complex carbs makes this dish ideal for steady energy release. Plus, the vibrant colors of the peppers indicate a high phytonutrient content, which supports immune health.
—
Tips Variations & Cooking Advice
Flavor Twists
– Mediterranean style – Swap oregano for za’atar, add crumbled feta, and use lamb instead of beef.
– Tex-Mex version – Add black beans, corn, and cumin; top with pepper jack cheese and fresh cilantro.
– Italian-inspired – Use Italian sausage, add chopped mushrooms, and finish with Parmesan and fresh basil.
Cooking Methods
– Instant Pot – After browning the filling, stuff peppers, add 1 cup broth, and cook on high pressure for 6 minutes with a quick release.
– Air Fryer – Preheat to 375°F, cook stuffed peppers for 12–15 minutes, checking for doneness.
– Slow Cooker – Layer peppers in the crock, pour tomato sauce over, and cook on low for 4–5 hours.
Dietary Adaptations
– Gluten-free – Use certified gluten-free oats or quinoa instead of rice; ensure all sauces are GF.
– Dairy-free – Omit cheese or use vegan mozzarella; nutritional yeast adds a cheesy flavor.
– Low-carb / Keto – Replace rice with cauliflower rice or riced broccoli; use full-fat cheese and meat.
—
Common Mistakes to Avoid
1. Skipping the blanch – Raw peppers stay crunchy; blanching ensures they’re tender by the time the filling is done.
2. Overfilling the peppers – Filling expands as it cooks, causing spillage and a messy dish. Leave a ½-inch gap at the top.
3. Undercooking the rice – Par-cooked rice will absorb moisture from the filling and become gummy. Always use fully cooked rice.
4. Baking uncovered too long – The cheese will brown before the peppers are tender. Always cover for the first 25 minutes.
5. Skipping the rest – Cutting into the peppers immediately after baking causes the filling to fall apart. Five minutes of resting is non-negotiable.
—
Storage & Meal Prep Tips
– Refrigeration – Store leftovers in an airtight container for up to 4 days. Separate layers with parchment paper to prevent sticking.
– Freezing – Wrap each stuffed pepper half individually in plastic wrap, then place in a freezer-safe bag. Freeze for up to 3 months.
– Reheating – For best texture, reheat in a 350°F oven for 15–20 minutes (covered) or microwave for 2–3 minutes with a damp paper towel to retain moisture.
– Meal prep – Assemble the entire dish up to 2 days in advance, but don’t bake until ready to serve. The peppers will soften slightly, but the filling stays fresh.
Pro tip: Double the recipe and freeze half for a busy weeknight meal. Just thaw overnight in the fridge before baking.
—
Conclusion
Mastering Stuffed Bell Peppers is a game-changer for your home cooking repertoire. This dish delivers on flavor, nutrition, and convenience—all while being highly adaptable to what you have on hand. Whether you’re looking for a reliable weeknight dinner, a meal prep staple, or a way to use up leftover rice and vegetables, this recipe covers it all. And if you’re eager to explore more creative ideas, diving into other bell pepper recipes will open up a world of variety. The beauty of Stuffed Bell Peppers is that they’re forgiving, customizable, and always satisfying. Try this recipe this week, and don’t forget to share your results—whether it’s a cheese pull photo or a comment about your favorite filling twist. Your next great meal is just one pepper away.
—
FAQs
1. Can I use raw peppers instead of blanching them?
Yes, but they will remain firmer and may require an extra 10–15 minutes of covered baking. Blanching ensures a tender texture and reduces bitterness, especially in green peppers.
2. How do I prevent the peppers from becoming too watery?
Drain the diced tomatoes thoroughly and avoid over-moistening the filling. Also, don’t add extra liquid to the baking dish—just the ½ cup of tomato sauce is enough.
3. Can I make this recipe vegetarian or vegan?
Absolutely. Replace the meat with cooked lentils, black beans, or crumbled tofu. For a vegan version, use plant-based cheese or nutritional yeast and ensure all other ingredients are plant-based.
4. What’s the best cheese for topping Stuffed Bell Peppers?
Mozzarella gives a classic stretch, cheddar adds sharpness, and pepper jack brings heat. A mix of mozzarella and Parmesan works beautifully for a golden, crispy top.
5. How do I know when the peppers are fully cooked?
The peppers should be tender when pierced with a fork, and the filling should reach an internal temperature of 165°F (74°C). The cheese should be bubbly and lightly browned.
How to Grow Stuffed Bell Peppers
Ingredients
Equipment
Method
- Start bell pepper seeds indoors 8-10 weeks before the last frost date in your area by filling small pots or seed trays with seed starting mix.
- Plant seeds about 1/4 inch deep, water them gently, and keep the soil consistently moist.
- Provide warmth (75-85°F) using a heating mat if possible, and ensure seedlings receive plenty of light, using grow lights if natural light is insufficient.
- Once seedlings have at least two sets of true leaves and all danger of frost has passed, begin hardening them off by gradually exposing them to outdoor conditions over a week.
- Prepare your garden bed or larger pots by enriching the soil with compost or well-rotted manure.
- Transplant seedlings into the prepared soil, spacing them about 18-24 inches apart, and water thoroughly.
- Water regularly, especially during dry spells, aiming for consistently moist but not waterlogged soil.
- Fertilize every 2-4 weeks with a balanced fertilizer, and provide support with stakes or cages as plants grow to prevent branches from breaking under the weight of the peppers.
- Watch out for pests and diseases, addressing them promptly with organic solutions if possible.
- Bell peppers are typically ready for harvest 60-90 days after transplanting, when they reach their full size and desired color.
- Use sharp pruning shears or a knife to cut the peppers from the plant, leaving a small piece of stem attached.