Why Homemade Smash Burgers Are Better Than Any Fast-Food Version
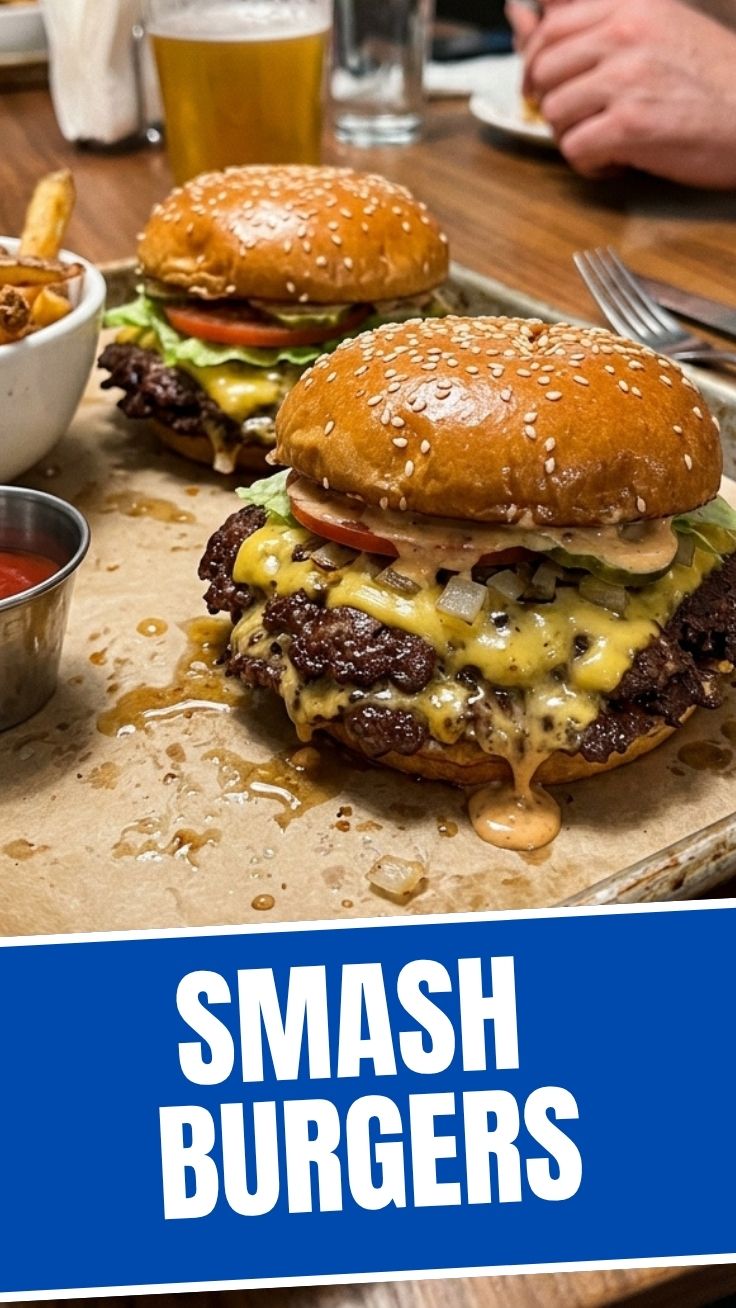
Have you ever bitten into a thin, crispy-edged burger with a juicy center and wondered why restaurant versions always taste so much better? The secret isn’t a special sauce or a secret ingredient—it’s the technique behind Smash Burgers. These aren’t your typical thick patties; they’re thin, lacy-edged marvels of browning and flavor. While fast-food chains have perfected their mass-produced versions, preparing this iconic dish at home gives you total control over quality, freshness, and customization. You can achieve that coveted crispy crust and tender interior for a fraction of the cost, without leaving your kitchen. In fact, mastering a Smashburger recipe at home is surprisingly simple, and it allows you to replicate—and improve upon—that drive-through experience with fresh, wholesome ingredients.
Ingredients & Kitchen Tools
Essential Ingredients
– Ground Chuck (80/20): The ideal fat-to-lean ratio ensures a juicy burger without excess grease. Opt for freshly ground chuck from your butcher.
– Soft Burger Buns: Potato rolls or brioche buns hold up best, offering a slight sweetness that complements the savory patty.
– American Cheese (or Cheddar): Melts perfectly over the hot patty; use slices, not shredded.
– Salt and Pepper: Coarse kosher salt and freshly ground black pepper are non-negotiable for seasoning.
– Vegetable Oil or Butter: Helps prevent sticking and promotes browning.
Kitchen Tools
– Cast Iron Griddle or Heavy-Bottomed Skillet: Retains heat evenly for that perfect crust.
– Metal Spatula: A thin, sturdy spatula is essential for smashing.
– Parchment Paper or Wax Paper: Prevents the spatula from sticking to the meat.
– Sharp Knife and Cutting Board: For prepping toppings (onions, tomatoes, lettuce).
– Bowl and Fork: For portioning and mixing (though minimal handling is best).
Optional Substitutions
– Ground turkey or chicken (add 1 teaspoon oil per patty to compensate for lower fat).
– Gluten-free buns for celiac diners.
– Dairy-free cheese or skip cheese entirely.
Prep Time & Cooking Schedule
| Phase | Duration | Temperature/Tips |
|——-|———-|——————|
| Prep Time | 10 minutes | Form meat into loose balls; toast buns lightly |
| Cooking Time | 8–10 minutes | High heat (400°F/200°C) on griddle |
| Resting Time | 2 minutes | Let patties rest briefly before assembling |
| Total Time | ~20 minutes | Plan ahead for grain-fed meat to rest at room temp |
Tip: Remove ground beef from the fridge 10 minutes before cooking to take the chill off, but don’t let it sit out longer. Time your bun toasting so it finishes just as the patties are done.
Step-by-Step Instructions
Creating the ultimate Smash Burgers involves a few critical steps that separate a dry patty from a juicy, crispy masterpiece. Follow this method precisely for consistent results.
Step 1: Portion and Prep Meat
Divide your ground chuck into ¼-cup portions (about 2–3 ounces each). Gently roll each portion into a light ball without overworking; compacting the meat too much will make it dense. Keep the balls cold until ready to cook.
Step 2: Heat the Griddle
Place your cast iron skillet over high heat for at least 5 minutes. Add a thin layer of vegetable oil (or butter). The pan must be screaming hot—you should see wisps of smoke. This temperature is what creates the crispy, browned crust that defines a proper Smashburger recipe.
Step 3: Smash Immediately
Place a meatball on the hot surface. Immediately cover with a sheet of parchment paper and press down firmly with a metal spatula using steady, even pressure. Smash until the patty is about ¼ inch thick. Hold for 10 seconds, then remove the paper and spatula. Season generously with salt and pepper.
Step 4: Sear Without Moving
Let the patty cook undisturbed for 90 seconds to 2 minutes. The edges will turn deep brown and lacy. Do not push down on the patty after smashing—this squeezes out juices and creates a dry burger.
Step 5: Flip and Add Cheese
Slide a thin metal spatula under the patty to loosen the crust. Flip it over in one swift motion. Immediately place a slice of cheese on top. Cook for another 45–60 seconds, just until the cheese melts.
Step 6: Toast Buns and Assemble
While patties rest, lightly butter the cut sides of your buns and toast them on the edges of the griddle (or under the broiler for 1 minute). Layer on your patty, then add toppings like crisp lettuce, ripe tomato, pickles, and a smear of special sauce.
Nutritional Benefits & Advantages
Despite their indulgent reputation, these Smash Burgers offer surprising nutritional benefits when made at home. The thin patties naturally control portion size—each burger contains only 4–6 ounces of meat, versus 8–10 ounces in restaurant versions. Using 80/20 ground chuck provides a good source of high-quality protein (about 20–25 grams per patty), along with essential B vitamins, iron, and zinc. The quick, high-heat cooking method minimizes fat loss, preserving nutrients better than slow cooking. Choosing whole-grain buns adds fiber, while fresh toppings like lettuce and tomato boost vitamin C and antioxidants. Compared to drive-through versions, homemade burgers avoid preservatives, excess sodium, and trans fats found in many fast-food oils.
Tips Variations & Cooking Advice
Flavor Twists
– Spicy Smash: Add a pinch of cayenne or smoked paprika to the meat before forming balls, or top with jalapeño slices.
– Umami Boost: Mix 1 teaspoon Worcestershire sauce or soy sauce into the ground beef (use minimal handling).
– Cheese Lovers: Swap American for pepper jack, blue cheese crumbles, or sharp cheddar.
Cooking Method Alternatives
– Griddle vs. Cast Iron: A flat-top grill works best, but a heavy-bottomed skillet is fine. Avoid nonstick pans—they don’t get hot enough.
– Indoor Broiler: If using an oven, preheat broiler on high, place patties on a foil-lined baking sheet, and broil for 4–5 minutes per side, pressing down halfway.
Dietary Adaptations
– Gluten-Free: Use certified gluten-free buns or lettuce wraps; check cheese ingredients.
– Low-Carb/Keto: Serve over a bed of lettuce with avocado, bacon, and keto-friendly sauce.
– Dairy-Free: Omit cheese or use plant-based slices (choose ones that melt well).
Common Mistakes to Avoid
1. Overworking the Meat: Handling ground beef too much develops gluten strands and makes patties tough. Roll gently, form loose balls, and smash immediately.
2. Pressing Down After Smashing: Resist the urge to push with your spatula while cooking—it releases precious juices. Only smash once at the start.
3. Skipping the Parchment Paper: Without it, the meat sticks to your spatula, ruining the crust. Always use wax or parchment paper.
4. Cold Pan: A lukewarm surface won’t create the sear. Wait until the pan is smoking hot before adding meat.
5. Uneven Smashing: Press firmly and evenly to create a consistent thickness for uniform cooking. A patty that’s thicker in the middle will cook unevenly.
Storage & Meal Prep Tips
If you have leftover patties (unlikely!), here’s how to store them:
– Refrigeration: Place cooked (and cooled) patties in an airtight container with paper towels between layers to absorb moisture. They’ll stay fresh for 3–4 days.
– Freezing: Wrap individual patties tightly in plastic wrap, then foil, and freeze for up to 3 months. For best results, freeze raw, unsmashed meatballs, then cook from frozen (add 30 seconds per side).
– Reheating: For crispy texture, reheat in a hot skillet over medium-high heat for 1–2 minutes per side, or in an air fryer at 375°F (190°C) for 3–4 minutes. Avoid microwaving, which makes them rubbery. Keep buns separate until serving.
Conclusion
Crafting Smash Burgers at home is a game-changer for burger lovers—it’s quick, affordable, and delivers unmatched flavor. By focusing on the thin patty technique and using high-quality ingredients, you can create a crispy, juicy masterpiece every time. Don’t be afraid to experiment with toppings or adapt the Smashburger recipe to your dietary needs. Whether you’re hosting a backyard cookout or craving a quick weeknight dinner, this method guarantees restaurant-worthy results. Share your creation on social media or tag a friend—and explore other burger variations to keep your kitchen adventures exciting.
Frequently Asked Questions
1. Can I use leaner meat like 90/10?
Yes, but the patties will be less juicy. Add 1 tablespoon of olive oil or a pat of butter to the meat before forming balls to compensate for lower fat.
2. Why are my patties dry even when I follow the steps?
Several factors: overhandling the meat (don’t knead), cooking too long (90 seconds per side is enough), or not smashing thin enough (aim for ¼ inch). Also, skip pressing down after flipping.
3. How do I prevent the cheese from sliding off?
Let the patty cook 30 seconds after flipping before adding cheese. The residual heat will melt it. For extra stickiness, place cheese on the inside of the bun (touching the patty) after the patty is done.
4. Can I make these on a gas grill?
Absolutely. Heat a cast iron skillet or griddle insert over high heat on the grill. Follow the same steps, but watch closely as grills get hotter faster. Close the lid briefly to help melt cheese.
5. How do I keep the buns from getting soggy?
Toast the cut sides of the buns until golden brown. Also, spread a thin layer of sauce or butter on the toasted side as a barrier. Avoid piling wet toppings directly on the bottom bun—place them on top of the patty.
Best way to grow
Ingredients
Equipment
Method
- Cultivate a positive mindset by focusing on opportunities and gratitude.
- Apply consistent effort to your goals, understanding that progress takes time.
- Engage in continuous learning through reading, courses, or new experiences.
- Practice daily reflection to assess your progress and identify areas for improvement.
- Set clear, achievable goals to guide your growth journey and celebrate milestones.