The Ultimate Guide to Perfectly Chewy and Crunchy Rice Krispie Treats
Have you ever bitten into a store-bought rice krispie treat only to find it rock-hard or disappointingly stale? There’s nothing quite like the satisfaction of making these iconic no-bake desserts from scratch in your own kitchen. Not only do you control the quality of ingredients, but you also guarantee that coveted balance of gooey marshmallow binding and crispy cereal crunch. In this comprehensive guide, we’ll show you how to master the classic Rice Krispie Treats recipe at home, ensuring every batch is fresh, flavorful, and perfectly textured.
Ingredients & Kitchen Tools
Required Ingredients
– 6 cups crispy rice cereal – The star of the show; choose a reputable brand for consistent crunch.
– 10 oz (about 40 large) marshmallows – Standard marshmallows work best; mini marshmallows melt faster.
– 3 tablespoons unsalted butter – Adds richness and prevents sticking; salted butter can be used but reduce added salt.
– 1/2 teaspoon vanilla extract – Enhances flavor; omit if using flavored marshmallows.
– 1/4 teaspoon salt (optional) – Balances sweetness; skip if using salted butter.
Kitchen Tools
– Large saucepan or Dutch oven – For even melting without scorching.
– 9×13-inch baking dish – For setting the treats; line with parchment paper for easy removal.
– Silicone spatula or wooden spoon – For folding; avoid metal which can scratch non-stick pans.
– Measuring cups and spoons – For precise proportions.
– Sharp knife or bench scraper – For clean cuts; spray with cooking spray to prevent sticking.
Optional Substitutions
– Vegan butter – Use coconut oil as a 1:1 replacement for dairy-free version.
– Gluten-free crispy rice cereal – Ensure certified gluten-free if needed.
– Marshmallow creme – 7 oz replaces 10 oz marshmallows, but yields softer texture.
Prep Time & Cooking Schedule
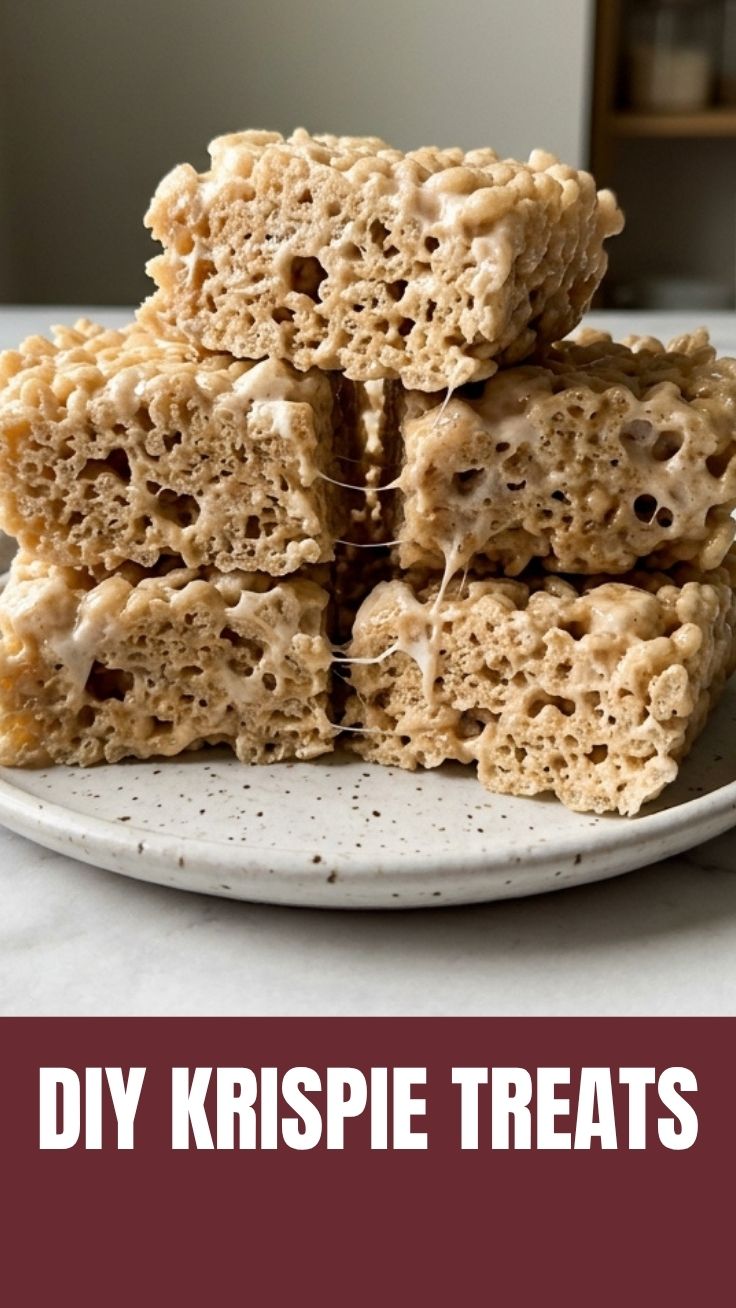
– Prep Time: 5 minutes (measure ingredients, line dish)
– Cook Time: 8–10 minutes (melt butter and marshmallows)
– Assembly Time: 5 minutes (mix and press into dish)
– Resting Time: 30 minutes (cool at room temperature for clean slicing)
– Total Time: Approximately 50 minutes
Pro Tip: Plan ahead—if you want perfectly square edges, allow the treats to cool completely for 1 hour before cutting. For a quick snack, they can be enjoyed after 15 minutes of cooling, though they’ll be slightly softer.
Step-by-Step Instructions
1. Prepare your workspace. Line a 9×13-inch baking dish with parchment paper, leaving overhang on two sides. Lightly grease the parchment with butter or cooking spray.
2. Melt the butter. In a large saucepan over medium-low heat, melt the butter completely. This takes about 2 minutes—do not brown it, as darker butter will alter the flavor.
3. Add marshmallows. Pour in the marshmallows and stir constantly with a silicone spatula. Keep the heat low to medium-low; high heat can cause the sugar to seize or burn. The marshmallows will swell and appear puffy before melting.
4. Stir until smooth. Continue stirring until the marshmallows are fully melted and the mixture is glossy. This takes 4–5 minutes. Remove from heat immediately to prevent scorching.
5. Incorporate vanilla and salt. Stir in the vanilla extract and optional salt. The mixture will bubble slightly—this is normal.
6. Fold in the cereal. Add the crispy rice cereal all at once. Use a folding motion to coat every grain evenly. Work quickly before the mixture cools and becomes stiff. If using add-ins (chocolate chips, sprinkles), fold them in now.
7. Press into the pan. Transfer the mixture to the prepared dish. Using a greased spatula or wax paper, press the mixture into an even layer. Apply firm, even pressure to ensure all pieces bind together—this is crucial for holding their shape as Rice Krispie Treats or Rice Krispie squares.
8. Cool and cut. Let the treats cool at room temperature for 30 minutes. Lift out using the parchment overhang, then cut into 12–16 squares with a sharp knife. For clean edges, wipe the knife between cuts.
Texture Tip: If you prefer extra-chewy treats, reduce the butter to 2 tablespoons. For crunchier treats, increase the cereal to 7 cups—just ensure the marshmallow coating stays even.
Nutritional Benefits & Advantages
While these treats are an indulgence, they offer surprising benefits when made from scratch:
– Quick energy source: The combination of simple carbohydrates from marshmallows and cereal provides rapid energy, making them a great pre-workout snack (in moderation).
– Customizable nutrition: You can boost nutritional value by adding nuts, seeds, or dried fruit—these increase protein and fiber.
– No artificial preservatives: Homemade versions contain zero preservatives or stabilizers, unlike store-bought options.
– Portion control: Cutting your own squares allows you to manage serving sizes easily.
Tips Variations & Cooking Advice
Flavor Variations
– Salted caramel: Drizzle melted caramel over the top and sprinkle with flaky sea salt before setting.
– Chocolate peanut butter: Fold in 1/2 cup chocolate chips and 1/4 cup peanut butter with the marshmallows.
– Brown butter: Brown the butter until golden and nutty before adding marshmallows for a deeper, sophisticated flavor.
– Fruity: Use fruit-flavored marshmallows (strawberry, blueberry) for a colorful twist.
Dietary Adaptations
– Gluten-free: Use certified gluten-free crispy rice cereal (e.g., Nature’s Path or Erewhon).
– Dairy-free: Substitute vegan butter or coconut oil, and use dairy-free marshmallows (Dandies brand works well).
– Lower sugar: Use sugar-free marshmallows or reduce marshmallows to 8 oz and add 1/4 cup unsweetened applesauce for moisture.
Cooking Method Alternatives
– Microwave method: Melt butter and marshmallows in a microwave-safe bowl in 30-second bursts, stirring between each, for 2–3 minutes total. Be careful not to overheat.
– Sous vide: For perfectly controlled melting, combine butter and marshmallows in a vacuum-sealed bag and sous vide at 140°F for 30 minutes—this prevents any scorching.
Common Mistakes to Avoid
1. Overheating the marshmallows: High heat causes sugar to caramelize, making treats hard and brittle. Always use low to medium-low heat.
2. Under-mixing the cereal: If you don’t fold thoroughly, some pieces will be dry and crumbly while others are gooey. Ensure every grain is coated.
3. Pressing too hard: Over-compressing the mixture creates dense, rock-hard treats. Use gentle, even pressure—just enough to bind them.
4. Cutting too early: Warm treats will tear and stick to the knife. Always cool completely for clean squares.
5. Using stale cereal: Check the expiration date; old cereal loses its crunch and results in soggy treats.
Storage & Meal Prep Tips
– Room temperature: Store in an airtight container at room temperature for up to 3 days. Layer with wax paper between stacks to prevent sticking.
– Refrigeration: For longer storage (up to 1 week), refrigerate in an airtight container. Note that they will become slightly firmer; let rest at room temperature for 10 minutes before serving.
– Freezing: Wrap each square individually in plastic wrap, then place in a freezer-safe bag. Freeze for up to 3 months. Thaw at room temperature for 15–20 minutes.
– Reheating: To restore softness, microwave a single square for 10–15 seconds on high. For a full batch, warm in a 300°F oven for 5 minutes.
Meal prep hack: Make a double batch and freeze half. They’re perfect for lunchboxes, parties, or last-minute dessert needs.
Conclusion
Mastering the classic Rice Krispie Treats at home is a game-changer for anyone who loves quick, satisfying desserts. By following this guide, you’ll achieve the perfect balance of chewiness and crunch every time—whether you’re making Rice Krispie squares for a bake sale, a birthday party, or a simple weeknight treat. The beauty of this recipe lies in its simplicity and adaptability: you can swap ingredients, adjust textures, and create endless variations with ease. We encourage you to try this recipe today, share your creations on social media, or explore other no-bake desserts on our site. Your kitchen is about to become the neighborhood’s favorite spot for nostalgic, homemade goodness!
FAQs
Q: Can I use mini marshmallows instead of large ones?
A: Yes! Mini marshmallows melt faster and more evenly. Use 10 oz by weight, which is about 6 cups of minis.
Q: Why are my treats too hard?
A: This usually happens from overheating the marshmallows or pressing the mixture too firmly. Use low heat and gentle pressure next time.
Q: How do I make them less sweet?
A: Reduce marshmallows to 8 oz and add 1/4 cup unsweetened coconut flakes or crushed nuts to balance sweetness.
Q: Can I add chocolate chips without them melting?
A: Yes! Fold in 1/2 cup chocolate chips after the cereal is mixed. The residual heat will soften but not fully melt them, creating delightful pockets.
Q: How long do homemade versions stay fresh compared to store-bought?
A: Homemade treats stay fresh for 3 days at room temperature, while store-bought versions can last 1–2 weeks due to preservatives. However, homemade taste far superior!
Q: What’s the best way to cut clean squares?
A: Spray your knife with cooking spray before each cut. Wipe clean between cuts to prevent sticking. For perfect edges, use a bench scraper.
Quick way to grow a perfect batch of Rice Krispie Treats
Ingredients
Equipment
Method
- Melt butter in a large saucepan over low heat.
- Add marshmallows and stir until completely melted and smooth.
- Remove from heat and stir in Rice Krispies cereal until well coated.
- Press the mixture evenly into a greased 9x13 inch pan.
- Let cool before cutting into squares and serving.