Here is the comprehensive, data-driven, and SEO-optimized blog post.
—
The Perfect Fluffy Pumpkin Roll: A Step-by-Step Guide to Fall Bliss
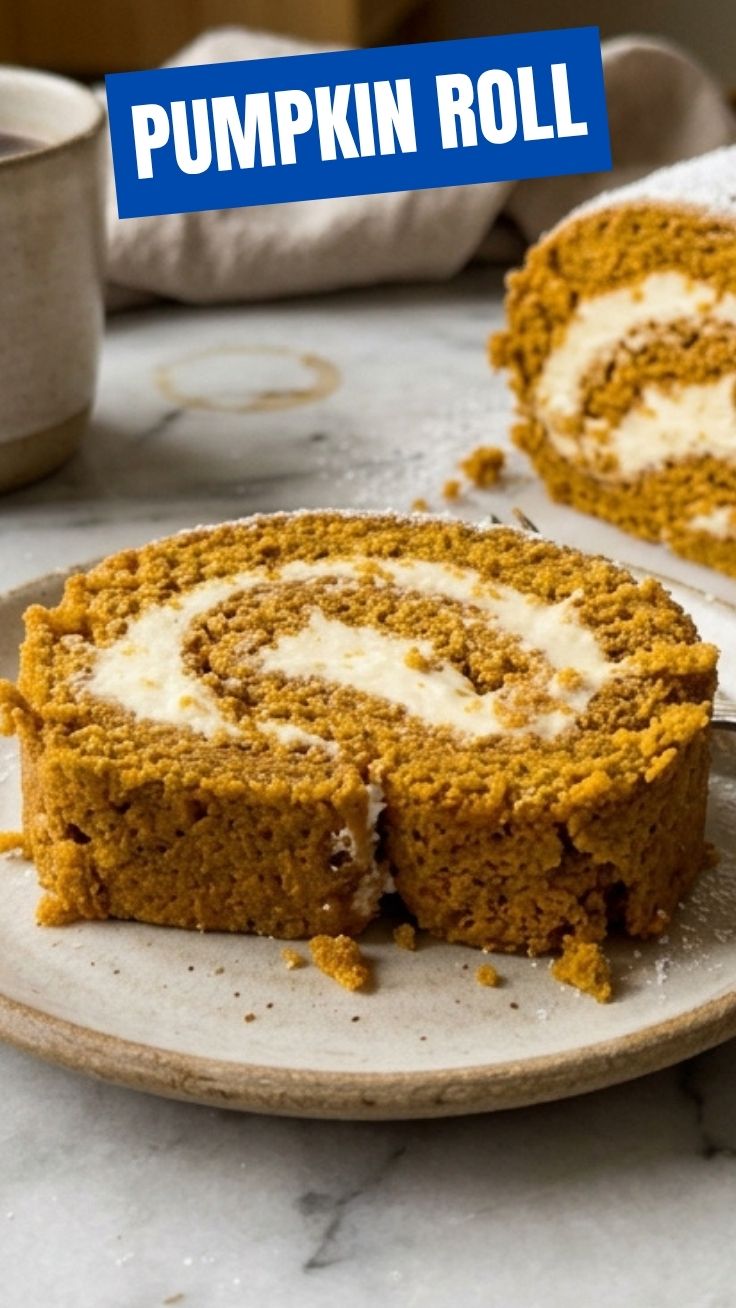
Have you ever bitten into a perfectly spiraled Pumpkin Roll only to find it cracked, dry, or lacking that rich autumnal flavor? You are not alone. Mastering this iconic dessert is a right of passage for home bakers, but it often feels intimidating due to the delicate rolling process. However, preparing this showstopper at home is not only rewarding but also significantly more cost-effective and customizable than buying a pre-made version. By focusing on moisture retention and proper temperature control, you can create a bakery-quality treat that wows guests. In this guide, we will demystify the process of crafting the ultimate Pumpkin Roll and explore why this seasonal pumpkin dessert is the perfect centerpiece for your holiday table.
Ingredients & Kitchen Tools
To ensure success, gather these ingredients and tools before you begin. Investing in the right equipment prevents common issues like sticking or uneven baking.
For the Cake (Sponge):
– Pumpkin Purée (¾ cup): Use 100% pure pumpkin, not pumpkin pie filling. Drain excess water on a paper towel for 10 minutes to prevent a soggy cake.
– Granulated Sugar (1 cup): Provides structure and sweetness.
– Eggs (3 large): Room temperature eggs create better volume when whipped.
– All-Purpose Flour (¾ cup): For a lighter texture, substitute with a gluten-free 1:1 baking blend.
– Baking Soda (1 tsp) & Baking Powder (1 tsp): The double leavening agent ensures a springy texture.
– Pumpkin Pie Spice (2 tsp) & Cinnamon (1 tsp): The soul of your pumpkin dessert.
– Salt (½ tsp): Balances sweetness.
For the Cream Cheese Filling:
– Cream Cheese (8 oz): Full-fat is crucial for stability.
– Unsalted Butter (¼ cup): Softened to room temperature.
– Powdered Sugar (2 cups): Sifted to avoid lumps.
– Vanilla Extract (1 tsp).
Kitchen Tools:
– Jelly Roll Pan (10×15-inch): A smaller pan will make the cake too thick to roll.
– Parchment Paper: Essential for lifting the cake without tearing.
– Clean Kitchen Towel: Dusted with powdered sugar to prevent sticking during the hot roll.
– Electric Mixer (Stand or Handheld): For whipping eggs and creaming filling.
Prep Time & Cooking Schedule
Plan your timeline carefully. The most common mistake is rushing the cooling process.
– Prep Time: 20 minutes (including draining the pumpkin and preheating oven to 350°F).
– Bake Time: 12–15 minutes (exactly).
– First Cool & Roll: 10 minutes at room temperature, then roll immediately while warm.
– Chill Time: 2 hours minimum (essential for the filling to set and the roll to hold its shape).
Pro-Tip: Bake this the night before you plan to serve it. The resting time allows the flavors of the pumpkin and spice to meld beautifully.
Step-by-Step Instructions
Step 1: Prepare the Pan & Oven
Line your jelly roll pan with parchment paper, leaving an overhang on the long sides. Spray lightly with non-stick spray. Preheat oven to 350°F.
Step 2: Whip the Batter
In a large bowl, beat the eggs and granulated sugar on high speed for 3–5 minutes until thick, pale, and ribbony. This is your primary source of lift. Gently fold in the pumpkin purée. In a separate bowl, whisk flour, baking soda, baking powder, spices, and salt. Fold the dry ingredients into the wet mixture until just combined. Do not overmix.
Step 3: Bake
Spread the batter evenly into the pan. Bake for exactly 12–15 minutes. The cake is ready when the top springs back when lightly touched. Overbaking is the #1 cause of cracks.
Step 4: The Crucial “Hot Roll”
Immediately after removing from the oven, run a knife around the edges. Dust a clean kitchen towel with powdered sugar. Invert the hot cake onto the towel. Gently peel off the parchment paper. Starting at the narrow end, roll the cake up in the towel (yes, cake and towel together). This “pre-roll” is the secret to a perfect spiral. Let it cool completely in this rolled position.
Step 5: Make the Filling
While the cake cools, beat the cream cheese and butter until smooth. Gradually add powdered sugar and vanilla. Beat until fluffy.
Step 6: Assemble the Pumpkin Roll
Once the cake is completely cool, gently unroll it. Spread the cream cheese filling evenly over the surface, leaving a 1-inch border at the edges. Re-roll the cake (without the towel this time) tightly. Wrap in plastic wrap and chill for at least 2 hours. This chilling phase solidifies the pumpkin dessert elements, making slicing clean and easy.
Nutritional Benefits & Advantages
While a pumpkin dessert is a treat, it offers surprising nutritional advantages compared to other desserts. Pumpkin purée is rich in Vitamin A (beta-carotene), which supports eye health and immunity. It is also low in fat and provides dietary fiber, which helps moderate the sugar absorption from the cake. When made at home, you control the quality of the ingredients—using real butter and cream cheese instead of hydrogenated oils found in commercial bakery items. One slice provides a good dose of antioxidants while giving you that satisfying sweet fix.
Tips Variations & Cooking Advice
– Flavor Variation: Add ½ cup of chopped pecans or toasted walnuts to the filling for crunch. Swap the cream cheese filling for a mascarpone and honey blend for a less tangy profile.
– Dietary Adaptation: To make this gluten-free, use a “Cup4Cup” style flour blend. For a dairy-free version, use vegan cream cheese and plant-based butter (the texture will be slightly softer, so chill for an extra hour).
– Spice Swaps: If you don’t have pumpkin pie spice, mix 1 tsp cinnamon, ½ tsp ginger, ¼ tsp nutmeg, and ¼ tsp allspice.
Common Mistakes to Avoid
– Cracking: Usually caused by overbaking or rolling the cake when it is too cool. Always roll it hot inside the towel.
– Tears when unrolling: If the cake sticks to the towel, you didn’t dust it with enough powdered sugar.
– Filling oozing out: The filling is too warm. Always use cold cream cheese and ensure the cake is completely cool before spreading.
– Air pockets: Use an offset spatula to spread the filling evenly—thick in the center, thin at the edges.
Storage & Meal Prep Tips
– Refrigeration: Store the wrapped Pumpkin Roll in the fridge for up to 5 days. The moisture from the filling actually keeps the cake soft over time.
– Freezing: This dessert freezes exceptionally well. Wrap the finished (un-sliced) roll tightly in plastic wrap, then aluminum foil. Freeze for up to 3 months. Thaw overnight in the fridge before serving.
– Reheating: This is best served cold or at room temperature. Avoid microwaving, which can melt the cream cheese and make the cake rubbery.
Conclusion
Creating a stunning Pumpkin Roll is a journey in patience and precision, but the reward is a spectacular, silky-smooth spiral of flavor that screams autumn. By following the “hot roll” technique and ensuring your cake is neither overbaked nor under-chilled, you will turn a simple pumpkin dessert into a masterpiece. We encourage you to try this recipe for your next gathering and share your beautiful results! If you enjoyed this, be sure to check out our other fall baking guides.
FAQs
Q: Can I use a different pan size?
A: It is not recommended. A 10×15-inch jelly roll pan is the standard size for roll cakes. Using a larger pan makes the cake too thin and fragile; a smaller pan makes it too thick to bend.
Q: My cream cheese filling is too runny. How do I fix it?
A: This happens if the cream cheese or butter was too warm. Pop the filling into the refrigerator for 15 minutes to allow it to stiffen before spreading.
Q: Can I use fresh pumpkin instead of canned?
A: Yes, but you must cook, puree, and then strain the fresh pumpkin through cheesecloth to remove excess water. Canned pumpkin is more consistent in moisture content.
Q: How do I cut clean slices without smashing the filling?
A: Use a sharp, serrated knife. Dip the knife in hot water and wipe it dry between each cut. This melts through the cream cheese cleanly.
Q: Can I add chocolate to this recipe?
A: Absolutely! Fold ¼ cup of mini chocolate chips into the batter before baking, or drizzle melted dark chocolate over the finished roll for a sophisticated touch.
Quick way to grow pumpkin roll in 6 steps
Ingredients
Equipment
Method
- Prepare your planting site by selecting a sunny spot with well-draining soil.
- Plant pumpkin seeds directly into the soil, approximately one inch deep and three feet apart.
- Water the seeds thoroughly after planting and continue to water regularly, especially during dry periods.
- Fertilize your pumpkin plants every two weeks with a balanced liquid fertilizer to encourage healthy growth.
- Once pumpkins begin to form, rotate them gently every few days to ensure even ripening.
- Harvest your pumpkin rolls when they reach your desired size and color, typically within 90-120 days of planting.