Unleash Your Inner Chef: Crafting the Ultimate Homemade Beef Nachos
Ever wondered how to elevate that classic movie night (or any night!) snack into a gourmet experience right in your own kitchen? Forget mediocre takeout or sad, soggy plates. Today, we’re diving deep into the glorious world of homemade Nachos. Preparing these culinary masterpieces at home isn’t just about saving money; it’s about customizing every single layer to perfection, from the perfectly seasoned beef to the velvety, bubbling nacho cheese. Get ready to impress your taste buds and your guests with this comprehensive guide to crafting the ultimate beef nachos that are bursting with flavor and unparalleled freshness. This isn’t just a recipe; it’s a personalized journey into deliciousness.
Ingredients & Kitchen Tools
To embark on your nacho adventure, gather these essentials:
- 1 lb Ground Beef (80/20 lean preferred): The foundation of our flavorful topping.
- 1 tbsp Olive Oil: For browning the beef.
- 1 large Onion, chopped: Adds aromatic depth and sweetness.
- 2 cloves Garlic, minced: Essential for savory richness.
- 1 packet (1 oz) Taco Seasoning: A convenient blend of spices for authentic flavor.
- 1/2 cup Water or Beef Broth: To meld the flavors and prevent dryness.
- 1 (15 oz) can Black Beans, rinsed and drained: For added protein and texture.
- 1 (15 oz) can Diced Tomatoes, undrained: Contributes moisture and tang.
- 1 (12 oz) bag Tortilla Chips: The crispy canvas for our toppings. Choose a sturdy, scoopable variety.
- 2 cups Shredded Monterey Jack or Cheddar Cheese: For the classic gooey, melty top.
* 2 tbsp Butter
* 2 tbsp All-Purpose Flour
* 1 cup Milk
* 1/2 lb American Cheese (deli-style or block), cubed: Melts beautifully for a smooth sauce.
* 1/4 tsp Smoked Paprika: A subtle smoky kick.
* Pinch of Cayenne Pepper: For a hint of heat.
- Optional Toppings:
* Sliced Jalapeños (fresh or pickled): For heat and a tangy crunch.
* Sour Cream or Greek Yogurt: For a cooling contrast.
* Guacamole or Sliced Avocado: Creamy and rich.
* Salsa or Pico de Gallo: Fresh and vibrant.
* Fresh Cilantro, chopped: For a burst of freshness.
Kitchen Tools:
- Large Skillet/Frying Pan: For browning the beef.
- Baking Sheet: To assemble and bake the nachos.
- Saucepan: For preparing the homemade nacho cheese sauce.
- Spatula/Wooden Spoon: For stirring.
- Grater (if cheese isn’t pre-shredded):
- Cutting Board & Knife: For prepping veggies.
Prep Time & Cooking Schedule

- Prep Time: 20-25 minutes (includes chopping veggies and preparing the cheese sauce)
- Cook Time: 20-25 minutes (browning beef, simmering, and baking)
- Assembly Time: 5 minutes
- Total Time: Approximately 50-55 minutes
This recipe is perfectly suited for a weeknight dinner when you have a bit of time to dedicate, or a fantastic weekend project. The components can be prepped in advance: the beef mixture can be cooked and stored, and the cheese sauce can be made ahead and gently reheated. This flexibility makes it a great option for entertaining!
Step-by-Step Instructions
1. Brown the Beef: Heat olive oil in a large skillet over medium-high heat. Add the ground beef and cook, breaking it apart with a spatula, until fully browned. Drain any excess grease.
2. Sauté Aromatics: Add chopped onion to the skillet with the beef and cook until softened, about 5 minutes. Stir in the minced garlic and cook for another minute until fragrant.
3. Season and Simmer: Stir in the taco seasoning, water (or beef broth), black beans, and diced tomatoes (undrained). Bring to a simmer, then reduce heat and let it gently cook for 5-7 minutes, allowing the flavors to meld and the liquid to slightly reduce. This rich base is crucial for our amazing Nachos.
4. Prepare Homemade Nacho Cheese Sauce (Optional, but recommended): In a separate saucepan, melt butter over medium heat. Whisk in the flour and cook for 1 minute to create a roux. Gradually whisk in the milk until smooth. Bring to a gentle simmer, then reduce heat to low. Add the cubed American cheese, smoked paprika, and cayenne pepper. Stir continuously until the cheese is completely melted and the sauce is smooth and creamy.
5. Preheat Oven & Assemble: Preheat your oven to 375°F (190°C). Spread a layer of tortilla chips on a large baking sheet.
6. Layer and Bake: Spoon about half of the seasoned beef mixture evenly over the chips. Sprinkle with half of the shredded Monterey Jack/Cheddar cheese. Repeat with another layer of chips, the remaining beef mixture, and the rest of the shredded cheese. Drizzle generously with the prepared homemade nacho cheese sauce if using.
7. Bake to Perfection: Bake for 10-15 minutes, or until the cheese is bubbly and melted and the chips are slightly golden. Keep an eye on them to prevent burning.
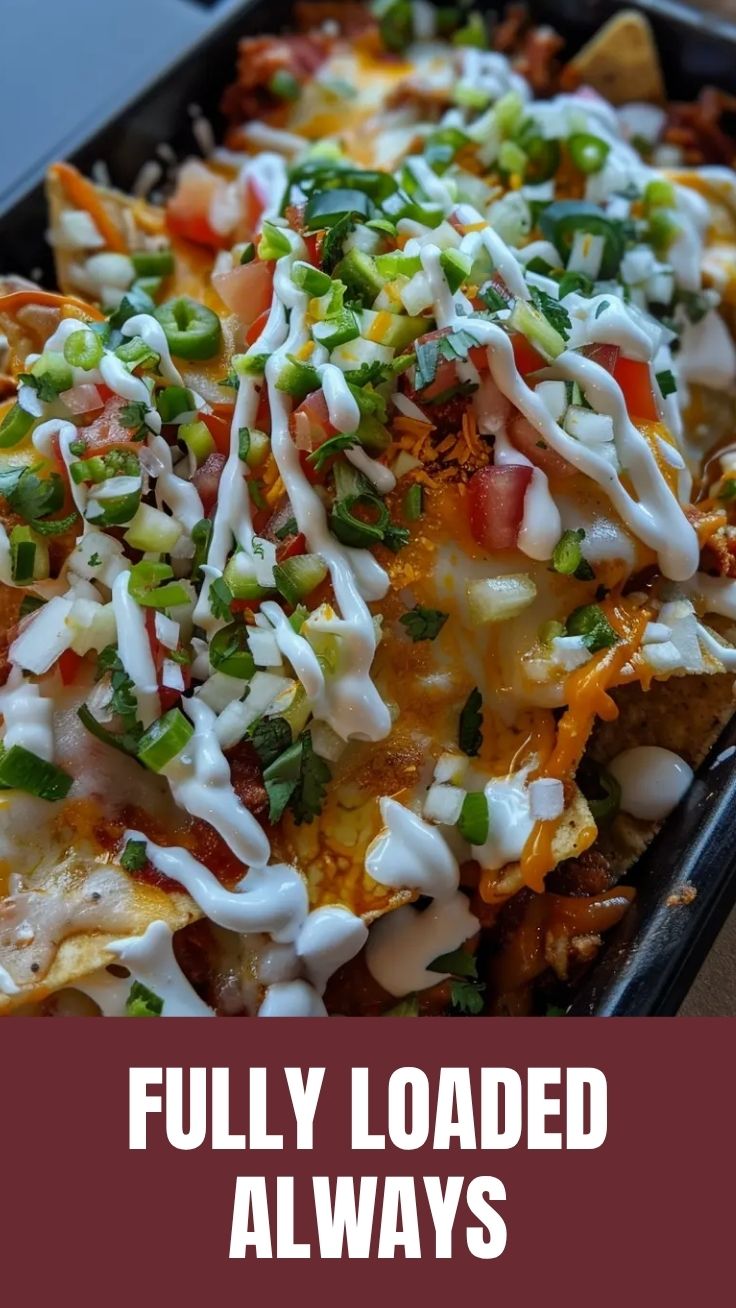
8. Garnish and Serve: Carefully remove from the oven. Add your desired optional toppings like jalapeños, sour cream, guacamole, salsa, and fresh cilantro. Serve immediately and enjoy the warm, cheesy goodness!
Nutritional Benefits & Advantages
Homemade beef nachos offer several nutritional advantages over their store-bought counterparts. By controlling the ingredients, you can opt for leaner ground beef, reducing saturated fat. The addition of black beans significantly boosts fiber and plant-based protein content, promoting satiety and digestive health. Diced tomatoes contribute vitamins A and C, while customizing your toppings allows you to load up on fresh vegetables like onions, jalapeños, and cilantro, adding vital nutrients and antioxidants. Skipping processed cheese sauces for a homemade version also means less sodium and fewer artificial ingredients, making for a healthier, yet equally satisfying, indulgence.
Tips, Variations & Cooking Advice
- Spice it Up: Increase the cayenne pepper in the cheese sauce or add a pinch of chili flakes to the beef for extra heat.
- Vegetarian Twist: Omit the beef and double the black beans, or substitute with cooked lentils, sautéed mushrooms, or crumbled plant-based meat alternative.
- Cheese Blends: Experiment with other melty cheeses like Colby Jack, Pepper Jack, or even a blend of Gruyère and fontina for a sophisticated twist.
- Low-Carb Option: Serve the beef and cheese mixture over a bed of sautéed bell peppers or lettuce cups instead of tortilla chips.
- Roast Your Veggies: For a deeper flavor, roast bell peppers or corn kernels before adding them as toppings.
Common Mistakes to Avoid
- Overcrowding the Baking Sheet: Too many chips on one sheet leads to uneven heating and soggy spots. Use two sheets if necessary.
- Not Draining Beef Fat: Excess fat can make your nachos greasy. Always drain after browning.
- Serving Cold: Nachos are best served immediately after baking when the cheese is still hot and melty.
- Skipping the Layers: Layering ensures every chip gets a good amount of topping and cheese. Don’t just dump everything on top!
- Soggy Chips: To prevent soggy chips, avoid adding liquidy toppings like salsa until just before serving. A quick pre-bake of plain chips for 5 minutes can also crisp them up extra.
Storage & Meal Prep Tips
Leftover Nachos are best stored with the components separated to maintain texture. Store the cooked beef mixture and homemade nacho cheese sauce in separate airtight containers in the refrigerator for up to 3-4 days. Chips should be stored at room temperature in an airtight bag to keep them crisp. To reheat, warm the beef mixture and cheese sauce on the stovetop or in the microwave. Reassemble fresh chips with the warmed toppings and a fresh sprinkle of shredded cheese, then bake briefly until heated through and melty. Freezing cooked nachos is not recommended as the chips will become unpleasantly soggy.
Conclusion
There you have it – your definitive guide to creating the most incredible homemade Nachos. From the perfectly seasoned beef to the creamy, dreamy nacho cheese, every bite is a testament to the joy of cooking from scratch. This recipe is more than just food; it’s an experience waiting to happen, perfect for sharing with loved ones or savoring solo. Don’t be shy – dive into your kitchen, embrace the warmth and aroma, and craft your own unforgettable batch. We encourage you to try this recipe and share your delicious creations in the comments below! What are your favorite nacho toppings?
FAQs
Q1: Can I use pre-shredded cheese?
A1: Yes, absolutely! While block cheese shredded at home melts smoother due to fewer anti-caking agents, pre-shredded cheese works perfectly well for convenience.
Q2: How do I prevent my chips from getting soggy?
A2: Ensure your beef mixture isn’t overly watery. Also, avoid adding fresh, wet toppings like salsa or guacamole until just before serving. Baking the chips alone for 5 minutes before adding toppings can also help.
Q3: Can I make this a spicier dish?
A3: Easily! Add extra cayenne pepper, a dash of hot sauce to the beef mixture, or incorporate chopped fresh serrano peppers along with the jalapeños for a real kick.
Q4: Can I prepare the beef mixture ahead of time?
A4: Yes, the seasoned beef mixture can be cooked up to 2-3 days in advance and stored in an airtight container in the refrigerator. Reheat gently before assembling your nachos.
Q5: What’s the best way to get even cheese coverage?
A5: Layering is key! Alternate chips, beef, and cheese, ending with a generous top layer of cheese. For store-bought shredded cheese, tossing it with a teaspoon of cornstarch can help it melt more evenly.
Proven way to grow Nachos in 5 easy steps. Nachos
Ingredients
Equipment
Method
- Prepare your seedbed by spreading tortilla chips evenly on a baking sheet; this forms the base for your nachos to grow.
- Carefully sprinkle your "seeds" (corn kernels and black beans) over the chip-bed, ensuring even distribution for a bountiful harvest.
- Gently water your crop with shredded cheddar cheese, allowing it to melt and bind your nascent nachos together under warm conditions.
- Once the cheese has melted, "fertilize" your nachos with diced tomatoes and sliced jalapeños to enhance flavor and promote growth.
- Serve your freshly grown nachos immediately with a dollop of sour cream, diced avocado, and a sprinkle of fresh cilantro for garnish.