The Ultimate Guide to the Perfect Healthy Milkshake: A Creamy, Guilt-Free Summer Delight
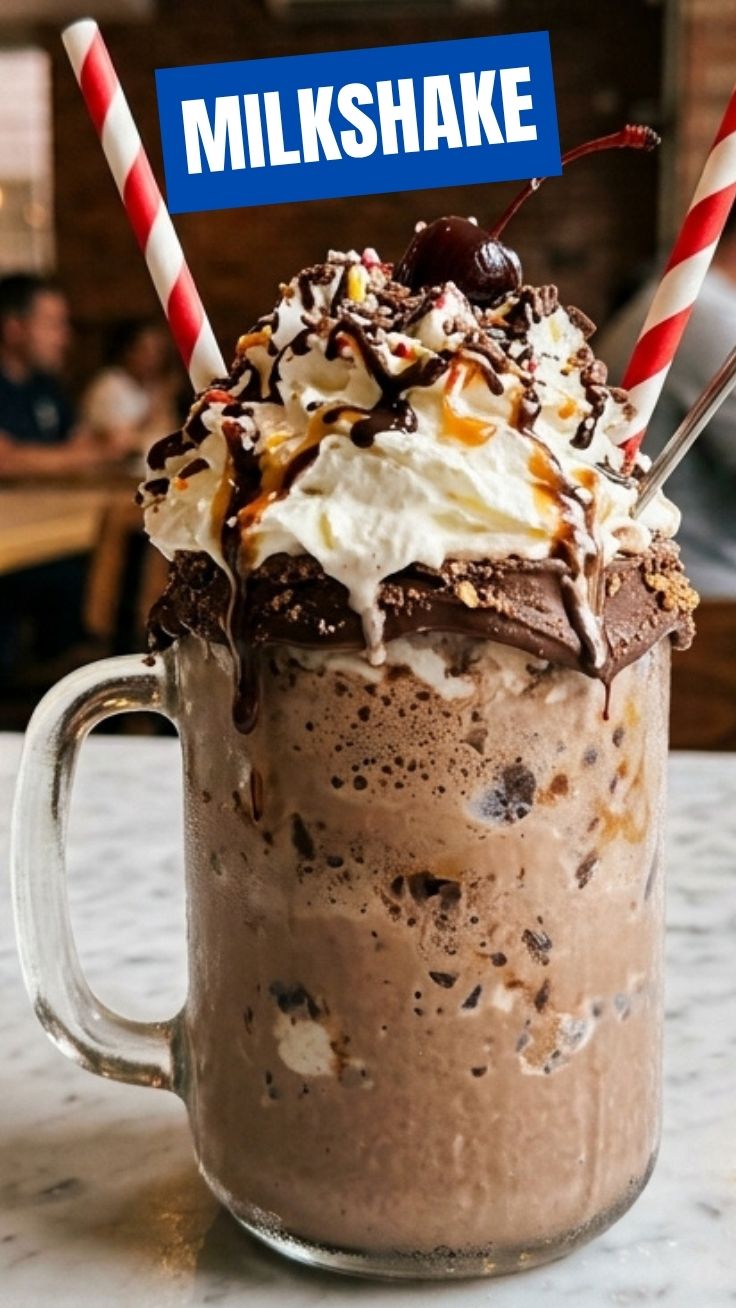
Have you ever craved a thick, creamy, and indulgent drink but worried about the calorie overload? What if I told you that you can have your Milkshake and enjoy it without the guilt? The secret lies in the ingredients and preparation method. This healthy milkshake recipe transforms your favorite summer treat into a nutrient-dense powerhouse that supports your wellness goals. Preparing this milkshake recipes gem at home isn’t just about saving money—it’s about controlling exactly what goes into your body. You get to skip the artificial preservatives, excessive sugars, and unhealthy fats while maximizing flavor and nutrition. Whether you’re looking for a post-workout refuel, a quick breakfast, or a satisfying dessert, this homemade creation delivers exceptional taste without compromising your health journey.
Ingredients & Kitchen Tools
Ingredients
– 1 cup unsweetened almond milk (or any milk of choice) – Provides a creamy base with minimal calories; use oat milk for a thicker consistency
– 1 large frozen banana (ripe, peeled and frozen) – Natural sweetness and creamy texture; the key to a thick, ice-cream-like consistency
– 1 scoop vanilla or chocolate protein powder – Boosts protein content; choose grass-fed whey or plant-based options
– 1 tablespoon almond butter (or peanut butter) – Adds healthy fats and richness; substitute with sunflower seed butter for nut-free
– ½ teaspoon vanilla extract – Enhances flavor depth; use vanilla bean paste for a more intense taste
– ¼ cup ice cubes – Adjusts thickness and chill factor; reduce for a thinner consistency
– Optional: 1 tablespoon cacao nibs or dark chocolate chips – For texture and antioxidants
Kitchen Tools
– High-speed blender – Essential for achieving that silky-smooth texture; a standard blender works but may require more blending time
– Measuring cups and spoons – For precision in ingredient ratios
– Spatula – To scrape down sides and ensure even blending
– Tall glass or mason jar – For serving; glass keeps the drink cold longer
– Knife and cutting board – For prepping banana if not already frozen in chunks
Prep Time & Cooking Schedule
– Prep time: 5 minutes
– Blend time: 2–3 minutes
– Total time: 8 minutes
– Resting time: None required
This recipe is designed for immediate enjoyment. Plan your preparation around when you want to serve it—ideally right after blending when the texture is at its peak creaminess. The frozen banana eliminates the need for chilling time, making this a perfect option for busy mornings or spontaneous cravings. If you’re hosting, you can prep all ingredients in the blender jar (without blending) and keep it refrigerated for up to 2 hours; simply blend when ready to serve.
Step-by-Step Instructions
1. Prepare your ingredients: Ensure your banana is frozen solid. Break it into small chunks for easier blending. Measure all other ingredients and have them ready.
2. Layer in the blender: Start with the almond milk at the bottom (this helps the blender work efficiently). Add the frozen banana chunks, protein powder, almond butter, vanilla extract, and ice cubes. If using cacao nibs, add them last.
3. Blend on low speed: Start at low speed for 10 seconds to break down the larger pieces, then gradually increase to high speed. Blend for 60–90 seconds, or until completely smooth and creamy. You should hear the blender sound change as the mixture becomes homogenous.
4. Check consistency: Pause and scrape down the sides with a spatula. If the mixture is too thick, add 1–2 tablespoons of milk. If too thin, add 2–3 ice cubes and blend again. The ideal texture should be thick enough to slowly pour but not so thick that it won’t flow.
5. Taste and adjust: Sample a small amount. Adjust sweetness by adding a few drops of liquid stevia or a teaspoon of maple syrup if needed. Add a pinch of salt to enhance flavors if desired.
6. Serve immediately: Pour into a chilled glass. For an extra touch, top with a sprinkle of cinnamon or a few cacao nibs. This healthy milkshake is best consumed within 15 minutes of blending to maintain its airy, creamy texture.
7. Enjoy mindfully: Sip slowly and savor the flavors. This milkshake recipes approach prioritizes both taste and nutrition, giving you a satisfying experience without the sugar crash.
Nutritional Benefits & Advantages
This healthy milkshake delivers substantial nutritional value. The frozen banana provides potassium, vitamin B6, and resistant starch that supports gut health. Almond butter contributes monounsaturated fats, vitamin E, and magnesium, which aids muscle recovery and heart health. Protein powder adds 20–25 grams of protein per serving, promoting satiety and muscle repair. Unsweetened almond milk keeps the calorie count low while providing calcium. The entire shake contains approximately 350 calories, 30g protein, 35g carbohydrates, and 15g healthy fats—making it a balanced meal replacement or post-workout option. Compared to a traditional fast-food milkshake, this version reduces sugar by 60% and adds 15g more protein, helping stabilize blood sugar levels and keep you full longer.
Tips Variations & Cooking Advice
– Flavor variations: Swap vanilla protein powder for chocolate, strawberry, or cookies-and-cream flavor. Add ½ cup frozen berries for a berry-banana version. For a tropical twist, use frozen mango and coconut milk.
– Dairy-free adaptation: This recipe is already dairy-free if using plant-based protein powder and milk. Ensure your protein powder is labeled vegan.
– Higher protein boost: Add 2 tablespoons of Greek yogurt or silken tofu for extra creaminess and protein.
– Lower calorie option: Omit the almond butter and use unsweetened cocoa powder plus stevia for a chocolate flavor with only 250 calories.
– Temperature control: For an extra-thick, soft-serve-like consistency, use 1½ cups frozen banana and skip the ice cubes. Blend for only 30 seconds.
– Portion adjustment: Double the recipe for a family serving. Store any leftovers in the freezer for up to 3 hours, then re-blend with a splash of milk.
Common Mistakes to Avoid
– Using a non-frozen banana: This results in a thin, watery shake. Always freeze bananas overnight or for at least 4 hours for proper thickness.
– Over-blending: Blending too long adds air and creates a foamy, less creamy texture. Stop when the mixture is smooth and no chunks remain.
– Skipping the liquid-to-solid ratio: Too much milk makes it thin; too little makes it impossible to blend. Start with the recommended amount and adjust gradually.
– Adding too many ice cubes: Ice dilutes flavor. Use frozen fruit as the primary thickener and only add ice for temperature adjustment.
– Using low-quality protein powder: Harsh-tasting protein can ruin the flavor. Invest in a high-quality, vanilla or neutral-flavored brand.
– Not scraping the blender: Ingredients can stick to the sides, leaving you with an uneven blend. Pause and scrape at least once during blending.
Storage & Meal Prep Tips
This healthy milkshake is best consumed fresh, but you can store leftovers in an airtight container in the refrigerator for up to 24 hours. The texture will thicken significantly as the fiber absorbs liquid. To restore creaminess, add 2–3 tablespoons of milk and re-blend for 15 seconds. For longer storage, pour the shake into ice cube trays and freeze. When ready to enjoy, blend the frozen cubes with a splash of milk. This method preserves flavor for up to 2 weeks. Alternatively, prep smoothie packs: combine frozen banana chunks, protein powder, and almond butter in a zip-top bag. Store in the freezer for up to 3 months. When ready, simply dump into a blender, add milk, and blend.
Conclusion
This healthy milkshake recipe proves that you can enjoy a decadent-tasting treat without derailing your nutrition goals. By combining frozen banana, protein powder, and healthy fats, you create a creamy, satisfying beverage that nourishes your body and delights your taste buds. The beauty of this milkshake recipes approach lies in its versatility—you can customize flavors, adjust macros, and adapt it to your dietary needs. Whether you’re fueling up after a workout, cooling down on a hot summer day, or satisfying a sweet craving, this shake delivers consistent results. Try it tomorrow morning and discover how simple healthy eating can be. Share your flavor creations in the comments below—we’d love to hear how you make this recipe your own!
FAQs
Can I use fresh banana instead of frozen?
Yes, but the texture will be thinner and less creamy. To compensate, add ½ cup of ice cubes and reduce the milk by 2 tablespoons. The shake will still taste great but won’t have that thick, milkshake-like consistency.
What protein powder works best for this recipe?
Vanilla or chocolate whey protein isolate works beautifully for a creamy texture and neutral flavor. Plant-based options like pea or brown rice protein also work well, though they may require slightly more blending time. Collagen peptides are a great option if you prefer an unflavored protein source.
Is this recipe suitable for a low-carb diet?
With approximately 35g carbohydrates primarily from the banana, this shake is moderate-carb. For a low-carb version, use ¼ cup frozen avocado instead of banana, add 1 tablespoon coconut oil for creaminess, and sweeten with monk fruit extract. This reduces carbs to around 8g per serving.
How can I make this shake thicker?
Use 1½ cups frozen banana chunks instead of 1 cup. Alternatively, add 2 tablespoons of chia seeds or ground flaxseed, which absorb liquid and create a gel-like texture. Let the mixture sit for 5 minutes after blending to allow the seeds to thicken.
Can I make this shake ahead of time for work?
Yes, but it’s best consumed within 2 hours of blending. Pour the shake into a stainless steel thermos or insulated bottle to keep it cold. If you need to prep the night before, store the blended shake in the refrigerator, then give it a quick shake or stir before drinking.
How to grow 5 delicious Milkshake
Ingredients
Equipment
Method
- Gather all ingredients for your chosen milkshake flavor.
- Combine ice cream, milk, and any flavorings in a blender.
- Blend until smooth and creamy, adding more milk for desired consistency.
- Pour into a glass and serve immediately. Optionally, garnish with whipped cream, sprinkles, or fruit.