The Ultimate Guide to Perfect Garlic Green Beans: A Restaurant-Quality Side Dish in Minutes
Have you ever wondered why the green beans at your favorite steakhouse taste so much better than the ones you make at home? The secret isn’t a fancy technique or expensive ingredients—it’s all about mastering the balance of texture, seasoning, and heat. Today, we’re going to unlock that secret with a recipe that transforms humble green beans into a show-stopping side dish. Learning to prepare this at home not only saves you money but also gives you complete control over quality and flavor. Whether you’re looking for a quick weeknight vegetable side or a dish to impress dinner guests, these Garlic Green Beans deliver every time. The key is achieving that perfect tender-crisp bite while infusing every bean with aromatic garlic goodness.
Ingredients & Kitchen Tools
For the Garlic Green Beans:
– Fresh green beans (1 pound): Look for bright, firm beans that snap when bent. Trim the stem ends but leave the curly tails intact for rustic appeal.
– Garlic cloves (4-5 large): Fresh garlic is non-negotiable here. Pre-minced jarred garlic will lack the punchy flavor we need.
– Butter (2 tablespoons): Unsalted allows better control of sodium levels. For a dairy-free option, use high-quality olive oil or vegan butter.
– Olive oil (1 tablespoon): Helps prevent the butter from burning while adding fruity notes.
– Salt (½ teaspoon): Use kosher or sea salt for best results.
– Black pepper (¼ teaspoon): Freshly cracked provides more aroma.
– Red pepper flakes (optional, ¼ teaspoon): Adds gentle heat; omit for sensitive palates.
Kitchen Tools:
– Large skillet or wok (12-inch preferred for even cooking without crowding)
– Sharp knife and cutting board
– Vegetable peeler (optional, for trimming)
– Tongs or spatula for tossing
– Paper towels (for drying beans after washing)
Prep Time & Cooking Schedule
– Prep time: 10 minutes (washing, trimming, and mincing garlic)
– Cook time: 8-10 minutes total
– Resting time: 2 minutes (let beans settle after cooking for optimal flavor distribution)
– Total time: 20 minutes
Quick timing note: This dish moves fast once you start cooking, so have all ingredients measured and within arm’s reach. The entire process from fridge to table takes less time than ordering takeout.
Step-by-Step Instructions
Step 1: Prepare the beans
Wash the green beans thoroughly under cold water and pat completely dry with paper towels. Excess moisture is the enemy of browning—wet beans will steam instead of sear. Trim the stem ends by lining up a handful and slicing off the tips in one clean cut. Leave the pointy tails intact for a natural look.
Step 2: Blanch for perfect texture (optional but recommended)
Bring a large pot of salted water to a rolling boil. Add the trimmed beans and cook for exactly 2 minutes. Immediately transfer to an ice bath (bowl of ice water) to stop the cooking process. This step ensures your Garlic Green Beans emerge vibrant green with a tender-crisp bite. Drain well and pat dry again.
Step 3: Sear with authority
Heat your largest skillet over medium-high heat. Add the olive oil and 1 tablespoon of butter. Once the butter stops foaming and begins to brown slightly (this takes about 30 seconds), add the blanched beans in a single layer. Let them cook undisturbed for 2 minutes—resist the urge to stir. This creates beautiful char marks that add smoky depth. Toss and repeat for another 2 minutes.
Step 4: Infuse with garlic
Reduce heat to medium. Push beans to one side of the pan and add the remaining 1 tablespoon of butter and the minced garlic to the empty space. Cook the garlic for 30-45 seconds, stirring constantly until fragrant but not browned (burnt garlic becomes bitter). Toss everything together, coating the beans with the garlic butter mixture.
Step 5: Season and finish
Sprinkle with salt, black pepper, and optional red pepper flakes. Toss once more and cook for 1 final minute. Remove from heat and let rest for 2 minutes before serving. The resting allows the flavors to meld, resulting in Garlic Butter Green Beans that taste even better than they smell.
Nutritional Benefits & Advantages
Green beans are nutritional powerhouses often overlooked in the vegetable world. A one-cup serving provides:
– 34 calories (perfect for weight management)
– 4 grams of fiber (promotes digestive health and satiety)
– 17% of daily vitamin C (immune system support)
– 15% of daily vitamin K (bone health and blood clotting)
– Rich in folate (essential for cell growth and metabolism)
The small amount of butter adds fat-soluble vitamin absorption—your body can better utilize the vitamins in green beans when paired with healthy fats. This dish is naturally gluten-free, low-carb, and keto-friendly, making it suitable for most dietary patterns.
Tips, Variations & Cooking Advice
Flavor variations to explore:
– Asian-inspired: Replace butter with sesame oil and add 1 tablespoon soy sauce and 1 teaspoon toasted sesame seeds
– Lemony twist: Add 1 tablespoon fresh lemon juice and 1 teaspoon lemon zest during the final toss
– Almondine style: Top with ¼ cup toasted sliced almonds for nutty crunch
– Balsamic glaze: Drizzle with balsamic reduction just before serving for sweet-tangy complexity
Dietary adaptations:
– Vegan: Substitute all butter with high-quality olive oil or vegan butter
– Dairy-free: Use avocado oil or ghee (clarified butter, technically dairy but lactose-free)
– Low-sodium: Reduce salt to ¼ teaspoon and add fresh herbs like thyme or rosemary
Alternative cooking methods:
– Roasting: Toss beans with oil and garlic, spread on baking sheet, roast at 425°F for 12-15 minutes
– Air fryer: Cook at 380°F for 8-10 minutes, shaking halfway
– Grilling: Use a grill basket over medium-high heat for 6-8 minutes
Common Mistakes to Avoid
Mistake #1: Skipping the drying step
Wet beans won’t brown properly. After washing, spread on a clean kitchen towel and pat thoroughly. Even a little moisture creates steam that prevents that desirable caramelization.
Mistake #2: Overcrowding the pan
The beans need space to make contact with the hot pan. If your skillet is too small, cook in batches. Crowding lowers the pan temperature and causes the beans to stew rather than sear.
Mistake #3: Burning the garlic
Garlic cooks in seconds—longer than 45 seconds on high heat results in bitter, acrid flavors. Always add garlic after browning the beans, when the pan temperature has reduced slightly.
Mistake #4: Overcooking to mush
Green beans should offer resistance when bitten (tender-crisp). If they’re limp and bendy, you’ve gone too far. The residual heat continues cooking even after removal from the pan.
Storage & Meal Prep Tips
Refrigeration: Store leftover green beans in an airtight container for up to 4 days. The flavor actually improves overnight as the garlic butter penetrates deeper.
Freezing: While fresh is best, you can freeze cooked green beans. Spread them on a baking sheet to freeze individually (prevents clumping), then transfer to a freezer bag. They keep for 2 months. Note: texture will be softer upon thawing.
Reheating methods:
– Skillet: Reheat over medium heat with a splash of water, tossing until warmed (2-3 minutes)
– Microwave: 30-second intervals, covered with a damp paper towel to retain moisture
– Oven: Spread on baking sheet, warm at 350°F for 5 minutes
Meal prep tip: Blanch beans up to 2 days ahead and store in the refrigerator. Complete the sauté step just before serving for the best texture.
Conclusion
Mastering the art of perfect green beans comes down to three principles: proper drying, high heat for caramelization, and adding garlic at the right moment to avoid bitterness. These Garlic Green Beans deliver restaurant-quality results with ingredients you likely already have in your kitchen. The versatility of this dish—whether served alongside a juicy steak, flaky fish, or simple roasted chicken—makes it an essential addition to your cooking repertoire. We encourage you to try this recipe tonight and experience the difference that proper technique makes. Don’t forget to share your results and tag friends who love Garlic Butter Green Beans—they’ll thank you for introducing them to this game-changing side dish!
FAQs
Q: Can I use frozen green beans instead of fresh?
A: Yes, but skip the blanching step since frozen beans are already blanched. Thaw them completely and pat extremely dry before cooking. Note that frozen beans will be slightly softer than fresh.
Q: Why are my garlic green beans bitter?
A: This usually happens when garlic burns. Always add garlic after reducing heat from high to medium, and cook for no more than 45 seconds. If your pan is too hot, remove it from the heat while stirring in the garlic.
Q: Can I make this dish nut-free?
A: Absolutely! The base recipe contains no nuts. For the almondine variation, simply substitute with toasted pumpkin seeds or omit entirely.
Q: How do I know when the beans are perfectly cooked?
A: The perfect green bean should offer slight resistance when bitten but not be crunchy or hard. It should bend slightly before breaking, with a vibrant green color. Cooking time is typically 8-10 minutes total if using the recommended method.
Q: Can I double this recipe for a crowd?
A: Yes, but cook in batches to avoid overcrowding. After cooking all batches, combine them in the pan, add a fresh pat of butter, and toss to reheat before serving. This ensures each batch develops proper caramelization.
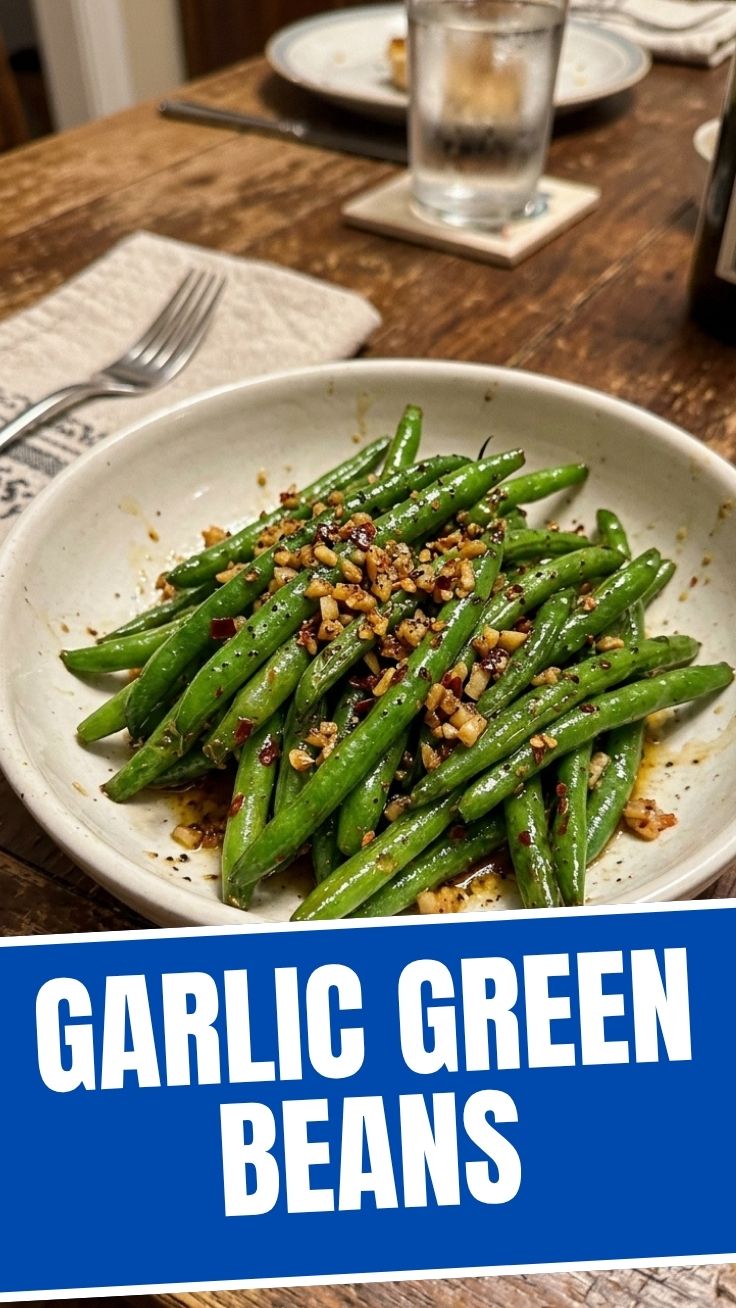
Garlic Green Beans
Ingredients
Equipment
Method
- Fill your planters with well-draining potting soil, leaving about an inch of space from the top.
- Plant green bean seeds about 1 inch deep and 3 inches apart, and plant garlic cloves with the pointed end up, about 2 inches deep.
- Lightly water the soil until it is moist but not waterlogged.
- Place the planters in a sunny spot where they can receive at least 6-8 hours of direct sunlight daily.
- Water regularly to keep the soil consistently moist, especially during dry periods, but avoid overwatering.
- Monitor for growth and tiny sprouts. You should see seedlings emerging within 3-5 days.
- By the 7th day, your green bean plants should have developed small pods and the garlic greens will be noticeable.
- Carefully snip off the green bean pods and garlic greens as needed, leaving the rest of the plant to continue growing.