Homemade Chocolate Peanut Butter Cups: Better Than Store-Bought
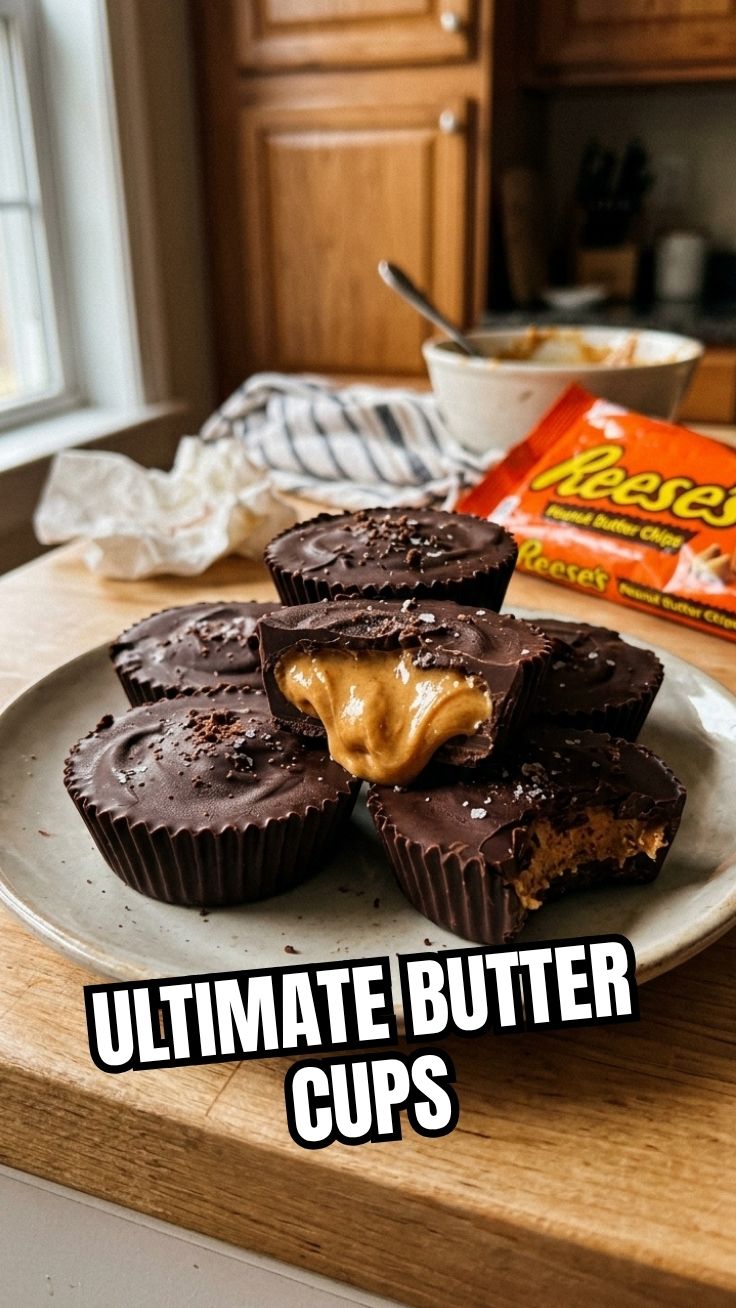
Have you ever wondered why homemade candy always tastes better than anything you can buy at the grocery store? When it comes to Chocolate Peanut Butter Cups, the answer is simple: you control the quality of every ingredient. There’s something deeply satisfying about biting into a cup you’ve made yourself—where the chocolate is rich, the peanut butter filling is creamy, and there are no preservatives or artificial flavors lurking inside. Whether you’re craving a sweet treat or looking for a gift idea, preparing this homemade chocolate peanut butter cups recipe at home saves money, lets you customize the taste, and gives you complete control over dietary needs. Plus, you’ll impress everyone who tastes them.
Ingredients & Kitchen Tools
For the Chocolate Coating
– Dark chocolate chips (2 cups) – Use 60-70% cacao for a balanced sweetness; semi-sweet works too
– Coconut oil (1 tablespoon) – Helps thin the chocolate for easy coating; optional but recommended
– Sea salt (flaky) – For sprinkling on top to enhance flavor
For the Peanut Butter Filling
– Creamy peanut butter (1 cup) – Natural, no-stir varieties work best; avoid oily separated brands
– Powdered sugar (1/2 cup) – Sift to remove lumps for a silky texture
– Unsalted butter (2 tablespoons) – Softened; adds richness and helps binding
– Vanilla extract (1 teaspoon) – Pure, not imitation, for deeper flavor
Kitchen Tools
– Mini muffin tin – Silicone or non-stick; standard 24-cup size works perfectly
– Muffin liners (mini) – Paper or foil; silicone tins may not need them
– Double boiler – Or a heatproof bowl set over simmering water
– Small cookie scoop – Helps portion filling evenly
– Spatula – Silicone for gentle mixing
– Refrigerator – For setting the cups
Optional Substitutions
– Peanut butter swap – Use almond butter, sunflower seed butter, or cookie butter
– Chocolate swap – Milk chocolate, white chocolate, or sugar-free chocolate chips
– Dairy-free – Use vegan butter and dairy-free chocolate
– Sugar-free – Powdered erythritol or monk fruit sweetener in filling
Prep Time & Cooking Schedule
– Prep time: 20 minutes
– Chill time: 45 minutes (two separate chilling cycles)
– Total time: 1 hour 5 minutes
Plan accordingly: the first chill takes about 15 minutes for the bottom chocolate layer, then 30 minutes after adding the filling and top layer. This is not a recipe you can rush—hasty chilling leads to dull, uneven chocolate. For best results, make these the night before you plan to serve them.
Step-by-Step Instructions
Step 1: Prepare the chocolate base
Melt 1 cup of dark chocolate chips with 1/2 tablespoon coconut oil in a double boiler over low heat, stirring constantly until smooth. Remove from heat immediately. Spoon about 1 teaspoon of melted chocolate into each mini muffin liner, tilting the tin to coat the bottom and slightly up the sides. Place the tin in the refrigerator for 15 minutes, or until firm.
Step 2: Make the peanut butter filling
In a small bowl, combine creamy peanut butter, softened butter, powdered sugar, and vanilla extract. Stir until a smooth, dough-like consistency forms. Using a small cookie scoop, portion about 1/2 teaspoon of filling into each chocolate-lined cup. Gently press down to flatten slightly, but do not compress too firmly—you want a pillowy center. At this point, you can taste and adjust sweetness by adding more powdered sugar if desired. Remember, the key to perfect homemade chocolate peanut butter cups is a filling that’s soft but holds its shape; if it’s too sticky, add a tablespoon more powdered sugar.
Step 3: Top with remaining chocolate
Melt the remaining 1 cup chocolate with 1/2 tablespoon coconut oil. Spoon about 1 teaspoon over each peanut butter center, spreading to the edges to seal completely. Tap the tin gently on the counter to remove air bubbles. Sprinkle with flaky sea salt.
Step 4: Final chill
Refrigerate for at least 30 minutes, or until the tops are firm and glossy. They should lift cleanly from the liners when ready. For a smooth finish, avoid opening the refrigerator frequently during this stage—temperature fluctuations can cause blooming (white streaks on the chocolate).
Pro tip: If your kitchen is warm, you may need to chill the filling briefly before adding the top layer to prevent it from melting into the chocolate.
Nutritional Benefits & Advantages
These indulgent treats offer more than just flavor. Dark chocolate is packed with antioxidants (flavonoids) that support heart health and reduce inflammation. Peanut butter provides plant-based protein (about 7g per serving) and healthy monounsaturated fats that keep you full longer. When you make them at home, you avoid the high-fructose corn syrup, hydrogenated oils, and artificial preservatives found in commercial candy. A single homemade cup has roughly 120 calories, making it a reasonable dessert option. For a lower-sugar version, use sugar-free chocolate and powdered monk fruit—still satisfying but with fewer carbs.
Tips Variations & Cooking Advice
– Flavor variations: Swap peanut butter for Nutella for chocolate-hazelnut cups; add crushed pretzels on top for sweet-salty crunch; or stir in mini marshmallows for a s’mores vibe.
– Dietary adaptations: For gluten-free, ensure your chocolate and peanut butter are certified gluten-free (most are, but check labels). For vegan, use dairy-free chocolate and vegan butter.
– Portion changes: Use a standard muffin tin for jumbo cups (increase chill time to 45 minutes per layer). For bite-size cups, use a mini tart pan.
– Textural twists: Add a pinch of cinnamon or cayenne to the filling for warmth; or fold in shredded coconut.
– Make it a gift: Package in a decorative box with parchment paper between layers—they make perfect holiday presents.
Common Mistakes to Avoid
1. Overheating the chocolate – Burned chocolate becomes grainy and bitter. Never exceed 120°F (49°C). Use low heat and stir frequently.
2. Not chilling long enough – Soft, sticky cups that won’t release from liners are the result of impatience. Wait until fully set before serving.
3. Using oily peanut butter – Natural peanut butter that separates often leads to a greasy filling that leaks through the chocolate. Stick with no-stir varieties.
4. Skipping the salt – Salt balances sweetness and enhances chocolate flavor. Even a light sprinkle makes a big difference.
5. Compressing the filling – If you press the peanut butter too firmly, the cups become dense and less enjoyable. Aim for a gentle, even layer.
Storage & Meal Prep Tips
Refrigeration: Store in an airtight container in the refrigerator for up to 2 weeks. Layer between parchment paper to prevent sticking. The cold environment keeps the chocolate snappy and the filling firm.
Freezing: These cups freeze beautifully for up to 3 months. Place in a single layer on a baking sheet to freeze solid (about 1 hour), then transfer to a freezer-safe bag or container. To thaw, let sit at room temperature for 10 minutes—no need to microwave.
Reheating? Not necessary, but if you prefer a softer center, leave at room temperature for 15 minutes before eating.
Meal prep tip: Make a double batch and freeze half. Perfect for last-minute dessert emergencies or unexpected guests.
Conclusion
Making Chocolate Peanut Butter Cups at home is a rewarding experience that delivers candy-shop quality without the additives. By following this guide, you’ve learned how to create a rich, creamy filling and a perfectly tempered chocolate shell that rivals store-bought versions. Whether you’re craving a nostalgic treat or impressing dinner guests, these cups always deliver. The beauty of this recipe lies in its simplicity and adaptability—once you master the basic method, you can experiment with endless flavors. So go ahead, whip up a batch, and taste the difference that fresh ingredients make. Remember, the secret to perfect homemade chocolate peanut butter cups is patience and quality ingredients. Try them today and share your results—you might just retire those red-orange wrappers for good.
FAQs
Q: Can I use crunchy peanut butter instead of creamy?
A: Yes, but the texture will be less smooth. For best results, stick with creamy unless you specifically want crunch pieces in the filling.
Q: My chocolate bloomed (white streaks) – what happened?
A: Bloom occurs when chocolate is exposed to temperature fluctuations or moisture. To avoid, store in a consistent cool environment and don’t refrigerate uncovered cups.
Q: Can I make these without a double boiler?
A: Absolutely. Melt chocolate in a microwave-safe bowl at 50% power in 30-second intervals, stirring each time until smooth. Be careful not to overheat.
Q: How do I get the filling to stay in the middle instead of rising to the top?
A: Press the filling gently into the bottom chocolate layer before adding the top. Chilling the filled cups for 5 minutes before adding the top layer also helps.
Q: Are these safe for people with peanut allergies?
A: Not unless you substitute the peanut butter with a seed butter like sunflower seed butter. Even then, cross-contamination is a concern if your kitchen handles peanuts.
Proven way to grow Chocolate Peanut Butter Cups in 7 steps
Ingredients
Equipment
Method
- Line a mini muffin tin with paper liners; this batch makes approximately 12 cups.
- Melt chocolate chips and coconut oil together in a microwave-safe bowl, stirring until smooth.
- Spoon a small amount of melted chocolate into the bottom of each muffin liner, then freeze for 5-10 minutes to set.
- In a separate bowl, mix peanut butter, powdered sugar, and melted butter until well combined and smooth.
- Remove the muffin tin from the freezer and place a small dollop of the peanut butter mixture onto the set chocolate in each liner.
- Gently press the peanut butter mixture to flatten it slightly, ensuring it doesn't touch the edges of the liner.
- Cover the peanut butter filling with the remaining melted chocolate, ensuring the filling is fully enclosed.
- Place the muffin tin back into the freezer for at least 15-20 minutes, or until the chocolate peanut butter cups are completely firm.
- Once firm, remove the cups from the muffin tin and peel off the liners. Serve immediately or store them in the refrigerator.