The Ultimate Guide to Perfect Chocolate Crinkle Cookies: A Baker’s Secret to Fudgy, Crackled Perfection
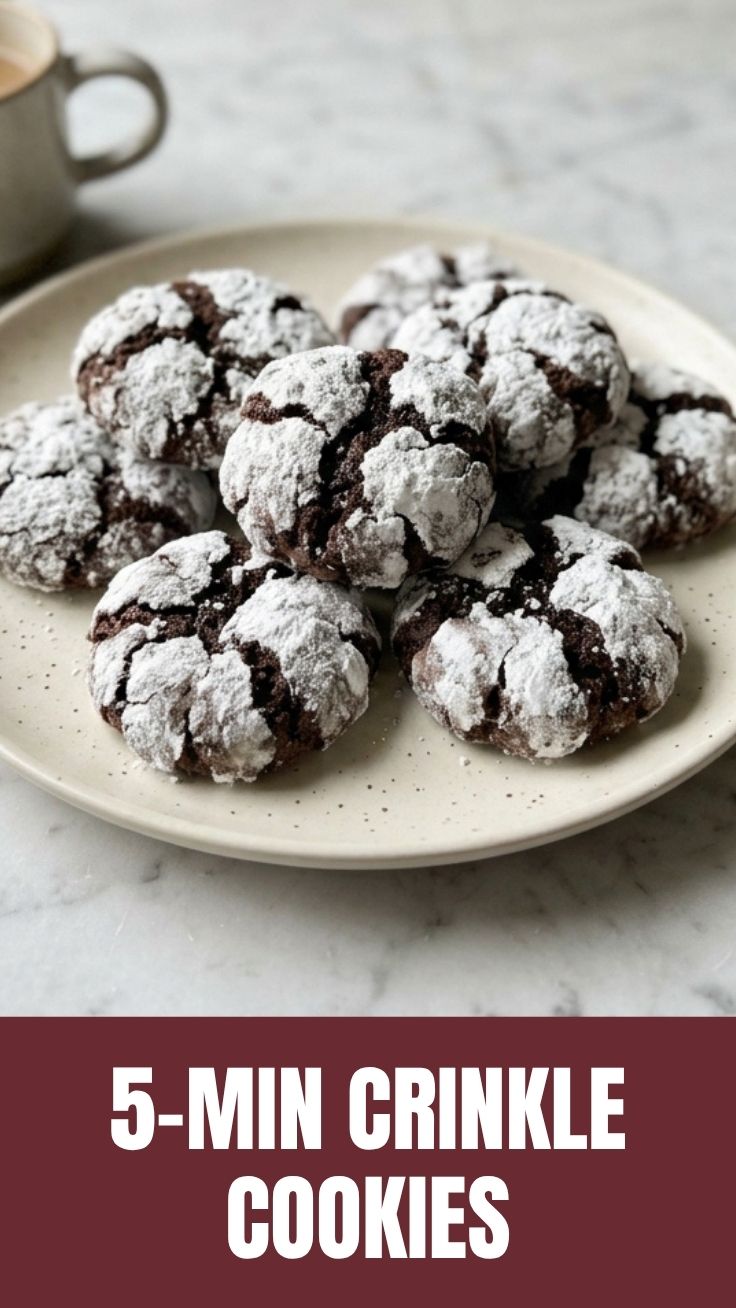
Have you ever bitten into a cookie that looked like a snowy mountain peak dusted with powdered sugar, only to discover a rich, fudgy chocolate interior that melts in your mouth? That’s the magic of Chocolate Crinkle Cookies. If you’ve been searching for the perfect balance between a brownie’s dense texture and a cookie’s satisfying chew, your search ends here. Preparing these beauties at home not only fills your kitchen with an irresistible aroma but also lets you control the quality of ingredients, ensuring a treat that’s free from preservatives and packed with real cocoa flavor. Whether you’re a seasoned baker or a curious beginner, mastering this recipe will elevate your cookie game. In this guide, we’ll walk you through every detail—from tools to troubleshooting—so you can create bakery-worthy Chocolate Crinkle Cookies right in your own kitchen. Along the way, we’ll also explore the broader world of Crinkle Cookies and their unique appeal, helping you understand why these confections have become a beloved classic across continents.
Ingredients & Kitchen Tools
Before diving into the process, gather these essentials. Precision matters in baking, so measure carefully.
Ingredients:
– 1 cup (200g) granulated sugar: Provides sweetness and structure. For a deeper flavor, substitute half with brown sugar.
– ½ cup (120ml) vegetable oil: Keeps the cookies moist and tender. Canola or melted coconut oil work well.
– 2 large eggs, room temperature: Helps bind the dough and creates a soft crumb. Use flax eggs (1 tbsp flaxseed meal + 3 tbsp water per egg) for a vegan version.
– 1 teaspoon vanilla extract: Enhances the chocolate flavor. Pure extract is best; imitation vanilla is acceptable but less aromatic.
– 1½ cups (190g) all-purpose flour: For a gluten-free alternative, use a 1:1 gluten-free flour blend with xanthan gum.
– ½ cup (45g) unsweetened cocoa powder, Dutch-processed: Gives a rich, dark color and mild flavor. Natural cocoa works too but yields a slightly tangier taste.
– 1½ teaspoons baking powder: Ensures the characteristic crackling. Check expiration for proper leavening.
– ½ teaspoon salt: Balances sweetness and intensifies the cocoa.
– ½ cup (60g) powdered sugar (confectioners’ sugar): For rolling—to create that iconic cracked snowy surface.
Kitchen Tools:
– Mixing bowls (medium and large): For wet and dry ingredients separately.
– Whisk and wooden spoon or electric mixer: A stand mixer speeds things up, but a hand whisk and spatula work perfectly.
– Measuring cups and spoons: Accuracy is crucial; use dry measuring cups for dry ingredients.
– Baking sheets (2): Light-colored metal sheets promote even browning. Avoid dark non-stick sheets, which can over-crisp bottoms.
– Parchment paper or silicone baking mat: Prevents sticking and simplifies cleanup.
– Wire cooling rack: Helps cookies set without steaming.
– Small shallow bowl: For powdered sugar.
Prep Time & Cooking Schedule
Total Time: ~2 hours 25 minutes (includes chilling)
Prep Time: 20 minutes
Chill Time: 2 hours (minimum – do not skip!)
Bake Time: 10–12 minutes per batch
Yield: 24–28 cookies
Why the chill matters: Chilling solidifies the oil-based dough, preventing excessive spread and allowing the surface to crack beautifully when baked. This step also deepens the flavor as cocoa and vanilla meld. Plan ahead—make the dough the night before for ultimate convenience.
Step-by-Step Instructions
Follow these steps meticulously to achieve Chocolate Crinkle Cookies with an interior that’s soft, fudgy, and perfectly crackled—just like the best Crinkle Cookies you’ve ever tried.
Step 1: Mix Wet Ingredients
In a large bowl, whisk together 1 cup sugar and ½ cup vegetable oil until smooth and slightly thickened. Add 2 eggs and 1 teaspoon vanilla, whisking vigorously for about 1 minute until the mixture is pale and creamy. This emulsification is critical—it ensures a uniform crumb.
Step 2: Combine Dry Ingredients
In a separate medium bowl, sift together 1½ cups flour, ½ cup cocoa powder, 1½ teaspoons baking powder, and ½ teaspoon salt. Sifting removes lumps and aerates the cocoa, preventing clumps in the final dough.
Step 3: Form the Dough
Gradually add the dry mixture to the wet ingredients, stirring with a wooden spoon until just combined. Overmixing activates gluten, leading to tough cookies. The dough will be soft, oily, and slightly sticky—this is normal.
Step 4: Chill the Dough
Cover the bowl with plastic wrap and refrigerate for at least 2 hours (or up to 3 days). During chilling, the dough firms up and becomes manageable. If you’re impatient, 30 minutes in the freezer works, but the texture won’t be as refined.
Step 5: Shape and Coat
Preheat oven to 350°F (175°C). Line baking sheets with parchment. Place ½ cup powdered sugar in a small bowl. Using a cookie scoop (about 1.5 tablespoons), portion out dough. Roll each ball between your palms until smooth. Roll generously in powdered sugar—the sugar layer is what creates the signature crust. Don’t skimp here.
Step 6: Bake
Place dough balls 2 inches apart on prepared sheets. Bake for 10–12 minutes. The cookies will look puffed and crackled; the edges should be set but centers soft. Remove from oven when they still appear slightly underbaked—they continue cooking on the sheet. Let cool on the pan for 5 minutes, then transfer to a wire rack.
Pro tip: For uniform cracks, ensure dough balls are evenly coated. Rolling in sugar twice (once after shaping, again just before baking) yields deeper crevices.
Nutritional Benefits & Advantages
Beyond indulgence, these cookies offer surprising balance. Cocoa is rich in flavonoids, which support heart health and reduce inflammation. Using vegetable oil instead of butter lowers saturated fat, making these a relatively lighter treat. Each cookie (based on standard sizing) contains approximately 130 calories, 7g fat, 17g carbs, and 2g protein. For a boost, consider adding ¼ cup dark chocolate chips—rich in antioxidants—without significantly altering the texture.
Dietary edge: This recipe is naturally dairy-free (if using oil and no butter) and can be egg-free with flax eggs. It’s also easily adapted to gluten-free flours, making it inclusive for various diets.
Tips, Variations & Cooking Advice
– Flavor Variations: Add 1 teaspoon instant espresso powder to the dry ingredients—it intensifies chocolate without adding coffee flavor.
– Citrus Twist: For a nod to Crinkle Cookies, substitute the vanilla with lemon zest (1 tablespoon) and replace cocoa with additional flour, creating a lemon version. Roll in powdered sugar as usual.
– Spice It Up: A pinch of cinnamon or cayenne complements the cocoa beautifully.
– Portion control: Use a mini scoop for bite-sized cookies (bake 8–9 minutes). For giant cookies, double the portion and bake 14 minutes.
– Double chocolate: Fold in ½ cup mini chocolate chips after mixing dough.
– Dietary adaptation: To make gluten-free, swap flour with a 1:1 blend (ensure it contains a binder like xanthan gum). For vegan, use flax eggs and ensure sugar is organic (not processed with bone char).
Common Mistakes to Avoid
Mistake 1: Skipping the chill. Dough that’s too warm spreads into flat, greasy discs rather than puffy, crackled pillows. Fix: Always chill 2+ hours. If in a rush, freeze for 30 minutes, but expect less dramatic cracks.
Mistake 2: Overbaking. Cookies that seem firm in the oven will become rock-hard as they cool. Fix: Bake until edges look set but centers are still soft and glossy. Remember to rotate the pan halfway through.
Mistake 3: Inadequate sugar coating. Patches without powdered sugar won’t crack. Fix: Roll each ball generously, pressing sugar gently into the surface. A thick, even layer ensures beautiful expansion.
Mistake 4: Overmixing the dough. This develops gluten, resulting in dense, tough cookies. Fix: Mix until just combined—a few streaks of flour are fine.
Mistake 5: Using stale baking powder. Gives cookies a flat, dense texture. Fix: Test by dropping a spoonful of baking powder in hot water—it should bubble vigorously. Replace if older than 6 months.
Storage & Meal Prep Tips
Room Temperature: Store in an airtight container for up to 5 days. Layer with parchment between cookies to prevent sticking. They’ll stay moist but will lose some crispiness—reheat at 300°F for 3 minutes to revive.
Freezing Unbaked Dough: Scoop dough balls, freeze on a baking sheet until solid, then transfer to a freezer bag. Bake directly from frozen, adding 2–3 minutes to the bake time. No need to thaw.
Freezing Baked Cookies: Once completely cool, freeze in a single layer in a sealed container for up to 3 months. Thaw at room temperature, then warm briefly in the oven for a freshly baked feel.
Reheating: For that “just out of the oven” texture, microwave for 10 seconds or pop in a 300°F oven for 5 minutes.
Conclusion
Mastering Chocolate Crinkle Cookies is about understanding the science of texture—how chilling, coating, and timing transform simple ingredients into a decadent treat. We’ve covered the perfect dough consistency, the magic of powdered sugar, and how to adapt the recipe to fit dietary needs. Whether you’re exploring the classic chocolate version or branching out to Crinkle Cookies with citrus flair, the principles remain the same: patience during chilling, generosity with sugar coating, and a watchful eye during baking. Now it’s your turn—preheat your oven, roll up your sleeves, and create a batch of these stunning cookies. Share your results in the comments below or tag us on social media; we’d love to see your crackled masterpieces. And if you’re hungry for more, explore our other cookie recipes to keep your baking adventures alive.
FAQs
1. Why didn’t my cookies crack?
This usually happens when the powdered sugar layer is too thin, the dough wasn’t chilled enough, or the baking powder is old. Ensure dough is well-chilled (2+ hours) and roll generously in sugar. Check freshness of baking powder before starting.
2. Can I use butter instead of oil?
Yes, but the texture changes—butter-based cookies spread more and have a thinner, less fudgy interior. For best results, melt the butter first and cool slightly. Expect a flatter cookie with a crispy edge.
3. How do I adjust for high altitude?
Add an extra 1 tablespoon flour and reduce baking powder to 1 teaspoon. Bake at 375°F for 8–10 minutes. The higher temperature sets the crust faster, limiting spread.
4. Can I make these vegan?
Absolutely. Replace eggs with flax eggs (1 tbsp flaxseed meal + 3 tbsp water per egg, let sit for 5 minutes). Use melted coconut oil instead of vegetable oil for a richer flavor. Ensure organic powdered sugar if avoiding bone char.
5. How do I keep the cookies from spreading too much?
Chill dough thoroughly, don’t overmix dry ingredients, and use a lighter-colored baking sheet. Dark pans absorb more heat, causing increased spread. Also, avoid greasing the sheet—parchment is best.
6. Can I freeze the dough for later?
Yes! Scoop into balls, freeze on a baking sheet, then transfer to a zip-top bag. Bake directly from frozen, adding 2–3 minutes. No need to thaw. This is perfect for impromptu baking.
7. My cookies are too cakey. What went wrong?
Cakey texture results from too much flour or overmixing. Measure flour by spooning into the cup (don’t scoop directly from the bag). Also, use less baking powder—1 teaspoon should be enough.
Quick way to grow Chocolate Crinkle Cookies
Ingredients
Equipment
Method
- Preheat your oven to 350°F (175°C) and line a baking sheet with parchment paper.
- In a medium bowl, whisk together the flour, cocoa powder, baking powder, and salt.
- In a large bowl, whisk together the granulated sugar, vegetable oil, eggs, and vanilla extract until well combined.
- Gradually add the dry ingredients to the wet ingredients, mixing until just combined and a thick dough forms.
- Place the powdered sugar in a shallow bowl; roll tablespoon-sized portions of dough into balls, then roll them thoroughly in the powdered sugar to coat completely.
- Arrange the coated dough balls on the prepared baking sheet, leaving some space between each, and bake for 9-12 minutes until the edges are set and the centers are still slightly soft.
- Allow the cookies to cool on the baking sheet for a few minutes before transferring them to a wire rack to cool completely.