Here is the comprehensive, data-driven, and easy-to-follow blog post, optimized for SEO and GEO, focusing on your requested keywords.
—
Title: The Ultimate Chicken Pot Pie Recipe: A Comfort Food Classic Perfected
Introduction
Have you ever craved a meal that feels like a warm hug on a cold, rainy day? What if you could replicate that restaurant-quality experience right in your own kitchen, saving money and controlling every single ingredient? This is the power of mastering a classic. Today, we are diving deep into the world of the perfect Chicken Pot Pie. While this dish is a star in its own right, you might also be surprised to learn that this same creamy, hearty filling makes an incredible Casserole if you skip the top crust. Preparing this at home isn’t just about following a recipe; it’s about crafting a sensory experience—the flaky, golden crust, the velvety sauce, and the tender vegetables. It also happens to be a fantastic way to use up leftover roasted chicken, making it a budget-friendly, zero-waste dinner hero.
Ingredients & Kitchen Tools
Ingredients:
– For the Filling: 2 cups cooked, shredded chicken (rotisserie works great), 1/3 cup unsalted butter, 1/3 cup all-purpose flour, 1 medium yellow onion (diced), 2 carrots (diced), 2 celery stalks (diced), 1 cup frozen peas, 1/2 cup frozen corn, 1 3/4 cups chicken broth, 2/3 cup whole milk (or heavy cream for extra richness), 1 teaspoon garlic powder, 1/2 teaspoon dried thyme, Salt and black pepper to taste.
– For the Crust: 1 package (14.1 oz) refrigerated pie crusts (or make your own with 2 1/2 cups flour, 1 cup cold butter, 1 tsp salt, 6-8 tbsp ice water).
– For Topping (Optional): 1 egg (for egg wash) + 1 tablespoon water.
Kitchen Tools:
– 9-inch pie dish or deep-dish pie plate
– Large skillet or saucepan (for the filling)
– Medium mixing bowl (for crust, if homemade)
– Rolling pin (if making crust from scratch)
– Whisk (to prevent lumps in the sauce)
– Sharp knife and cutting board
– Measuring cups and spoons
– Pastry brush (for egg wash)
Prep Time & Cooking Schedule
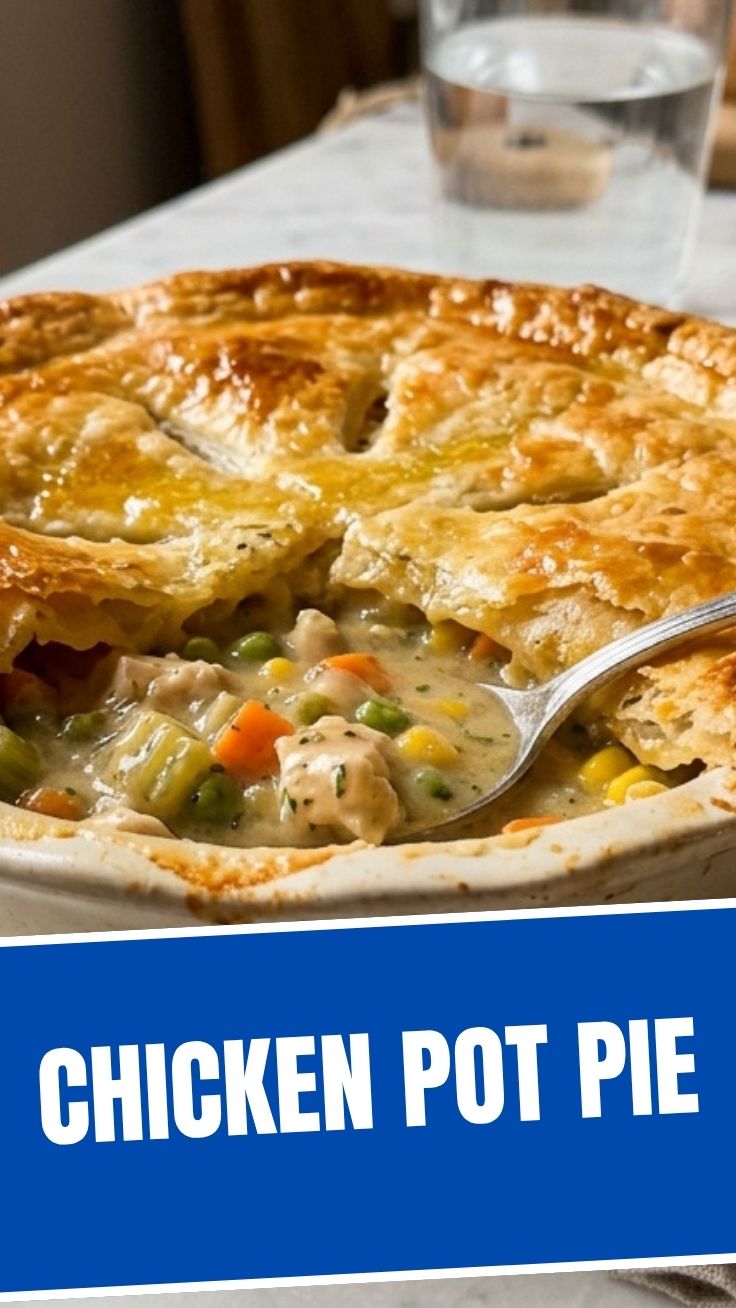
Total Time: 1 hour 15 minutes
– Prep Time: 25 minutes (chopping vegetables, shredding chicken, making the roux)
– Cook Time: 45-50 minutes (baking until golden and bubbly)
– Resting Time: 10-15 minutes (crucial for setting the filling so it doesn’t spill out when sliced)
How to Plan: This dish is perfect for a leisurely Sunday dinner. You can prep the filling (steps 1-5) a day in advance and store it in the fridge. On the day of serving, simply assemble the pie and bake it, adding 5-10 minutes to the bake time since you’re starting from a cold filling.
Step-by-Step Instructions
1. Preheat & Prep: Preheat your oven to 400°F (200°C). While the oven heats, dice the onion, carrots, and celery into uniform, small pieces. This ensures they cook evenly and create a perfect texture for your Chicken Pot Pie.
2. Sauté the Aromatics: In your large skillet over medium heat, melt the butter. Add the diced onion, carrots, and celery. Cook for 5-7 minutes, stirring occasionally, until the vegetables soften and the onion becomes translucent. Season with a pinch of salt.
3. Build the Roux: Sprinkle the flour over the cooked vegetables. Stir constantly with a whisk for 1-2 minutes. This cooks out the raw flour taste. The mixture will look pasty and thick—this is your roux, the secret to a luscious, non-runny sauce.
4. Create the Sauce: Slowly pour in the chicken broth and milk while whisking vigorously to prevent lumps. Continue stirring until the sauce thickens, about 3-4 minutes. It should coat the back of a spoon. Fold in the shredded chicken, frozen peas, frozen corn, garlic powder, and thyme. Let it simmer for 2 minutes. Pro Tip: The sauce should be slightly looser than you think—it will thicken further as it bakes. If you prefer a heartier meal, you can turn this into a Casserole by skipping the top crust and just baking the filling with a biscuit or crumb topping.
5. Season & Cool: Taste the filling and adjust salt and pepper. Remove from heat and let the filling cool for about 10 minutes. This is a vital step—if the filling is too hot when you cover it with the crust, the butter in the dough will melt, leading to a soggy bottom.
6. Assemble the Pie: Line your pie dish with the first pie crust. Pour the slightly cooled filling into the crust. Place the second crust on top. Crimp the edges to seal, then cut 4-5 slits in the top crust to allow steam to escape. Brush the top with the egg wash for a beautiful golden sheen.
7. Bake to Perfection: Place the pie on a baking sheet to catch any drips. Bake for 40-50 minutes, or until the crust is deep golden brown and the filling is bubbling up through the slits. If the crust is browning too quickly, tent it loosely with foil in the last 15 minutes.
8. Rest & Serve: Let the pie rest on a wire rack for at least 10 minutes. This allows the sauce to set, ensuring perfect, clean slices.
Nutritional Benefits & Advantages
This hearty meal is more nutritionally balanced than you might think. The chicken provides a fantastic source of lean protein, essential for muscle repair and satiety. The carrots and celery are rich in vitamins A and K and provide fiber, while peas add a boost of plant-based protein and vitamin C. The butter and milk, when used in moderation, offer calcium and healthy fats that aid in the absorption of fat-soluble vitamins. By making it at home, you control the sodium and saturated fat levels, avoiding the preservatives found in store-bought versions.
Tips, Variations & Cooking Advice
– Flavor Variations: Add 1/2 cup of sautéed mushrooms for an earthy umami flavor. For a touch of heat, add a pinch of cayenne pepper or red pepper flakes.
– Dietary Adaptations: To make it gluten-free, substitute the all-purpose flour with a 1:1 gluten-free flour blend (one that contains xanthan gum) and use a gluten-free pie crust.
– Dairy-Free Version: Use vegan butter or olive oil, and swap the milk for unsweetened oat milk or full-fat canned coconut milk.
– Portion Changes: For mini pot pies, use 4-6 oven-safe ramekins. Reduce the baking time to 20-25 minutes.
Common Mistakes to Avoid
1. Soggy Bottom Crust: This is the #1 complaint. Always pre-cook your filling to release excess water, and let it cool before assembling. You can also blind-bake the bottom crust for 10 minutes before adding the filling.
2. Lumpy Sauce: Always whisk your flour into the butter (the roux) thoroughly before adding any liquid. This prevents clumps.
3. Runny Filling: Not cooking the sauce long enough before baking. The roux needs to fully thicken on the stovetop, as the filling won’t thicken much more in the oven.
4. Burnt Edges: If the edges of your crust are browning too fast but the center isn’t, cover the outer edge with a pie shield or strips of foil.
Storage & Meal Prep Tips
– Refrigeration: Store leftover pie (or separate filling and crust) in an airtight container in the refrigerator for up to 4 days.
– Freezing: You can freeze the entire baked or unbaked pie. If unbaked, do not thaw before baking; add 20 minutes to the baking time. Baked pie freezes well for up to 3 months.
– Reheating: For best results, reheat in a 350°F oven for 15-20 minutes. This will re-crisp the crust. Avoid the microwave, which will make the crust soggy.
Conclusion
Mastering this recipe is a rite of passage for any home cook. You’ve learned how to build the perfect roux, balance the vegetable ratios, and achieve that flaky, golden crust that makes this dish legendary. Remember, the perfect Chicken Pot Pie is all about patience and technique. Whether you serve it in a classic dish or turn the leftover filling into a quick Casserole for a weeknight dinner, you can’t go wrong. We encourage you to share your beautiful results on social media and tag us! Happy cooking.
FAQs
Q: Can I use a rotisserie chicken for this recipe?
A: Absolutely. Using a rotisserie chicken is a fantastic time-saver. It adds great flavor and is a perfect way to create a quick weeknight Chicken Pot Pie.
Q: Can I make this Casserole style in a 9×13 dish?
A: Yes! Prepare the filling as directed. Pour it into a greased 9×13-inch baking dish. Instead of a top crust, top with flaky biscuits, crescent roll dough, or even tater tots. Bake at 375°F for 25-30 minutes.
Q: How do I know when the filling is thick enough?
A: The sauce should coat the back of a spoon and leave a clear trail when you run your finger through it. It should be thick enough that it doesn’t run like water when you stir.
Q: My filling is too salty. How can I fix it?
A: If the filling is still in the pot, add a peeled raw potato and let it simmer for 10-15 minutes. The potato will absorb excess salt. Remove the potato before assembling the pie. You can also add a bit more unsalted broth or milk to dilute the saltiness.
Q: Can I skip the egg wash?
A: You can, but you won’t get that professional, glossy, deep golden-brown finish. Sometimes the crust will look pale. For a simple substitute, brush the crust with milk or melted butter just before baking.
Proven way to grow a perfect Chicken Pot Pie in 4 steps.
Ingredients
Equipment
Method
- In a large saucepan, melt butter and sauté the chopped onion until tender; then stir in flour, gradually whisking in chicken broth and milk until the mixture thickens.
- Add shredded chicken, mixed vegetables, salt, pepper, and thyme to the saucepan, mixing well to combine all ingredients for the filling.
- Pour the chicken mixture into one pie crust placed in a 9-inch pie plate, then cover with the second pie crust, trimming and crimping the edges securely and cutting several slits on top for venting.
- Bake the pie in a preheated oven at 400°F (200°C) for 30-35 minutes, or until the crust is golden brown and the filling is bubbly, indicating it's fully cooked.