The Ultimate Blueberry Cheesecake: A Creamy, Tangy Dessert You’ll Make Again and Again
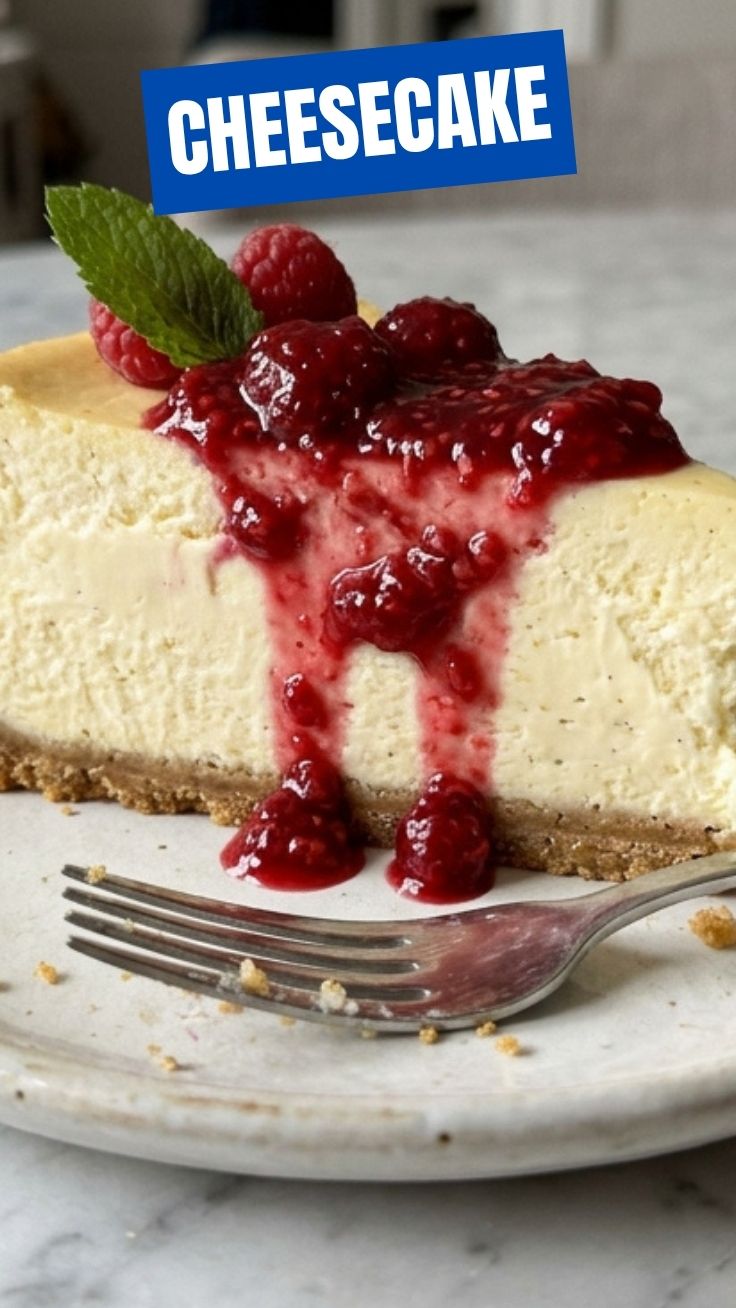
Have you ever craved a dessert that’s both luxuriously creamy and bursting with bright, fruity flavor? This Cheesecake with a luscious blueberry topping delivers exactly that. Preparing a homemade cheesecake may seem intimidating, but it’s one of the most rewarding baking projects you can tackle. Not only does it fill your kitchen with an irresistible aroma, but you also control every ingredient—no artificial preservatives, no mystery stabilizers. Plus, the satisfaction of slicing into a perfectly set, silky cheesecake topped with jewel-toned berries is unbeatable. In this guide, you’ll learn a foolproof method for a classic blueberry cheesecake that’s creamy, tangy, and beautifully balanced. Whether you’re a seasoned baker or a first-timer, this recipe is designed to deliver consistent, jaw-dropping results.
Ingredients & Kitchen Tools
For the crust:
– 1½ cups graham cracker crumbs (or crushed digestive biscuits)
– ¼ cup granulated sugar
– 6 tbsp unsalted butter, melted (use salted butter and omit added salt)
For the cheesecake filling:
– 24 oz (three 8-oz blocks) full-fat cream cheese, softened to room temperature
– 1 cup granulated sugar
– 3 large eggs, room temperature
– 1 tsp vanilla extract
– 1 tbsp fresh lemon juice (adds brightness)
– ¼ cup sour cream (or full-fat Greek yogurt for tang)
For the blueberry topping:
– 2 cups fresh or frozen blueberries
– ¼ cup granulated sugar
– 1 tbsp cornstarch mixed with 2 tbsp cold water (slurry)
– 1 tsp lemon zest
Optional substitutions:
– Gluten-free crust: Use gluten-free graham crackers or almond flour + butter.
– Dairy-free filling: Use vegan cream cheese and coconut cream (texture may be softer).
– Sweetener swap: Replace sugar with honey or maple syrup (reduce liquid elsewhere).
Kitchen tools:
– 9-inch springform pan
– Mixing bowls (large + medium)
– Electric hand mixer or stand mixer with paddle attachment
– Rubber spatula
– Saucepan for topping
– Fine-mesh sieve (optional, for smooth topping)
– Roasting pan (for water bath)
Prep Time & Cooking Schedule
– Prep time: 20 minutes
– Bake time: 55–65 minutes
– Cooling time: 1 hour at room temperature
– Chilling time: 4 hours minimum (overnight is best)
Total time: ~6 hours (mostly hands-off). Plan to make this cheesecake a day ahead for the best texture—it allows the flavors to meld and the structure to set firmly. The water bath ensures even, gentle heat, so you won’t end up with a cracked surface.
Step-by-Step Instructions
1. Prepare the crust. Preheat oven to 325°F (163°C). In a medium bowl, combine graham cracker crumbs and sugar. Pour in melted butter and stir until mixture resembles wet sand. Press firmly into the bottom of a greased springform pan. Bake for 10 minutes, then set aside to cool.
2. Make the cheesecake filling. In a large bowl, beat softened cream cheese with an electric mixer on medium speed until smooth—about 2 minutes. Add sugar and beat until fluffy. Scrape down the bowl. Add eggs one at a time, mixing on low after each just until incorporated. Overmixing incorporates too much air and can cause cracks. Stir in vanilla, lemon juice, and sour cream.
3. Assemble and bake. Wrap the outside of the springform pan with a double layer of aluminum foil (to prevent water seepage). Place the pan in a large roasting pan. Pour the filling over the crust. Pour hot water into the roasting pan until it reaches halfway up the sides of the springform pan. Bake the cheesecake for 55–65 minutes. The edges should be set, and the center will jiggle slightly when shaken. Turn off the oven, crack the door, and let the cheesecake cool inside for 1 hour.
4. Prepare the blueberry topping. While the cheesecake cools, combine blueberries, sugar, and lemon zest in a saucepan over medium heat. Cook until berries release juices, about 5 minutes. Stir in the cornstarch slurry and continue cooking until thickened, about 2 minutes. Remove from heat and let cool.
5. Chill and serve. Once the cheesecake reaches room temperature, refrigerate uncovered for 1 hour, then cover and chill for at least 4 hours (overnight is ideal). Before serving, spoon the cooled blueberry topping over the cheesecake. Slice with a warm, dry knife for clean cuts.
Nutritional Benefits & Advantages
Blueberry cheesecake offers more than just indulgence. Cream cheese provides calcium, protein, and vitamin A (good for bone health and vision). Blueberries are packed with antioxidants (anthocyanins) that fight inflammation and support brain function. The moderate amount of sugar is balanced by the fiber in the berries and the richness of the dairy. Compared to store-bought versions, this homemade cheesecake has no artificial flavors, high-fructose corn syrup, or hydrogenated oils. The sour cream adds probiotics, aiding digestion. For a lower-calorie option, use reduced-fat cream cheese and a sugar substitute—though the texture will be slightly less creamy.
Tips, Variations & Cooking Advice
– Flavor twist: Add 1 tsp almond extract to the filling for a nutty undertone.
– No-bake version: Use a no-bake filling of cream cheese, whipped cream, and gelatin. Chill for 6 hours.
– Lemon-blueberry: Increase lemon juice to 2 tbsp and add 1 tbsp lemon zest to the topping.
– Gluten-free: Substitute almond flour crust or use gluten-free graham crackers (check labels).
– Dairy-free: Use vegan cream cheese, coconut cream, and a nut-based crust. The texture will be softer but still delicious.
– Portion control: Make mini cheesecakes in a muffin tin with a water bath—bake for 18–20 minutes.
Common Mistakes to Avoid
– Cracked surface: Caused by overmixing, overbaking, or drastic temperature changes. Always use room-temperature ingredients, bake in a water bath, and cool gradually inside the oven.
– Runny center: Underbaking or too much liquid in the filling (e.g., adding extra sour cream). Check for a slight jiggle in the center; it will set as it chills.
– Soggy crust: Pressing crumbs too lightly or baking the crust too briefly. Use a flat-bottomed glass to press firmly and pre-bake for 10 minutes.
– Sticky knife: Warm the knife under hot water and wipe dry between cuts. This prevents the blueberry topping from smearing.
Storage & Meal Prep Tips
– Refrigeration: Store leftover cheesecake in an airtight container in the fridge for up to 5 days. Cover the cut surface with plastic wrap to prevent drying.
– Freezing: Wrap the entire cheesecake (without topping) in two layers of plastic wrap and one layer of foil. Freeze for up to 2 months. Thaw in the refrigerator overnight. Add fresh blueberry topping after thawing.
– Reheating: Cheesecake is best served cold or at room temperature. If you prefer a warm topping, reheat the blueberry sauce in a small saucepan and spoon over slices.
Conclusion
Making a homemade cheesecake from scratch is a rewarding experience that yields a dessert far superior to any store-bought version. The combination of silky cream cheese filling and tangy, sweet blueberry topping creates a perfect balance of flavors and textures. With a reliable water bath method and careful temperature control, you can achieve a crack-free, creamy slice every time. Whether you’re celebrating a special occasion or simply treating yourself, this recipe is a keeper. So preheat your oven, gather your ingredients, and give it a try. I’d love to hear about your results—share your photos and questions in the comments below, and explore more dessert recipes on the blog!
FAQs
1. Can I use frozen blueberries for the topping?
Yes, frozen blueberries work perfectly. No need to thaw—just increase the cooking time by 2–3 minutes until the berries soften and release their juices.
2. Why did my cheesecake crack even with a water bath?
Cracks often result from overmixing air into the batter or rapid cooling. Always mix on low speed after adding eggs, and let the cheesecake cool slowly in the oven with the door ajar.
3. Can I substitute the cream cheese with a lower-fat version?
You can use reduced-fat cream cheese, but the texture will be less dense and may not set as firmly. Avoid fat-free cream cheese, which can cause a gummy consistency.
4. How do I know when the cheesecake is done baking?
The edges should be set and lightly golden, while the center jiggles like Jell-O when gently shaken. An internal temperature of 150°F (65°C) is ideal. Overbaking leads to cracks.
5. Can I make the cheesecake without a springform pan?
Yes, use a deep 9-inch cake pan lined with parchment paper. To unmold, invert onto a plate and then flip right-side up. The water bath is still recommended for even baking.
Quick way to grow Cheesecake expertise in 7 stepsCheesecake
Ingredients
Equipment
Method
- Preheat your oven to 350°F (175°C) and lightly grease a 9-inch springform pan.
- In a medium bowl, combine graham cracker crumbs, sugar, and melted butter, then press the mixture firmly into the bottom of the prepared springform pan.
- Bake the crust for 10 minutes, then remove it from the oven and let it cool while you prepare the filling.
- In a large bowl, beat the softened cream cheese and sugar together until smooth and creamy.
- Beat in the eggs one at a time, ensuring each is fully incorporated before adding the next, then stir in the sour cream and vanilla extract until just combined.
- Pour the cream cheese mixture over the cooled crust and spread evenly, then bake for 50-60 minutes, or until the edges are set but the center still jiggles slightly.
- Turn off the oven, prop the door open slightly, and let the cheesecake cool in the oven for 1 hour, then remove it, let it cool completely on a wire rack, and chill in the refrigerator for at least 4 hours before serving.