Unlock the Secret to Irresistible Homemade Brownies: Your Ultimate Guide!
Ever craved that perfectly gooey, rich Chocolate brownies that melts in your mouth, leaving you dreaming of another bite? While store-bought options can satisfy in a pinch, there’s an unparalleled joy in creating these delectable treats from scratch. Beyond the delicious aroma that fills your home, baking your own Brownies allows for complete control over ingredients, ensuring a healthier, more personalized dessert experience. This comprehensive guide will equip you with everything you need to master the art of homemade Brownies, transforming you into a dessert connoisseur.
Ingredients & Kitchen Tools
Crafting the perfect Brownies requires a handful of essential ingredients and tools. Here’s what you’ll need:
- Unsalted Butter (1 cup / 226g): Essential for rich flavor and tender texture. Using unsalted allows you to control the salt content.
- Granulated Sugar (2 cups / 400g): Provides sweetness and contributes to the crackly top.
- Large Eggs (4): Binds the ingredients, adds moisture, and creates chewiness.
- Pure Vanilla Extract (2 teaspoons): Enhances the chocolate flavor. Opt for pure vanilla for the best taste.
- All-Purpose Flour (1 cup / 125g): Gives structure to the Brownies. Don’t overmix!
- Unsweetened Cocoa Powder (¾ cup / 75g): The star ingredient for deep chocolate flavor. Dutch-processed cocoa yields a darker color and milder taste.
- Salt (½ teaspoon): Balances sweetness and amplifies chocolate notes.
- Baking Powder (½ teaspoon – optional): For slightly cakier Brownies. Omit for fudgier results.
- Chocolate Chips or Chunks (1 cup / 170g – optional): For extra pockets of melted chocolate. Use semi-sweet or dark.
Kitchen Tools:
- 9×13 inch baking pan: The ideal size for this recipe, ensuring even baking.
- Parchment paper: Lines the pan for easy removal and cleanup.
- Large mixing bowls (2): For wet and dry ingredients.
- Whisk: For combining dry ingredients and aerating eggs.
- Rubber spatula: For folding ingredients gently.
- Measuring cups and spoons: For precise ingredient measurement.
- Saucepan: For melting butter (if not using a microwave).
Prep Time & Cooking Schedule
- Prep Time: 15 minutes
- Cook Time: 25-30 minutes
- Cooling Time: At least 2 hours (crucial for texture!)
To prepare, first preheat your oven to 350°F (175°C) and line your 9×13 inch baking pan with parchment paper, leaving an overhang on the sides for easy lifting. This recipe is perfect for an afternoon baking session, allowing ample cooling time before indulging.
Step-by-Step Instructions
Follow these steps for flawless Brownies:
1. Melt Butter & Sugar: In a large, microwave-safe bowl or saucepan, melt the butter. Once melted, stir in the granulated sugar until well combined. The mixture should be glossy.
2. Add Eggs & Vanilla: Allow the butter-sugar mixture to cool slightly (to avoid scrambling the eggs). Whisk in the eggs one at a time, ensuring each is fully incorporated before adding the next. Stir in the vanilla extract. This creates the essential base for our fudgy Brownies.
3. Combine Dry Ingredients: In a separate medium bowl, whisk together the all-purpose flour, unsweetened cocoa powder, and salt (and baking powder if using). This ensures even distribution and prevents lumps.
4. Gradually Combine Wet & Dry: Add the dry ingredients to the wet ingredients in two additions, gently folding with a rubber spatula until just combined. Be careful not to overmix, as this can lead to dry, tough Brownies. If using, fold in the chocolate chips now. The visual cue here is when no streaks of flour remain.
5. Bake: Pour the batter into the prepared baking pan and spread evenly. Bake for 25-30 minutes, or until a toothpick inserted into the center comes out with moist crumbs, not wet batter. The edges should be set, but the center will still be a bit wobbly—this is key for achieving gooey Chocolate brownies.
6. Cool Completely: This is perhaps the most important step for perfect Chocolate brownies. Allow the Brownies to cool completely in the pan on a wire rack for at least two hours before cutting. This allows them to set and develop their signature fudgy texture.
Nutritional Benefits & Advantages
While a treat, these Brownies offer some surprising benefits. Dark cocoa powder is rich in antioxidants, which can help combat free radicals in the body. Furthermore, baking at home allows you to control sugar levels and opt for high-quality, whole ingredients, avoiding the hydrogenated oils and artificial flavors often found in pre-made options. The eggs provide protein, and butter contributes healthy fats in moderation.
Tips, Variations & Cooking Advice
- Fudgier Brownies: Reduce flour by 2 tablespoons for an even chewier, denser result.
- Cakey Brownies: Increase flour by 2 tablespoons and definitely use the baking powder.
- Flavor Boosts: Add a pinch of espresso powder to enhance the chocolate flavor without tasting like coffee. Swirl in peanut butter for a nutty twist, or add a dash of cayenne pepper for a subtle spicy kick.
- Gluten-Free: Substitute all-purpose flour with a 1:1 gluten-free baking blend that contains xanthan gum.
- Dairy-Free: Use a good quality plant-based butter substitute and ensure your chocolate chips are dairy-free.
Common Mistakes to Avoid
- Overmixing the Batter: This develops gluten, leading to tough, dry Brownies. Mix until just combined.
- Overbaking: The most common culprit for dry Brownies. Aim for moist crumbs on a toothpick, not fully clean.
- Cutting Too Soon: Patience is key! Warm Brownies are crumbly. Let them cool completely for clean cuts and a proper fudgy texture.
- Not Enough Salt: Salt is crucial for balancing sweetness and intensifying the chocolate flavor. Don’t skip it!
Storage & Meal Prep Tips
Once cooled, store your Brownies in an airtight container at room temperature for up to 3-4 days. For longer storage, wrap individual servings tightly in plastic wrap and then foil, then freeze for up to 3 months. Thaw at room temperature or gently warm in the microwave for a fresh-baked feel. These are excellent for meal prep, as they hold up well and make for a quick, satisfying treat.
Conclusion
There you have it – your definitive guide to baking the perfect homemade Brownies. With a little care and attention to detail, you can create a batch of incredibly rich, fudgy Chocolate brownies that will impress everyone. So, gather your ingredients, follow these steps, and prepare to delight in the unparalleled satisfaction of baking your own Brownies. Don’t forget to share your creations and let us know your favorite variations in the comments below!
FAQs
Q1: My Brownies are too dry. What went wrong?
A1: Most likely, they were overbaked. Ensure you pull them from the oven when a toothpick comes out with moist crumbs, not liquid batter, and cool them completely.
Q2: Can I use oil instead of butter?
A2: While you can, butter contributes significantly to the flavor and texture of these Brownies. If you must use oil, opt for a neutral-flavored oil like vegetable or canola.
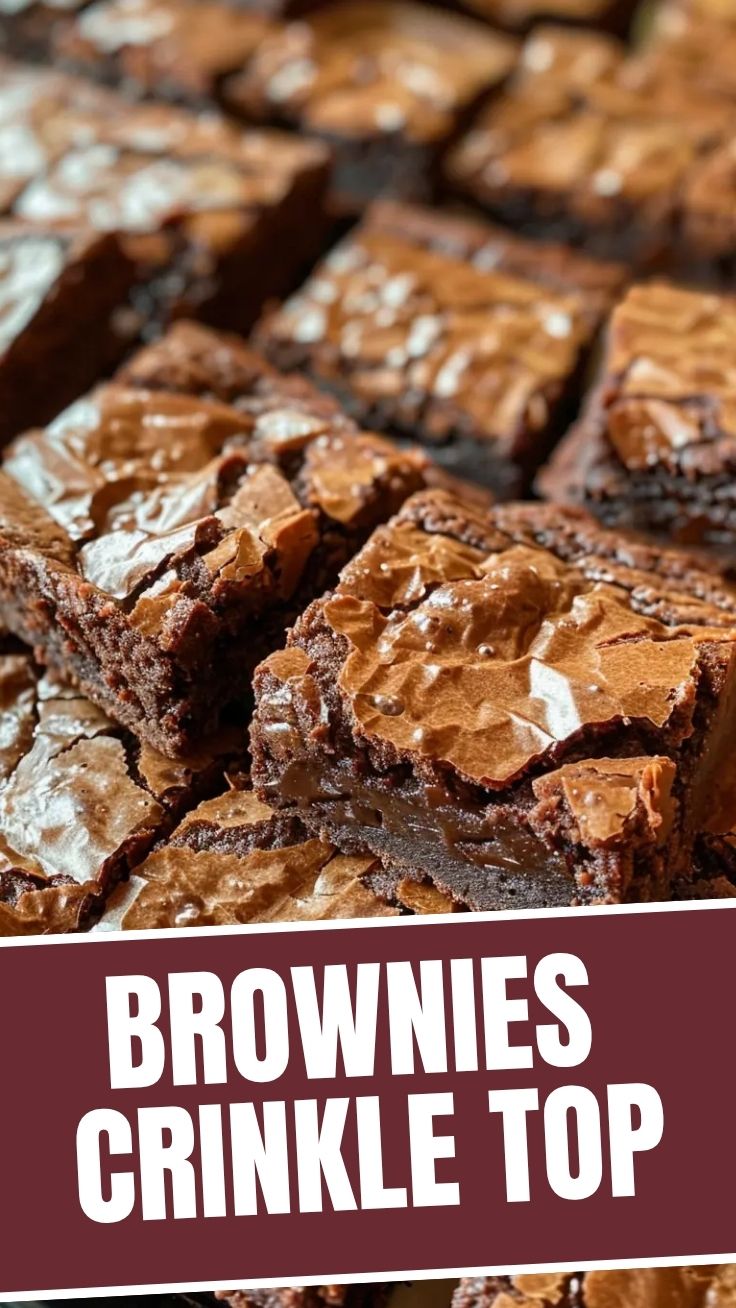
Q3: How do I get that perfect crackly top?
A3: The crackly top is often a result of whisking the eggs and sugar thoroughly until light and airy, and ensuring the batter isn’t overmixed with flour. Rapid cooling also helps set this texture.
Q4: Can I add nuts to this recipe?
A4: Absolutely! Fold in 1 cup of chopped nuts (walnuts, pecans, or almonds work well) with the chocolate chips in step 4.
Q5: How long do homemade Brownies last?
A5: When stored in an airtight container at room temperature, they typically last 3-4 days. In the freezer, they can stay fresh for up to 3 months.
How to Grow Delicious Brownies
Ingredients
Equipment
Method
- Preheat the oven to 350°F (175°C) and prepare a 9x13 inch baking pan by greasing and flouring it.
- Combine the brownie mix, vegetable oil, water, and egg in a large bowl, stirring gently until just combined.
- Pour the brownie batter into the prepared pan, spreading it evenly.
- Bake for 20-25 minutes, or until a toothpick inserted into the center comes out with moist crumbs.
- Allow the brownies to cool completely in the pan on a wire rack.
- Melt the chocolate chips and milk together in a microwave-safe bowl, stirring until smooth.
- Pour the melted chocolate glaze over the cooled brownies and spread evenly.
- Decorate with assorted candies, sprinkles, or nuts as desired.
- Cut into squares and serve your "home-grown" brownies.