Why This Crispy Delight Deserves a Spot in Your Kitchen
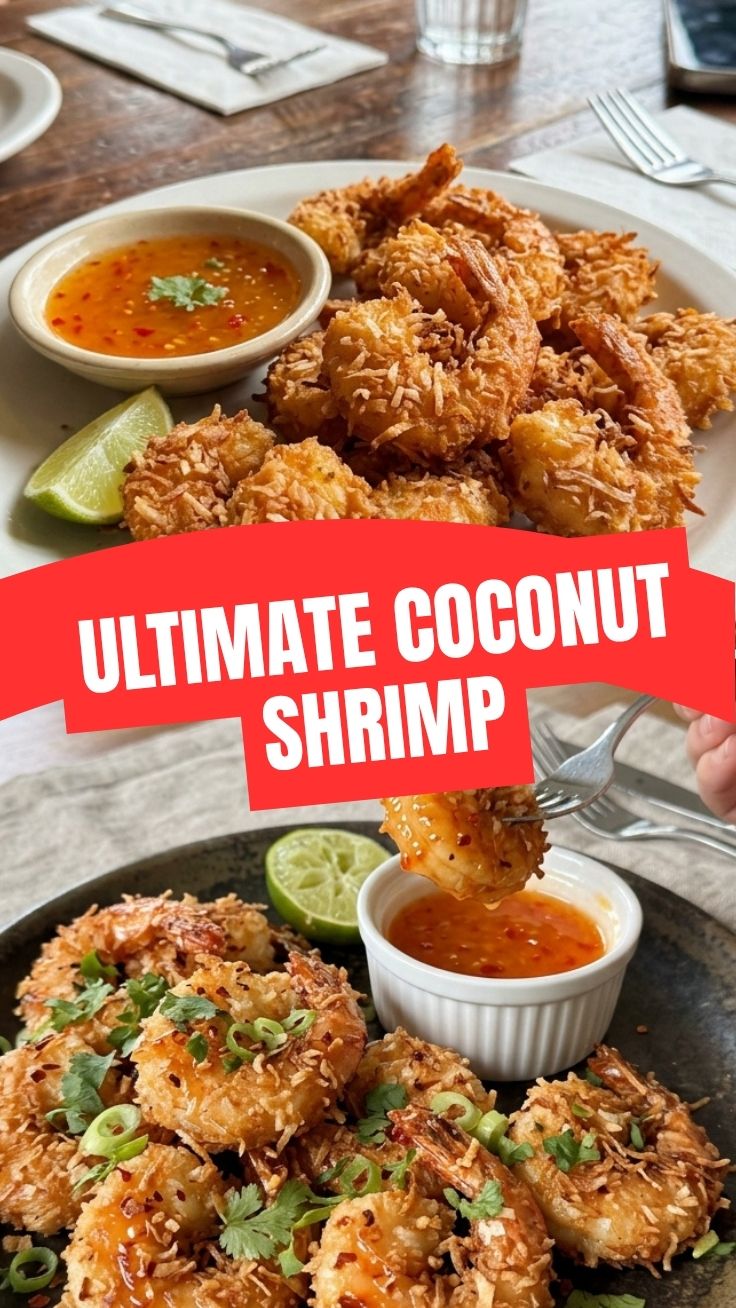
Have you ever craved that perfect crunch at home—the golden, juicy bite with a whisper of tropical sweetness—only to settle for a soggy takeout version? You deserve better, and so do your taste buds. Preparing this crowd-pleasing dish yourself not only guarantees fresh, restaurant-quality results but also lets you control every ingredient, from oil quality to seasoning. Whether you’re hosting a dinner party or treating yourself on a weeknight, learning how to make Coconut Shrimp at home transforms a simple seafood appetizer into a memorable culinary experience. This coconut shrimp recipe gives you the best of both worlds: a crispy, flavorful exterior and tender, succulent shrimp inside. Let’s dive into every detail so you can recreate this tropical favorite with confidence.
—
Ingredients & Kitchen Tools
For the Shrimp:
– 1 lb large shrimp (21–25 count) – peeled and deveined, tails on for easier handling.
– ½ cup all-purpose flour – helps the batter stick; substitute with almond flour for gluten-free.
– 2 large eggs – lightly beaten, act as a binder for the coating.
– 1 cup unsweetened shredded coconut – ensures a crisp, golden crust without added sugar.
– ½ cup panko breadcrumbs – adds extra crunch; use gluten-free panko if needed.
– 1 tsp salt – enhances overall flavor.
– ½ tsp black pepper – adds mild heat.
– ½ tsp garlic powder – optional but recommended for depth.
– Vegetable or coconut oil – for frying (coconut oil intensifies the tropical notes).
For the Dipping Sauce:
– ½ cup sweet chili sauce – classic pairing.
– 2 tbsp honey – balances sweetness.
– 1 tbsp lime juice – adds brightness.
– 1 tsp soy sauce – for umami depth.
Kitchen Tools:
– Large mixing bowls (3) – for flour, egg wash, and coconut mixture.
– Whisk or fork – for beating eggs.
– Deep skillet or heavy-bottomed pot – for even frying.
– Paper towels – for draining excess oil.
– Baking sheet with wire rack – keeps shrimp crispy while you finish frying.
– Meat thermometer – ensures oil reaches 350°F (ideal crispiness zone).
Optional Substitutions:
– Shrimp → chicken tenders or firm tofu (adjust cooking time).
– Panko → crushed pork rinds for keto-friendly version.
– Sweet chili sauce → mango-habanero jam for extra heat.
—
Prep Time & Cooking Schedule
– Prep Time: 20 minutes
– Cooking Time: 10 minutes (2–3 minutes per batch)
– Total Time: 30 minutes
– Resting Time: 5 minutes after frying (allows steam to escape, keeping coating crispy)
Planning Tip: This dish comes together quickly, so prep all ingredients and tools before you start. Heat oil while you bread the shrimp to save time. Serve immediately for peak crunch—this is not a dish that improves sitting around.
—
Step-by-Step Instructions
1. Set up your breading station. Arrange three shallow bowls: one with flour, one with beaten eggs, and one with a mix of shredded coconut, panko, salt, pepper, and garlic powder.
2. Pat shrimp dry. Use paper towels to remove excess moisture—this is the secret to a crispy coating that stays on.
3. Coat each shrimp. Dredge in flour (shake off excess), dip in egg, then press firmly into the coconut-panko mixture. Ensure even coverage. Place on a baking sheet.
4. Heat oil to 350°F (175°C). Use enough oil to submerge shrimp halfway. Test with a breadcrumb—it should sizzle immediately.
5. Fry in batches (4–5 shrimp at a time). Avoid overcrowding; it drops oil temperature and makes shrimp greasy. Cook 2–3 minutes per side until deep golden brown.
6. Drain and rest. Transfer to a wire rack over paper towels. Sprinkle with a pinch of salt while hot.
7. Make the dipping sauce. Whisk together sweet chili sauce, honey, lime juice, and soy sauce in a small bowl.
8. Serve immediately. Pair with fresh lime wedges and extra sauce on the side.
Pro Tips: For even cooking, use shrimp of similar size. If the coating falls off, your oil isn’t hot enough, or the shrimp is too wet. Resting on a wire rack—not paper towels alone—keeps the bottom from steaming. This Coconut Shrimp technique guarantees a crunchy shell every time, and following this coconut shrimp recipe step-by-step ensures restaurant-quality results.
—
Nutritional Benefits & Advantages
Shrimp is a lean protein powerhouse—low in calories (about 84 calories per 3 ounces) yet packed with selenium, vitamin B12, and omega-3 fatty acids that support heart and brain health. Unsweetened coconut adds fiber and healthy medium-chain triglycerides (MCTs), which may boost energy metabolism. Compared to deep-fried bar food, this version uses moderate oil and avoids heavy batters, making it a smarter indulgence. If you opt for air frying (see tips below), you can further reduce fat by 40–50% without sacrificing crunch.
—
Tips, Variations & Cooking Advice
– Flavor Twists: Add ½ tsp curry powder or smoked paprika to the coconut mix for a warm, aromatic kick.
– Air Fryer Method: Preheat to 400°F. Spray breaded shrimp with oil and cook 8–10 minutes, flipping halfway. No need to flip if using a single layer.
– Baking Version: Bake at 425°F on a greased wire rack for 12–14 minutes, turning once. Not as crunchy as fried, but still delicious and lighter.
– Gluten-Free: Use almond flour instead of all-purpose flour and certified gluten-free panko or crushed pork rinds.
– Dairy-Free: This recipe is naturally dairy-free; double-check your panko for dairy additives.
—
Common Mistakes to Avoid
| Mistake | Why It Happens | Solution |
|———|—————-|———-|
| Coating falls off while frying | Shrimp not dried properly or oil not hot enough | Pat shrimp super dry; maintain oil at 350°F |
| Soggy crust | Overcrowding pan or resting on paper towels alone | Fry in small batches; cool on wire rack |
| Burnt coconut | Oil too hot or cooking too long | Use thermometer; coconut browns fast—watch closely |
| Tough, rubbery shrimp | Overcooking | Shrimp cooks in 2–3 minutes total—remove as soon as golden |
| Greasy texture | Oil temperature dropped below 325°F | Let oil reheat between batches; never crowd the pan |
—
Storage & Meal Prep Tips
– Refrigeration: Store leftover shrimp in an airtight container with a paper towel to absorb moisture. They stay crispy for up to 2 days.
– Freezing: Place cooled shrimp in a single layer on a baking sheet, freeze until solid, then transfer to a freezer bag. They keep well for up to 1 month.
– Reheating (crucial!): Never microwave—it turns the coating rubbery. Instead, reheat in an air fryer at 375°F for 4–5 minutes or in a 400°F oven for 6–8 minutes on a wire rack.
– Meal Prep: Bread raw shrimp and freeze on a tray before frying. Fry straight from frozen, adding 1–2 extra minutes to cooking time.
—
Conclusion
Mastering this Coconut Shrimp is about small details—drying shrimp thoroughly, controlling oil temperature, and using a wire rack for drainage. When you follow this coconut shrimp recipe , you get a dish that’s crisp, golden, and bursting with tropical flavor without ever leaving your kitchen. Try it for your next game-day gathering, weeknight dinner upgrade, or meal prep experiment. Share your results in the comments—we’d love to see your golden batch. Craving more coastal-inspired recipes? Explore our collection of quick seafood appetizers next.
—
FAQs
1. Can I use frozen shrimp for this recipe?
Yes. Thaw them overnight in the fridge or under cold running water for 15 minutes. Pat extremely dry—frozen shrimp hold more moisture, which can cause the coating to slide off during frying.
2. My coconut burned before the shrimp was cooked. What went wrong?
Your oil was likely too hot (above 365°F). Coconut and panko brown fast. Keep oil at a steady 350°F, and cook shrimp just 2–3 minutes per side. If you see dark brown spots before the shrimp is opaque, lower the heat immediately.
3. What can I substitute for panko to make this keto-friendly?
Use crushed pork rinds (pork skins) or fine almond flour mixed with the shredded coconut. Both keep the carb count low while adding crunchy texture. Bake or air fry instead of deep-frying for best results.
4. How do I prevent the coating from falling off during baking?
Make sure every shrimp is fully coated in flour (shake off excess only), then egg, then the coconut mixture. Press the coating firmly onto the shrimp with your hands. Spray both sides generously with oil before baking—this helps the coating adhere and brown.
5. Can I make the dipping sauce ahead of time?
Absolutely. Combine sweet chili sauce, honey, lime juice, and soy sauce in a jar and refrigerate for up to 5 days. Stir well before serving. For a spicy version, add ½ teaspoon sriracha or a minced Thai bird chili.
Proven way to grow 5 Coconut Shrimp
Ingredients
Equipment
Method
- Prepare three shallow dishes: one with flour, one with beaten eggs, and one with a mixture of coconut flakes and panko breadcrumbs.
- Take each shrimp, dredge it in flour, then dip in egg, and finally coat thoroughly with the coconut-panko mixture.
- Heat oil in a deep skillet or pot to 350°F (175°C).
- Carefully place the coated shrimp into the hot oil, ensuring not to overcrowd the pan.
- Fry for 2-3 minutes per side, or until golden brown and cooked through.
- Remove the shrimp from the oil and place them on a wire rack lined with paper towels to drain excess oil.
- Serve the "grown" coconut shrimp immediately with your favorite dipping sauce.