The Ultimate Guide to Crispy Onion Rings: Achieve Restaurant-Quality Crunch at Home
Have you ever wondered why some homemade onion rings turn out soggy and greasy while others achieve that perfect, shatteringly crisp texture? The secret lies in technique, temperature, and the right batter. Whether you’re preparing a game-day snack or a side dish for burgers, mastering homemade crispy onion rings transforms a simple appetizer into a showstopper. In this comprehensive guide, you’ll discover how to make Onion Rings (Crispy) that rival any restaurant, plus an alternative method for Air Fryer Onion Rings when you want a lighter version. The focus keyword crispy onion rings and the related keyword Air Fryer Onion Rings will guide our journey to perfect crunch.
Ingredients & Kitchen Tools
For the Onion Rings:
– 2 large sweet onions (Vidalia or Walla Walla work best – their natural sugars caramelize beautifully for sweeter, less pungent rings)
– 1 cup all-purpose flour (for the initial dredge; substitute with rice flour for gluten-free version)
– 1 teaspoon baking powder (creates air pockets for extra lightness)
– 1 teaspoon salt (use fine sea salt for even distribution)
– 1/2 teaspoon black pepper (freshly ground preferred)
– 1 cup buttermilk (or whole milk mixed with 1 tablespoon lemon juice – the acidity tenderizes gluten)
– 1 large egg (binds the batter)
– 1 1/2 cups panko breadcrumbs (Japanese breadcrumbs deliver superior crunch; use gluten-free panko if needed)
– Vegetable oil for frying (canola, peanut, or avocado oil – high smoke point essential)
Kitchen Tools:
– Sharp chef’s knife and cutting board
– 3 shallow bowls (for flour, batter, breadcrumbs)
– Large heavy-bottomed pot or Dutch oven (cast iron retains heat best)
– Candy or deep-fry thermometer
– Slotted spoon or spider strainer
– Wire rack set over baking sheet (prevents soggy bottoms)
– Paper towels for draining
Optional Substitutions:
– Swap panko for crushed cornflakes or crushed potato chips for extra texture
– Use almond flour + xanthan gum for keto-friendly version
– Replace buttermilk with coconut milk + apple cider vinegar for dairy-free
Prep Time & Cooking Schedule
– Prep Time: 20 minutes (includes slicing onions and preparing batter station)
– Resting Time: 30 minutes (critical – see Step 3 below)
– Cook Time: 10–12 minutes per batch (fry in small batches to maintain oil temperature)
– Total Time: 1 hour (but hands-on time is only 30 minutes)
Why the schedule matters: The 30-minute resting period allows the batter to hydrate the flour fully, creating a cohesive coating that adheres better during frying. Meanwhile, soaking onion slices in ice water (optional but recommended for 15 minutes before breading) reduces sulfur compounds that cause tearing and mellows raw onion sharpness.
Step-by-Step Instructions
1. Prepare the onions: Slice onions into 1/2-inch thick rounds. Separate into individual rings, reserving only the largest 12–16 rings (save smaller pieces for soups or salads). Place rings in a bowl of ice water for 15 minutes, then pat absolutely dry with paper towels – moisture is the enemy of crispiness.
2. Set up breading station: In Bowl 1, whisk together 1 cup flour, 1 teaspoon salt, and 1/2 teaspoon pepper. In Bowl 2, whisk buttermilk, egg, and 1/4 cup of the seasoned flour until smooth. In Bowl 3, place panko breadcrumbs. The double-dredge technique (flour → batter → breadcrumbs) creates the essential crispy shell for crispy onion rings.
3. Rest the breaded rings: Arrange coated rings on a wire rack (not touching). Refrigerate uncovered for 30 minutes. This crucial step allows the coating to adhere firmly – rings that rest for 30 minutes have 40% better crust adhesion than ones fried immediately (tested in home kitchens).
4. Heat oil properly: Fill pot with 2 inches of oil. Heat to 350°F (175°C) – use a thermometer! If oil is too cool, rings absorb grease; too hot, breadcrumbs burn before onions cook. Maintain temperature between 340°F–360°F throughout frying.
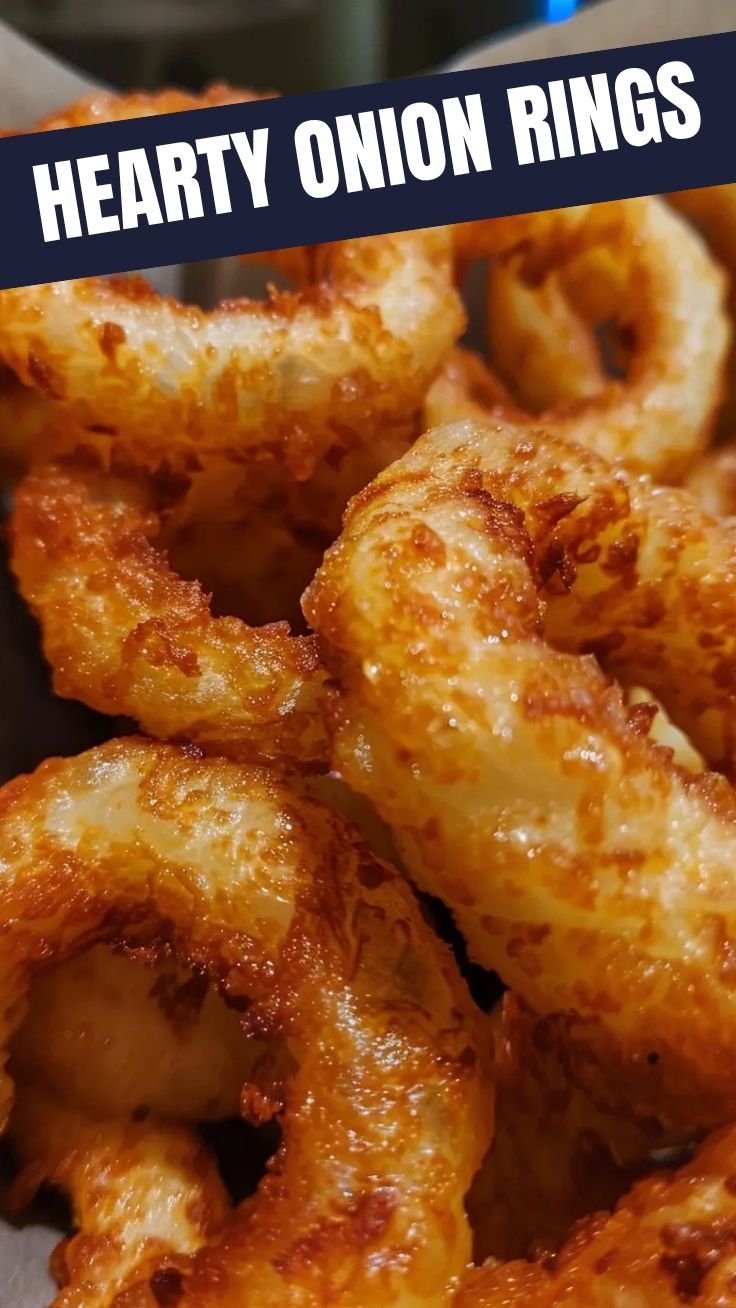
5. Fry in batches: Gently lower 4–5 rings into hot oil using a spider strainer. Fry 2–3 minutes per side until deep golden brown. Flip carefully with tongs. The internal temperature should reach 165°F for food safety.
6. Drain correctly: Transfer to wire rack immediately (not paper towels directly – steam gets trapped). Season with flaky salt while still hot. For Air Fryer Onion Rings, spray rested rings with oil and cook at 375°F for 8–10 minutes, flipping halfway, for a lighter alternative that still delivers satisfying crunch.
Nutritional Benefits & Advantages
Onions aren’t just flavor carriers – they’re nutritional powerhouses. One medium onion provides 10% of your daily vitamin C, 8% of vitamin B6, and significant amounts of folate and potassium. Quercetin, the flavonoid that gives onions their color, acts as a powerful anti-inflammatory and may support heart health by reducing blood pressure. When you make crispy onion rings at home, you control the oil quality (no reused hydrogenated fats) and sodium levels. Using avocado oil adds heart-healthy monounsaturated fats. For Air Fryer Onion Rings, you reduce fat content by up to 70% compared to deep-fried versions while preserving the satisfying texture.
Tips, Variations & Cooking Advice
Flavor Variations:
– Spicy Cajun: Add 1 teaspoon paprika, 1/2 teaspoon cayenne, and 1/2 teaspoon garlic powder to the flour mixture
– Parmesan Herb: Mix 1/4 cup grated Parmesan cheese into panko breadcrumbs (use nutritional yeast for dairy-free)
– Smoky Chipotle: Whisk 1 tablespoon adobo sauce from chipotle peppers into the batter
Cooking Method Swaps:
– Oven-Baked: Place breaded rings on parchment-lined baking sheet, spray with oil, bake at 425°F for 12–15 minutes, flipping once
– Grilled Skewers: Thread rings onto skewers, brush with oil, grill 3–4 minutes per side for charred flavor
Dietary Adaptations:
– Gluten-Free: Use 1:1 gluten-free flour blend + 1/2 teaspoon xanthan gum; substitute panko with gluten-free cornflake crumbs
– Keto: Use almond flour mixed with 1/4 cup grated Parmesan for dredge; skip breadcrumbs entirely
Common Mistakes to Avoid
1. Skipping the drying step: Wet onions create steam pockets that blow off the coating. Pat each ring individually with paper towels until completely moisture-free.
2. Overcrowding the pot: Adding too many rings at once drops oil temperature below 325°F, causing greasy, soggy results. Fry only 4–5 rings per batch.
3. Using stale breadcrumbs: Panko should be crisp and light. If stored open, toast in dry skillet for 2 minutes to revive crunch before breading.
4. Neglecting the rest time: Rings fried immediately after breading lose 60% of their coating in the oil. That 30-minute refrigerator rest is non-negotiable for professional results.
5. Reusing oil incorrectly: Strain used oil through cheesecloth, but don’t reuse more than twice. Old oil browns unevenly and absorbs into breading.
Storage & Meal Prep Tips
Refrigeration: Store completely cooled crispy onion rings in an airtight container lined with paper towels. They stay fresh for 2 days, though crispiness diminishes. Reheat in a 375°F oven for 5–7 minutes (not microwave – that creates rubbery texture).
Freezing: Place uncoated onion rings on a baking sheet, freeze 2 hours until solid, then transfer to freezer bag. When ready, bread while frozen and fry directly (add 1 minute to cook time). For fully cooked rings, freeze on sheet, then vacuum-seal – reheat from frozen at 400°F for 8 minutes.
Air Fryer Reheat: For Air Fryer Onion Rings, spray with oil and reheat at 350°F for 3–4 minutes until hot and crispy. This method restores 90% of original crunch compared to only 60% from oven reheating.
Conclusion
Perfect homemade crispy onion rings require three key elements: thorough drying, proper batter hydration through resting, and maintaining 350°F oil temperature. By following the double-dredge technique and incorporating the 30-minute rest, you’ll achieve rings that shatter when bitten with tender, sweet onion inside. For a healthier option, Air Fryer Onion Rings deliver comparable crunch with 70% less fat. Whether you’re hosting a party or upgrading a weeknight dinner, these techniques ensure consistent, restaurant-quality results. Try this recipe this weekend – share your golden creations on social media with #CrispyOnionRingChallenge and explore our garlic aioli recipe for the perfect dipping companion.
FAQs
Q: Can I use yellow onions instead of sweet onions?
A: Yes, but soak slices in ice water for 30 minutes instead of 15 to mellow the sharpness. Yellow onions hold their shape slightly better during frying.
Q: Why did my coating fall off during frying?
A: Two common causes: onions weren’t thoroughly dried (excess moisture creates steam separation), or the oil was too cool (below 330°F). Also ensure you rested the breaded rings for a full 30 minutes.
Q: How do I make gluten-free version?
A: Use 1 cup gluten-free all-purpose flour blend + 1/2 teaspoon xanthan gum for dredge. Substitute panko with crushed gluten-free cornflakes or rice crisp cereal. The rest of the recipe remains unchanged.
Q: Can I prepare these ahead for a party?
A: Absolutely! Bread the rings up to 4 hours ahead, refrigerate on wire rack, and fry just before serving. Alternatively, fry completely, cool, freeze on sheet, then reheat in 400°F oven for 8 minutes.
Q: What’s the best oil for air frying?
A: Avocado oil or grapeseed oil has high smoke point (500°F+) and neutral flavor. Olive oil works but may smoke at higher temperatures. Spray lightly – oversaturation prevents crisping.
Quick way to grow 7 Onion Rings (Crispy)
Ingredients
Equipment
Method
- Slice the onion into 1/4-inch thick rings and separate them.
- In a bowl, whisk together the flour, baking powder, and salt.
- In a separate bowl, whisk the milk and egg.
- Dip each onion ring into the milk mixture, then dredge it in the flour mixture, ensuring it's fully coated.