The Ultimate Guide to Perfecting Hummus (Homemade) at Home
Have you ever wondered why store-bought hummus never quite captures that creamy, velvety texture and fresh nutty flavor you get at your favorite Mediterranean spot? The answer lies in a simple secret: making Hummus (Homemade) allows you to control every variable, from the quality of the chickpeas to the amount of tahini. Not only does homemade hummus taste superior, but it also lets you skip unnecessary preservatives and adjust the seasoning to your exact palate. In this post, I’ll walk you through a foolproof Hummus Recipe that delivers restaurant-quality results every time, using techniques that transform humble chickpeas into a silky dip you’ll want to eat by the spoonful.
Preparing hummus from scratch might sound intimidating, but it’s surprisingly straightforward once you understand a few key principles. We’ll cover ingredient choices, temperature control, and texture cues so that even a beginner can achieve that signature smoothness. Let’s dive into the kitchen and create something truly special.
—
Ingredients & Kitchen Tools
Essential Ingredients
– Canned or dried chickpeas: Canned are convenient; dried require overnight soaking and longer cooking.
– Tahini: A rich sesame paste; look for one that’s well-stirred to avoid bitterness.
– Lemon juice: Freshly squeezed for brightness; bottled lacks complexity.
– Garlic: 1–2 cloves; adjust to taste, roast for a milder flavor.
– Extra-virgin olive oil: Use high-quality for drizzling; cheaper oils can taste harsh.
– Ground cumin: Optional but authentic; adds earthy warmth.
– Salt: Fine sea salt dissolves easily; kosher salt can be substituted.
– Ice water: The secret to a fluffy, aerated texture.
– Baking soda (if using dried chickpeas, plus a pinch for peeling).
Kitchen Tools
– Food processor or high-speed blender (immersion blender works but yields less smooth texture).
– Measuring cups and spoons.
– Small bowl for peeling chickpeas (optional but recommended).
– Spatula for scraping sides.
– Fine-mesh strainer for rinsing.
Optional Substitutions
– Can’t find tahini? Substitute with sunflower seed butter (nut-free) or cashew butter.
– Garlic-sensitive? Use garlic powder or infused oil.
– Diet adjustment: Omit olive oil in the base for a lower-fat version; still drizzle on top.
—
Prep Time & Cooking Schedule
– Prep time: 15 minutes (if using canned chickpeas) or 10 hours + (if using dried, including soaking and cooking).
– Cooking time (dried chickpeas): 1–2 hours until tender.
– Resting time: 10–30 minutes after blending for flavors to meld (optional but recommended).
– Total active time: 15–20 minutes.
Plan ahead: If using dried chickpeas, soak them overnight with 1 teaspoon baking soda to soften skins. Cook until very tender to achieve ultimate creaminess. For a quick weeknight hummus, canned chickpeas work beautifully—just ensure you heat them (as we’ll cover).
—
Step-by-Step Instructions
1. Prepare the chickpeas: If using canned, drain and rinse them. Place in a saucepan, cover with fresh water, and simmer for 10–15 minutes. This loosens the skins and makes the hummus silkier. (Optional: Peel the skins off by rubbing chickpeas between your hands—this yields ultra-smooth texture.) For dried chickpeas, cook until very soft, then peel if desired.
2. Make the tahini base: In a food processor, blend ⅓ cup tahini with ¼ cup lemon juice and 1 small garlic clove. Process for 1 minute until the mixture thickens and turns pale. This “whipped” tahini step is crucial for a creamy, non-bitter base.
3. Add chickpeas: Scrape down sides. Add the drained chickpeas and ½ teaspoon salt (plus cumin if using). Pulse a few times, then process continuously for 1 minute. Stop and scrape.
4. Adjust consistency: With the processor running, drizzle in 2–3 tablespoons ice water and 1 tablespoon olive oil. Process for 2 minutes until extremely smooth. Add more water by the tablespoon if needed; the hummus should be light and fluffy, not thick. Taste and adjust salt, lemon, or garlic.
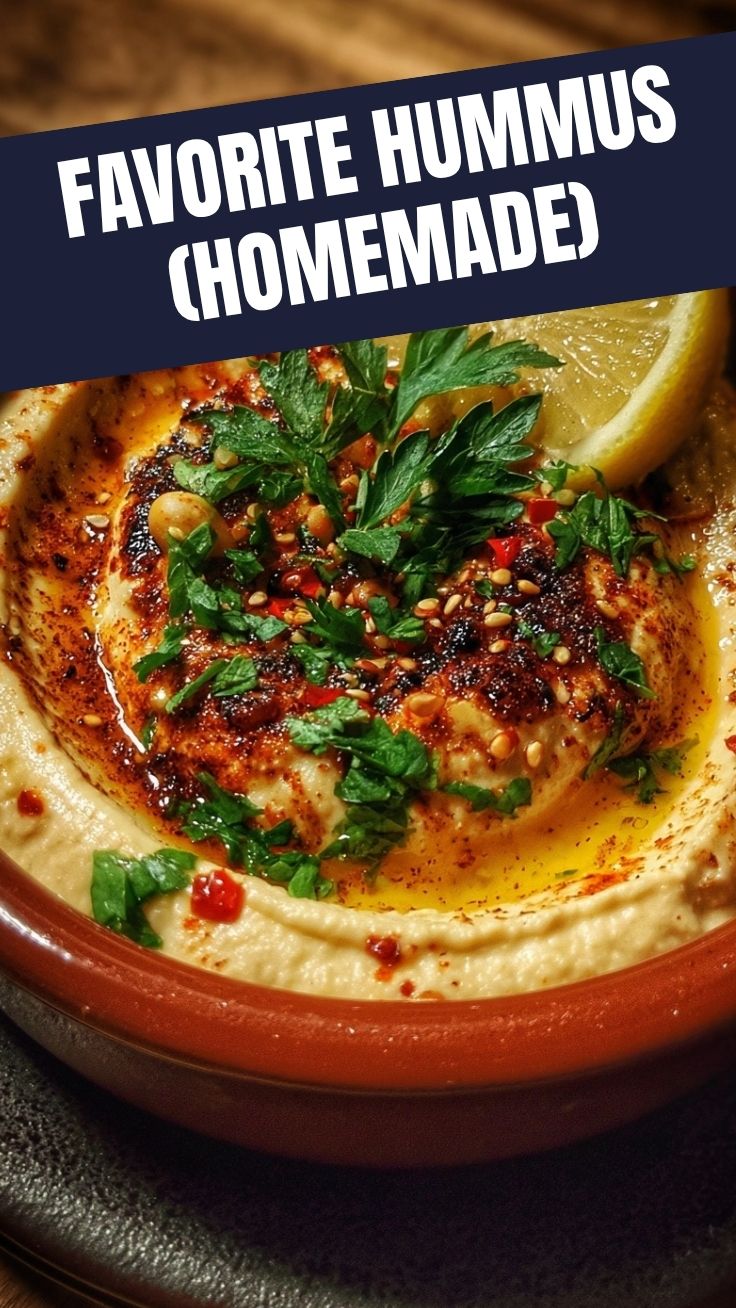
5. Finish and serve: Transfer to a bowl, create a well with a spoon, drizzle with olive oil, and sprinkle with paprika, sumac, or fresh parsley. Enjoy immediately. This Hummus (Homemade) is the star of any meze platter, and mastering this Hummus Recipe will earn you compliments from every guest.
—
Nutritional Benefits & Advantages
Hummus is a nutritional powerhouse. Chickpeas provide plant-based protein and fiber, supporting digestive health and blood sugar regulation. Tahini contributes healthy fats, calcium, and vitamin E, making this dip heart-friendly. A typical ¼-cup serving contains about 100 calories, 5g protein, and only 2g sugar. Additionally, homemade hummus avoids the excess sodium and preservatives found in commercial brands. The olive oil drizzle adds antioxidants and anti-inflammatory compounds. If you’re following a gluten-free, dairy-free, or vegan diet, this dish fits perfectly.
—
Tips, Variations & Cooking Advice
– Flavor twists: Roast garlic before adding for sweetness; blend in roasted red peppers, sun-dried tomatoes, or fresh herbs like cilantro or basil.
– Spice it up: Add a pinch of cayenne or smoked paprika; swirl in harissa for North African flair.
– Ingredient swaps: Replace chickpeas with black beans or cannellini beans for a different taste and color.
– Dietary adaptions: For oil-free hummus, skip the olive oil and use extra water or aquafaba (chickpea liquid) for creaminess.
– Textural upgrade: For extra smoothness, pass blended hummus through a fine-mesh sieve.
– Portion control: This recipe makes about 2 cups; double it for a party.
—
Common Mistakes to Avoid
– Skipping the tahini whipping step: Blending tahini with lemon and garlic first prevents a gritty, split texture.
– Using cold chickpeas straight from the can: Cold chickpeas thicken the hummus and lead to a stiff result. Always warm them.
– Adding too much garlic raw: Raw garlic can be harsh; start with one clove and taste before adding more.
– Over or under-seasoning: Hummus needs more salt than you think; taste at the end and adjust.
– Processing too little: A 2-minute continuous blend after adding water gives that silky, mousse-like consistency.
—
Storage & Meal Prep Tips
– Refrigeration: Store hummus in an airtight container for up to 5 days. To prevent a dry skin, press plastic wrap directly onto the surface.
– Freezing: Hummus freezes beautifully for up to 3 months. Portion into ziplock bags or small containers; thaw overnight in the fridge.
– Reheating: Bring to room temperature or gently microwave at 50% power in 30-second bursts; stir well. Drizzle fresh olive oil on top to revive flavor.
– Meal prep: Make a double batch over the weekend; use as a spread for sandwiches, a dip for vegetables, or a base for grain bowls.
—
Conclusion
Making Hummus (Homemade) at home is not only rewarding but also allows you to customize it to your dietary needs and taste preferences. Whether you follow this Hummus Recipe to the letter or experiment with your own variations, the result will always be healthier and more delicious than anything from a tub. I encourage you to try this method at least once—you’ll never go back to store-bought. Share your results in the comments, and don’t forget to check out our Mediterranean quinoa bowl for a perfect pairing!
—
FAQs
1. Can I make hummus without tahini?
Yes, though the flavor will be different. Use sunflower seed butter, cashew butter, or even peanut butter as alternatives. The hummus will be less nutty but still creamy.
2. How do I fix hummus that is too thick?
Gradually add warm water or aquafaba (chickpea liquid) while blending. Process for an additional minute until the desired consistency is reached.
3. Why is my hummus bitter?
Bitterness typically comes from tahini that is old or not stirred properly. Also, over-processing garlic can release bitter compounds. Use fresh tahini and roasted garlic if needed.
4. Can I use dried chickpeas without soaking?
You can, but it will require significantly longer cooking time (2–3 hours). Soaking overnight reduces cooking time and helps soften skins for smoother hummus.
5. How long does homemade hummus last?
In the refrigerator, up to 5 days in an airtight container. You can freeze it for up to 3 months. Let it come to room temperature before serving for best texture.
—
This post contains affiliate links to referenced ingredients; thank you for supporting our blog.
Quick way to grow your Hummus (Homemade) garden
Ingredients
Equipment
Method
- Combine chickpeas, tahini, lemon juice, minced garlic, and cumin in a food processor, then process until smooth.
- While processing, slowly add cold water one tablespoon at a time until the desired creamy consistency is achieved.
- Season the hummus with salt to taste and pulse a few more times to incorporate.
- Transfer the homemade hummus to a serving bowl.
- Drizzle with a little olive oil and sprinkle with paprika and fresh chopped parsley, if desired.
- Serve immediately with pita bread, fresh vegetables, or your favorite dippers.