The Ultimate Guide to Perfect Pickled Red Onions: A Tangy Game-Changer
Have you ever noticed how a single vibrant garnish can completely transform a meal? That’s the magic of Pickled Red Onions. This simple, tangy condiment adds a burst of color, crunch, and acidity that cuts through rich foods like tacos, burgers, or rice bowls. Making them at home isn’t just economical; it puts you in full control of the flavor profile. Unlike store-bought versions, homemade Pickled Red Onions allow you to customize the sweetness, spice, and tang to perfectly match your palate. The secret weapon behind this transformation is the pickling brine, a simple yet powerful solution of vinegar, water, salt, and sugar that works its magic in minutes. Whether you want a Mexican-inspired taqueria flavor or a subtle Asian twist, mastering this basic technique opens up a world of culinary possibilities. Let’s dive into how you can make this vibrant staple your new favorite kitchen hack.
Ingredients & Kitchen Tools
To get started, you need surprisingly few items. Here’s what you’ll need for a perfect batch:
Ingredients:
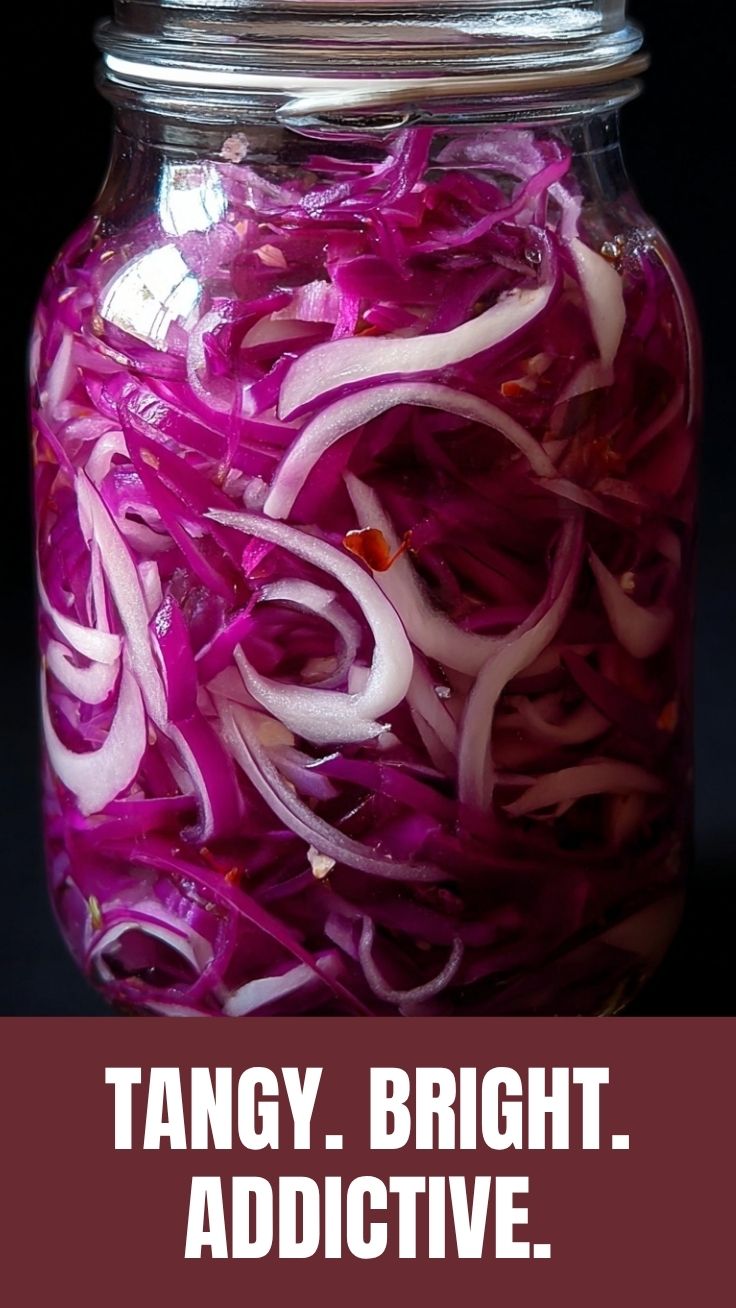
– 2 large Red Onions: The star of the show. Look for firm, heavy ones without soft spots. Slice them thinly for the best texture and quick absorption.
– 1 cup White Vinegar: Provides a sharp, clean base. Apple cider vinegar works well for a fruitier note.
– 1 cup Water: Filtered water is best for a neutral flavor and to prevent discoloration.
– 1 tablespoon Granulated Sugar: Balances the acidity. Use honey or maple syrup for a complex sweetness.
– 1 tablespoon Kosher Salt: Crucial for drawing out moisture and enhancing overall flavor. Avoid fine table salt unless you measure less.
– Optional Spices: 1 tsp black peppercorns, 2 cloves garlic (smashed), 1 bay leaf, or 1 tsp red pepper flakes for heat.
Kitchen Tools:
– Chef’s Knife & Cutting Board: For uniform slicing.
– Wide-Mouth Glass Jar (16 oz): Mason jars work perfectly. Always sterilize them with hot water first.
– Small Saucepan: For heating the pickling brine.
– Measuring Cups & Spoons: For precision.
Prep Time & Cooking Schedule
The beauty of this recipe is that you don’t need hours. Active Prep Time is just 10 minutes, mostly spent slicing onions. Cooking Time for the brine is roughly 5 minutes. However, the Resting Time is where the flavor truly develops.
– Quick Pickle: Ready in 30 minutes (after the brine cools). Enjoy a sharp, crunchy result.
– Optimal Pickle: Let it sit in the fridge for 24 hours. The flavors mellow and meld beautifully, resulting in a softer, more rounded tang.
– Meal Prep: You can make a double batch on Sunday for a week of vibrant salads, sandwiches, and grain bowls.
Step-by-Step Instructions
This process is almost too easy, yet the results are restaurant-quality. Follow these steps for the best Pickled Red Onions you’ve ever tasted.
1. Prep the Onions: Peel the red onions and slice them thinly using a knife or mandolin. Aim for 1/8-inch thick rings or half-moons. Place them in your clean glass jar.
2. Make the Brine: In a small saucepan, combine the water, vinegar, sugar, salt, and any optional spices. Bring this mixture to a simmer over medium heat, stirring occasionally until the sugar and salt completely dissolve. Do not let it boil vigorously, as this can drive off too much vinegar.
3. Pour the Brine: Once the sugar and salt are dissolved, the pickling brine is ready. Carefully pour the hot liquid over the sliced onions in the jar. Press the onions down with a spoon to ensure they are fully submerged.
4. Cool and Seal: Let the jar cool to room temperature on the counter. This usually takes about 20-30 minutes. Once cool, screw on the lid tightly and transfer the jar to the refrigerator.
5. Test for Readiness: For a quick pickle, taste after 30 minutes. For the best texture and flavor depth, wait 24 hours. The longer they sit, the more the onions absorb the tangy, sweet, and savory notes of the brine.
Nutritional Benefits & Advantages
Don’t let the “garnish” reputation fool you. Pickled Red Onions are packed with surprising health benefits:
– Low Calorie: A serving delivers massive flavor for virtually zero calories.
– Antioxidants: Red onions are rich in quercetin and anthocyanins (which give them their vibrant color), helping to fight inflammation and oxidative stress.
– Gut Health: While this is a quick pickle (not a lacto-ferment), the vinegar-based brine can aid digestion and help balance stomach acid levels. Research suggests the acetic acid in the brine may help stabilize blood sugar after meals.
– Electrolytes: The salt provides essential sodium and electrolytes, making them a great topping for a post-workout meal or a hydrating snack.
– Probiotic Potential: If you skip the boiling step and use a raw vinegar like Bragg’s, you can introduce beneficial bacteria for a slight probiotic boost, though for safety and long-term storage, we recommend the traditional hot-brine method.
Tips Variations & Cooking Advice
Once you master the base technique, the world is your oyster. Here are some powerful variations to explore:
– Mexican Taqueria Style: Use white vinegar, add a sliced jalapeño, and a pinch of Mexican oregano. Perfect for tacos and burritos.
– British Pub Style: Use malt vinegar and a teaspoon of brown sugar for a rich, toasty flavor that pairs beautifully with fish and chips.
– Asian Fusion: Substitute rice vinegar for half the white vinegar, and add a slice of fresh ginger and a star anise. Ideal for ramen bowls and banh mi sandwiches.
– Mediterranean Twist: Use red wine vinegar and add fresh dill or a cinnamon stick. Great on falafel and gyros.
– Sweet & Spicy: Bump the sugar to 1.5 tablespoons and add a habanero pepper slice for a fiery kick.
– Dietary Needs: This recipe is naturally gluten-free, vegan, and dairy-free. Always check your vinegar labels to ensure they are certified gluten-free if you have celiac disease.
Common Mistakes to Avoid
Even simple recipes can go wrong. Here’s how to nail it every time:
– Thick Slices: If you cut the onions over 1/4 inch thick, the brine won’t penetrate effectively. You’ll end up with a crunchy outside but a raw, harsh onion flavor inside. Solution: Use a mandolin slicer for uniform, paper-thin cuts.
– Forgetting to Salt: Salt is not just for taste; it’s essential for drawing water out of the onions via osmosis, allowing the brine to infuse them properly. Solution: Don’t reduce the salt by more than half.
– Using a Reactive Container: Storing highly acidic pickled vegetables in aluminum or copper bowls can react with the metal, creating off-flavors and potential toxins. Solution: Always use glass, ceramic, or food-grade plastic.
– Skipping the Cooling Step: Placing a hot glass jar directly into the fridge can cause thermal shock and shatter the glass. Solution: Always let the jar cool completely on the counter first.
– Overcooking the Brine: Boiling the brine aggressively can evaporate the vinegar, unbalancing the ratio and weakening the preserving power. Solution: Just bring it to a gentle simmer until the salt and sugar dissolve.
Storage & Meal Prep Tips
– Refrigeration: Pickled Red Onions are best stored in an airtight glass jar in the refrigerator. They will maintain peak quality for 3 to 4 weeks. They are safe to eat beyond this, but the texture will become very soft and the flavor will fade.
– Freezing: Freezing is not recommended. The water content in the onions forms ice crystals that rupture the cell walls, resulting in a mushy, unappetizing texture upon thawing.
– Reusing the Brine: Once you’ve eaten the first batch, the leftover pickling brine is liquid gold! You can reuse it to quick-pickle other vegetables like sliced cucumbers, carrots, or radishes. Just bring it to a boil again before pouring it over new veggies to kill any bacteria.
– Meal Prep Idea: Store a jar in your work fridge. Add a few slices to your lunchtime sandwich, salad, or grain bowl for an instant flavor upgrade without any extra morning effort.
Conclusion
From taco Tuesdays to elevating a simple avocado toast, Pickled Red Onions are a versatile staple worth mastering. The beauty lies in the simplicity of the pickling brine and the immediate gratification it provides. I encourage you to make a batch tonight—not only will you save money, but you will also have a delicious, healthy condiment ready to elevate any meal. Give it a try and experience the tangy transformation yourself!
FAQs
1. Can I use apple cider vinegar instead of white vinegar?
Absolutely! Apple cider vinegar (ACV) adds a slightly fruity, milder flavor. Your Pickled Red Onions will have a less sharp, more mellow tang. It works beautifully in Mexican and American-style dishes.
2. Why are my pickled red onions turning a weird gray-blue color?
This is a completely harmless chemical reaction! Red onions contain anthocyanins, which are pH-sensitive. When they mix with the alkaline minerals in your tap water or salt, they can turn bluish-green. Solution: Use filtered or distilled water. Adding a bit more vinegar will usually restore the bright pink color.
3. Can I reuse the pickling brine?
Yes, once! After you finish the first batch, bring the leftover brine to a rolling boil again. Pour it over a fresh batch of sliced onions. The second batch will be slightly less potent but still delicious. Discard the brine after the second use.
4. How long do they need to sit before eating?
For a quick fix, they are ready in 30 minutes (cooling time included). However, for the best texture and flavor integration, we recommend waiting 24 hours. The bite mellows, and the onions become perfectly crisp-tender.
5. Do I have to boil the brine?
Yes, for standard quick pickling. Boiling the pickling brine ensures the salt and sugar dissolve perfectly and helps to slightly soften the onions, allowing them to absorb flavor faster. It is also a crucial step for food safety if you plan to store them for more than a week.
Pickled Red Onions
Ingredients
Equipment
Method
- Thinly slice the red onions using a mandoline or a sharp knife and pack them tightly into clean pint-sized jars.
- In a medium saucepan, combine apple cider vinegar, water, sugar, and salt; bring the mixture to a boil, stirring until the sugar and salt dissolve.
- Pour the hot pickling liquid over the sliced onions in the jars, ensuring all onions are submerged, and add optional peppercorns or garlic slices to each jar.
- Seal the jars and allow them to cool completely at room temperature, then transfer them to the refrigerator and let them pickle for at least 5 days before serving.