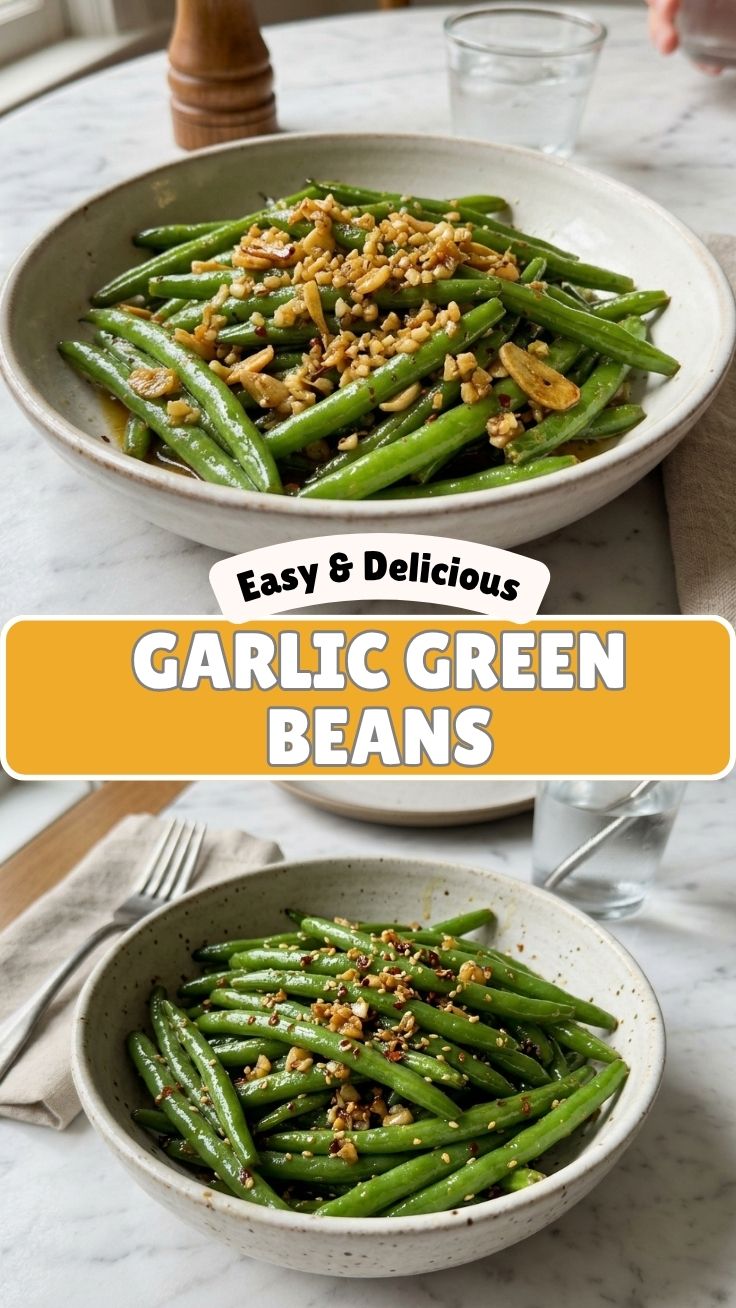
The Ultimate Garlic Green Beans Recipe: A Crispy, Flavorful Side Dish
Can a simple side dish steal the show at dinner? Absolutely. When you master Garlic Green Beans, you unlock a versatile, nutrient-packed companion that transforms any meal. Whether sautéed, roasted, or stir-fried, these beans deliver crunch and savory depth in minutes. But what sets this recipe apart? It’s the balance of crisp-tender texture and aromatic garlic, achieved with techniques that prevent sogginess and burnt cloves. You might also explore Sichuan Garlic Green Beans for a spicy twist—but today, we’re focusing on a classic method that highlights fresh garlic green beans with minimal fuss. Preparing this dish at home saves money, avoids preservatives, and lets you control flavor intensity. Sichuan garlic green beans share a similar foundation but use chili and Szechuan peppercorns for heat; our version prioritizes pure, elegant flavor. Ready to elevate your weeknight cooking? Let’s dive in.
Ingredients & Kitchen Tools
– Fresh green beans (1 lb): Trim ends; look for bright, firm pods without blemishes.
– Garlic cloves (4–5, minced): Use fresh for pungent aroma; pre-minced jars may burn faster.
– Olive oil (2 tbsp): High smoke point for sautéing; avocado oil works as a substitute.
– Salt (½ tsp): Enhances natural sweetness; sea salt or kosher salt preferred.
– Black pepper (¼ tsp): Freshly ground for bite; optional if you prefer mild flavor.
– Red pepper flakes (¼ tsp, optional): Adds subtle heat; skip for kid-friendly versions.
Kitchen Tools: Large skillet or wok (non-stick or stainless steel), sharp chef’s knife, cutting board, colander, paper towels for drying, and wooden spoon or tongs.
Optional Substitutions:
– Replace olive oil with butter for richer taste (add ghee for dairy-free).
– Use frozen green beans (thaw and dry thoroughly) if fresh unavailable—cook 1–2 minutes less.
– Swap garlic with shallots or leeks for milder notes.
Prep Time & Cooking Schedule
– Prep Time: 10 minutes (wash, trim, mince garlic).
– Cook Time: 8–10 minutes total (blanch 2 minutes, sauté 6–8 minutes).
– Resting Time: None—serve immediately for optimal crunch.
Timing tip: Prepare garlic and beans while preheating the skillet. Blanching (brief boiling) ensures even cooking and vibrant color. If you’re batch-cooking, blanch beans ahead, shock in ice water, and store for up to 2 days. The actual sauté happens quickly, so have all ingredients ready before turning on the heat. This schedule makes garlic green beans a last-minute lifesaver—perfect for busy weeknights when you need a healthy side in under 20 minutes.
Step-by-Step Instructions
1. Blanch the beans: Bring a large pot of salted water to a boil. Add green beans for 2 minutes until bright and slightly tender. Transfer to an ice bath to halt cooking; drain and pat dry with paper towels. This step removes bitterness and locks in color.
2. Heat the skillet: Over medium-high heat, add olive oil. Wait until it shimmers but doesn’t smoke—about 30 seconds.
3. Sauté garlic: Add minced garlic and optional red pepper flakes. Stir constantly for 30 seconds until fragrant but not browned.
4. Cook beans: Spread green beans in a single layer. Cook undisturbed for 2 minutes to develop slight char. Toss and repeat for 4–5 minutes until tender-crisp.
5. Season: Sprinkle salt and pepper. For a bolder profile, toss with a splash of soy sauce or a squeeze of lemon.
6. Finish: Remove from heat immediately. Serve hot as a side or incorporate into grain bowls.
Tip: For a variation, try Sichuan Garlic Green Beans nutty toasted sesame oil and chili crisp in step 3—this adds complexity while keeping the core technique intact. The key is not overcrowding the pan; cook in batches if needed to maintain heat. Adjust salt gradually; beans absorb seasoning quickly. This method ensures garlic green beans stay crisp, not soggy, and the Sichuan garlic green beans style offers a spicy alternative for adventurous palates.
Nutritional Benefits & Advantages
A 1-cup serving of green beans provides approximately 30 calories, 2 grams of fiber, and 10% of the daily vitamin C requirement. Garlic contributes allicin, a compound linked to immune support and reduced inflammation. Combined with heart-healthy olive oil, this dish supports digestion and blood sugar regulation. Green beans are also rich in vitamin K (essential for bone health) and folate. Compared to roasted potatoes or creamy casseroles, garlic green beans offer a low-calorie, high-nutrient option that fits keto, paleo, and vegan diets. The quick cooking preserves water-soluble vitamins, making it a superior choice over boiled sides. Regularly including such vegetables can lower LDL cholesterol and improve satiety—a win for weight management.
Tips Variations & Cooking Advice
– Flavor Twists: Add toasted almonds, pine nuts, or sesame seeds for crunch. Sprinkle Parmesan (if not vegan) in the last minute.
– Alternative Methods:
– Oven-roast at 425°F for 12–15 minutes (toss halfway) for deeper caramelization.
– Air-fry at 375°F for 8–10 minutes for extra crispness without oil.
– Dietary Adaptations: Use tamari instead of soy sauce for gluten-free; replace butter with coconut oil for dairy-free.
– Portion Control: For 4 servings, double ingredients—but season in stages to avoid saltiness.
– Spice Level: Increase red pepper flakes or add a dash of smoked paprika for warmth.
Experiment with textures: blanch longer (3 minutes) for softer beans, or skip blanching and sauté directly (add 2 minutes to cook time). Sichuan garlic green beans can be made by adding 1 tablespoon of Chinese black vinegar and ½ teaspoon Szechuan peppercorns—this variation pairs beautifully with rice or noodles.
Common Mistakes to Avoid
– Overcooking greens: They turn mushy. Stop when they’re tender-crisp—test a bean at the 6-minute mark.
– Burning garlic: Minced garlic cooks fast; add it after the beans have a slight head start, or use whole cloves and remove before serving.
– Wet beans: Excess moisture causes steaming instead of sautéing. Pat beans thoroughly after blanching.
– Skipping salt: Under-seasoning leaves beans flat. Season layered: a pinch in blanching water, plus final adjustment.
– Crowding pan: Too many beans lower heat, leading to uneven cooking. Cook in batches if needed.
Avoid these pitfalls to ensure garlic green beans retain their signature snap and robust garlic aroma every time.
Storage & Meal Prep Tips
Store leftovers in an airtight container in the refrigerator for up to 3 days. Reheat in a skillet over medium-high heat for 2–3 minutes with a splash of water to re-steam; avoid microwaving, which makes them limp. For meal prep, blanch beans ahead and store dry in a sealed bag for 2 days. Sauté fresh just before serving. Freezing is possible but changes texture—blanch, then shock, drain, and freeze in single layers on a baking sheet before transferring to a freezer bag. Thaw in the fridge and reheat quickly. Sichuan garlic green beans freeze similarly, though the chili oil may separate; stir well after thawing.
Conclusion
Mastering this dish means you’ll never settle for bland, overcooked vegetables again. The quick blanch-and-sauté technique locks in crunch, while garlic provides aromatic depth. Whether you stick with classic garlic green beans or explore the fiery notes of Sichuan garlic green beans, you’ve gained a healthy, versatile side that complements grilled meats, pasta, or grain bowls. I encourage you to try this recipe tonight—tweak the spices to match your mood and share your results in the comments. Explore related content like lemon-herb broccoli or ginger bok choy for more vegetable inspiration. Your taste buds will thank you.
FAQs
1. Can I use pre-minced garlic from a jar?
Fresh garlic provides the best flavor and texture. Jarred garlic often contains preservatives that burn faster, leading to bitterness. If in a pinch, add it late in cooking.
2. How do I make these beans dairy-free and gluten-free?
This recipe is naturally gluten-free and dairy-free as written. Ensure your soy sauce or chili crisp brands are certified gluten-free if using those variations.
3. My beans turned out mushy—what went wrong?
Overblanching or overcrowding the pan are common causes. Blanch for exactly 2 minutes, shock in ice water, and sauté in batches to maintain high heat.
4. Can I swap frozen beans for fresh?
Yes, but thaw and pat dry thoroughly. Reduce blanching time to 1 minute to prevent extra softness. Frozen beans often produce slightly less crisp results.
5. How do I adjust for a Sichuan version?
Add 1 tablespoon of chili bean paste and 1 teaspoon of Szechuan peppercorns when you add garlic. Finish with a teaspoon of Chinese black vinegar for authentic tang. Adjust heat to your tolerance.
Quick way to grow 4 garlic green beansGarlic Green Beans
Ingredients
Equipment
Method
- Trim the ends of the green beans and rinse them thoroughly under cold water.
- Mince the garlic cloves finely, preparing them for cooking.
- Heat olive oil in a large skillet or frying pan over medium heat.
- Add the minced garlic to the hot oil and sauté for about 30 seconds until fragrant, being careful not to burn it.
- Add the trimmed green beans to the skillet, stirring to coat them with the garlic and oil.
- Season with salt and black pepper, then cook for 8-12 minutes, stirring occasionally, until the green beans are tender-crisp.
- Serve immediately as a delicious and healthy side dish.