The Ultimate Seven Layer Dip Recipe: A Foolproof Guide to the Perfect Party Appetizer
Have you ever arrived at a gathering only to find the dip bowl empty and the chips scattered in defeat? That’s the power of a truly irresistible Seven Layer Dip. This iconic crowd-pleaser combines creamy, crunchy, spicy, and fresh elements in one glorious dish. Preparing it at home isn’t just about saving money—it’s about controlling freshness, customizing heat levels, and ensuring every layer shines. Whether you’re hosting Game Day or a casual fiesta, mastering this classic Tex-Mex appetizers staple will earn you legendary status among your guests. The beauty of a Seven Layer Dip lies in its simplicity, but getting each layer perfect requires attention to detail.
Ingredients & Kitchen Tools
For the Dip (serves 8-10):
– Refried beans (16 oz can): Use traditional or vegetarian. Warm slightly for easier spreading.
– Sour cream (1 cup): Full-fat provides best texture. Greek yogurt works as lighter substitute.
– Guacamole (1½ cups): Homemade or store-bought. Add lime juice to prevent browning.
– Salsa (1 cup): Choose chunky style. Drain excess liquid to avoid runny layers.
– Shredded cheddar or Mexican blend cheese (1½ cups): Sharp cheddar adds bold flavor.
– Black olives (½ cup, sliced): Adds briny contrast. Omit if not preferred.
– Green onions (⅓ cup, sliced): Fresh garnish for color and mild onion bite.
Optional additions: Diced tomatoes (drained), fresh cilantro, pickled jalapeños, hot sauce.
Essential Tools:
– 9×9 or 8×8 glass dish (clear dish shows off layers)
– Spatula for even spreading
– Small bowls for pre-prepping layers
– Sharp knife and cutting board
Prep Time & Cooking Schedule
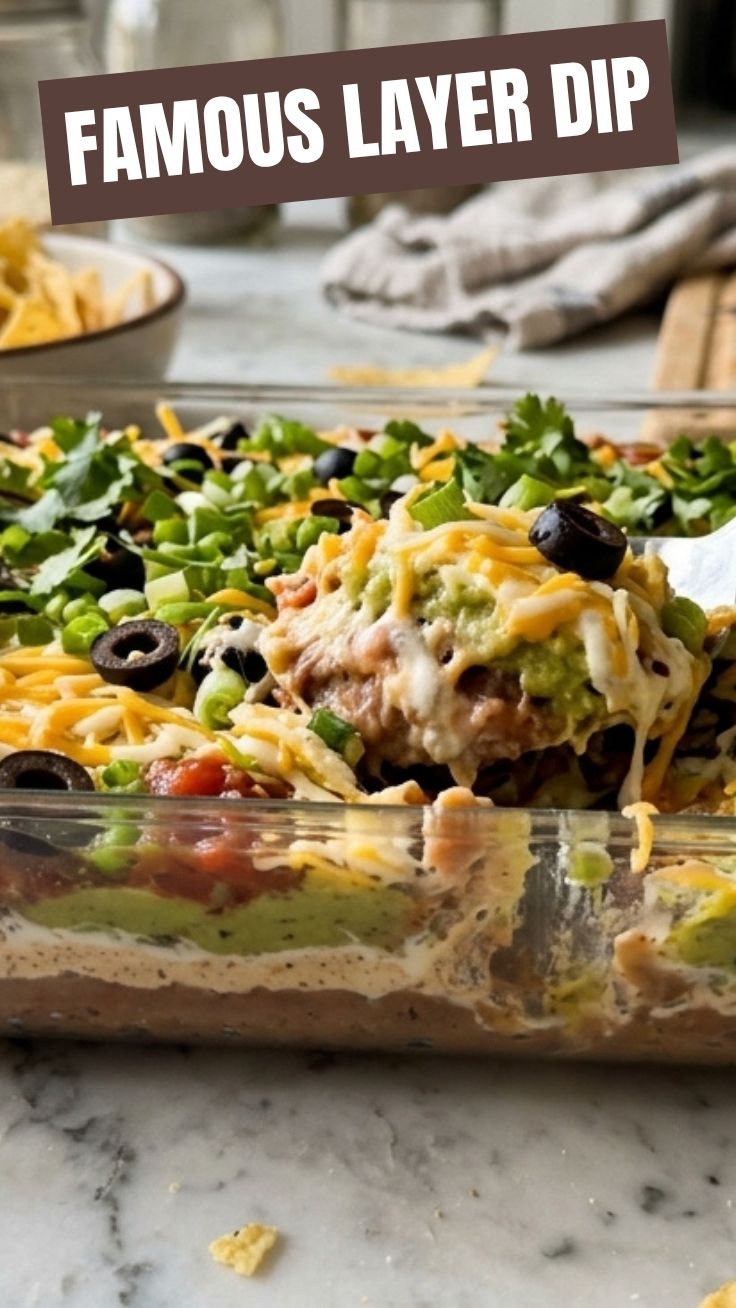
Total time: 30 minutes active prep
No cooking required (except warming beans if desired)
Best timeline for serving:
– 15 minutes: Prep all ingredients and chop vegetables
– 10 minutes: Assemble layers in dish
– 5 minutes: Final garnishes
– Chill 30 minutes before serving (optional, helps layers set)
For parties, assemble 2-4 hours ahead and refrigerate. Add fresh garnishes just before serving to maintain maximum appeal.
Step-by-Step Instructions
1. Prepare your base layer. Spread refried beans evenly across the bottom of your glass dish. Pro tip: Warm beans for 30 seconds in microwave first—they spread like butter and create a sturdy foundation that prevents other layers from sinking.
2. Build the creamy second layer. Carefully spread sour cream over beans. Use an offset spatula and start from edges working inward—this prevents dragging beans into the sour cream.
3. Add the guacamole layer. Gently dollop guacamole over sour cream, then spread outward. For homemade Seven Layer Dip, mash avocados with lime juice, salt, and cumin. Press plastic wrap directly onto surface if preparing ahead to prevent discoloration.
4. Pour salsa as the fourth layer. Drain salsa in fine-mesh sieve first! Excess liquid will turn your dip into soup. Spoon evenly over guacamole.
5. Sprinkle cheese generously. Cover entire surface. Use freshly shredded cheese—pre-shredded contains anti-caking agents that prevent melting.
6. Scatter sliced black olives. Distribute evenly for uniform flavor in every bite.
7. Finish with green onions and optional garnishes. Add fresh cilantro, diced tomatoes, or jalapeños. Serve immediately with sturdy tortilla chips.
For authentic Tex-Mex appetizers, serve alongside warm tortilla chips, jicama sticks, or mini bell pepper halves for low-carb options.
Nutritional Benefits & Advantages
This layered dip offers surprising nutritional value per serving (approximately ¼ cup):
– Protein (8g): From beans, cheese, and sour cream
– Healthy fats (12g): Avocado base provides monounsaturated fats that support heart health
– Fiber (4g): Black beans and chickpea-based refried beans contribute
– Calcium (15% DV): Cheese and sour cream deliver bone-strengthening minerals
– Vitamin C (10% DV): From fresh salsa, lime juice, and green onions
Dietary note: This dish is naturally gluten-free when served with corn chips. Pair with fresh vegetables for added nutrient density.
Tips Variations & Cooking Advice
Flavor Twists:
– Southwest version: Replace sour cream with chipotle-lime crema (sour cream + minced chipotle)
– Tex-Mex loaded: Add seasoned ground beef or chorizo as a warm layer between beans and sour cream
– Spicy upgrade: Mix diced jalapeños into guacamole or use habanero salsa
Dietary Adaptations:
– Dairy-free: Use cashew sour cream and vegan cheese shreds or nutritional yeast
– Oil-free: Skip olives, use oil-free refried beans, and check salsa ingredients
– Whole30: Combine with lettuce cups and compliant salsa
Portion Tips: For large gatherings, double recipe in a 9×13 dish. For small groups, make individual servings in small ramekins.
Common Mistakes to Avoid
1. Soggy dip from un drained ingredients – Always drain salsa and pat olives dry. Excess moisture ruins texture within hours.
2. Brown guacamole layer – Press plastic wrap directly onto guacamole surface when refrigerating. Add extra lime juice as natural preservative.
3. Cold beans causing separation – Warm beans slightly before spreading. Cold beans crack and separate from other layers.
4. Overmixing layers – Spread, don’t stir! Each distinct layer should remain visible.
5. Serving with flimsy chips – Use restaurant-style tortilla chips that can scoop all layers without breaking.
Storage & Meal Prep Tips
Refrigeration: Cover tightly with plastic wrap for up to 3 days. The guacamole may darken slightly but remains safe to eat.
Freezing: Not recommended—sour cream and guacamole separate upon thawing, creating watery texture.
Reheating: Serve cold or at room temperature. Never microwave the entire dip—guacamole becomes bitter and cheese becomes rubbery.
Meal Prep Strategy: Prep individual components separately (dice veggies, shred cheese, make guacamole) and assemble fresh 1-2 hours before serving for best results.
Conclusion
Mastering this Seven Layer Dip transforms you from guest to hero at any gathering. The combination of creamy, crunchy, spicy, and fresh elements makes it a timeless favorite among Tex-Mex appetizers. Remember the golden rules: drain wet ingredients, warm your beans, and keep layers distinct. Your guests will appreciate the fresh, homemade touch that beats any store-bought version. Now grab your chips and start layering—your party is about to become legendary. Share your creation on social media, tag your friends, and let us know which variation you tried in the comments below!
FAQs
Can I make Seven Layer Dip the night before?
Yes, but add guacamole and fresh toppings no more than 6 hours before serving. Layer beans, sour cream, and cheese first, then add guacamole and garnishes later.
What are the best chips for serving?
Thick restaurant-style tortilla chips work best. Avoid thin chips that break easily. Scoop-shaped chips hold more dip per bite.
How do I keep guacamole from turning brown?
Press plastic wrap directly onto guacamole surface (no air pockets). Adding extra lime juice and storing in airtight container also helps.
Can I substitute Greek yogurt for sour cream?
Yes, use full-fat plain Greek yogurt. Drain excess liquid first by sitting in a fine-mesh strainer for 10 minutes.
Is this recipe spicy?
Traditional version is mild. For heat, add diced jalapeños, use hot salsa, or sprinkle cayenne between layers. Serve hot sauce on the side for customization.
Quick way to grow Seven Layer Dip in 7 Minutes
Ingredients
Equipment
Method
- Spread the refried beans evenly across the bottom of a serving dish.
- In a separate bowl, mix the sour cream and taco seasoning until well combined, then spread this mixture over the bean layer.
- Carefully spread the guacamole over the sour cream mixture.
- Sprinkle the shredded cheddar cheese over the guacamole.
- Top the cheese layer with the chopped tomatoes.
- Finish by scattering the sliced black olives over the tomatoes.
- Serve immediately with tortilla chips or refrigerate until ready to serve.