Why Store-Bought Just Doesn’t Compare: The Ultimate Guide to Silky Smooth Hummus
Have you ever wondered why restaurant hummus tastes so much creamier than the store-bought tubs in the refrigerator section? The secret isn’t a magic ingredient—it’s technique. Making authentic Hummus at home transforms a simple Hummus into a velvety, nutrient-dense dip that costs a fraction of the price. When you control every element from the quality of your chickpea to the amount of tahini, you unlock a depth of flavor that no commercial version can replicate. This guide walks you through every detail so you can create restaurant-quality spreads with confidence.
Ingredients & Kitchen Tools
Legume Base
– 1 can (15 oz) or 1½ cups cooked chickpea — look for low-sodium or cook your own for best texture
– ¼ cup fresh lemon juice (about 1 large lemon) — bottled juice creates a metallic aftertaste
– ¼ cup well-stirred tahini — choose runny brands without added oil for creamier results
Flavor Enhancers & Liquids
– 1 small garlic clove, minced — adjust based on your garlic tolerance
– ½ teaspoon sea salt, plus more to taste
– 2 tablespoons extra-virgin olive oil — choose fruity, grassy varieties for garnish
– 2–3 tablespoons ice-cold water — this is the secret to fluffy texture
– Optional: ½ teaspoon ground cumin, paprika, or sumac for depth
Kitchen Tools
– Food processor (high-speed works best) or high-powered blender
– Fine-mesh strainer for rinsing chickpeas
– Rubber spatula for scraping sides
– Small bowl for lemon-tahini emulsion
– Airtight container for storage
Prep Time & Cooking Schedule
Total Active Time: 15 minutes
Total Inactive Time: 10 minutes (resting for flavor melding)
Total Time from Start to Finish: 25 minutes
Plan to make your hummus at least 30 minutes before serving to allow flavors to settle. If using dried chickpeas instead of canned, add 1 hour for pressure cooking or 2 hours for stovetop simmering (plus overnight soaking). For best results, prepare the dip the day before your gathering—the texture improves significantly after 8–12 hours in the fridge.
Step-by-Step Instructions
Step 1: Prepare the chickpea base
Drain and rinse your canned chickpeas thoroughly. For ultra-smooth results, gently rub the chickpeas between your palms under running water to remove the thin skins—this takes 3–4 minutes but eliminates graininess. Pat dry with a towel. If you’re using dried chickpeas, soak them overnight in salted water (1 teaspoon salt per cup of water) before cooking until tender.
Step 2: Create the lemon-tahini emulsion
In a small bowl, whisk together the tahini and lemon juice until the mixture lightens in color and thickens noticeably—this usually takes 30–45 seconds. Let it rest for 5 minutes. This step prevents the bitterness that occurs when tahini and garlic combine too quickly. Add the minced garlic, salt, and ice-cold water, then whisk again until smooth.
Step 3: Process to perfection
Transfer the tahini mixture to your food processor. Add the prepared chickpea and process for 30 seconds. Scrape down the sides, then process for another 60 seconds. While the machine runs, drizzle in the olive oil through the feed tube. If the mixture looks too thick, add ice water one tablespoon at a time while processing until you reach a consistency that falls slowly from a spoon. Taste and adjust salt or lemon as needed—you’re aiming for a balance where no single ingredient dominates.
Step 4: Finish and rest
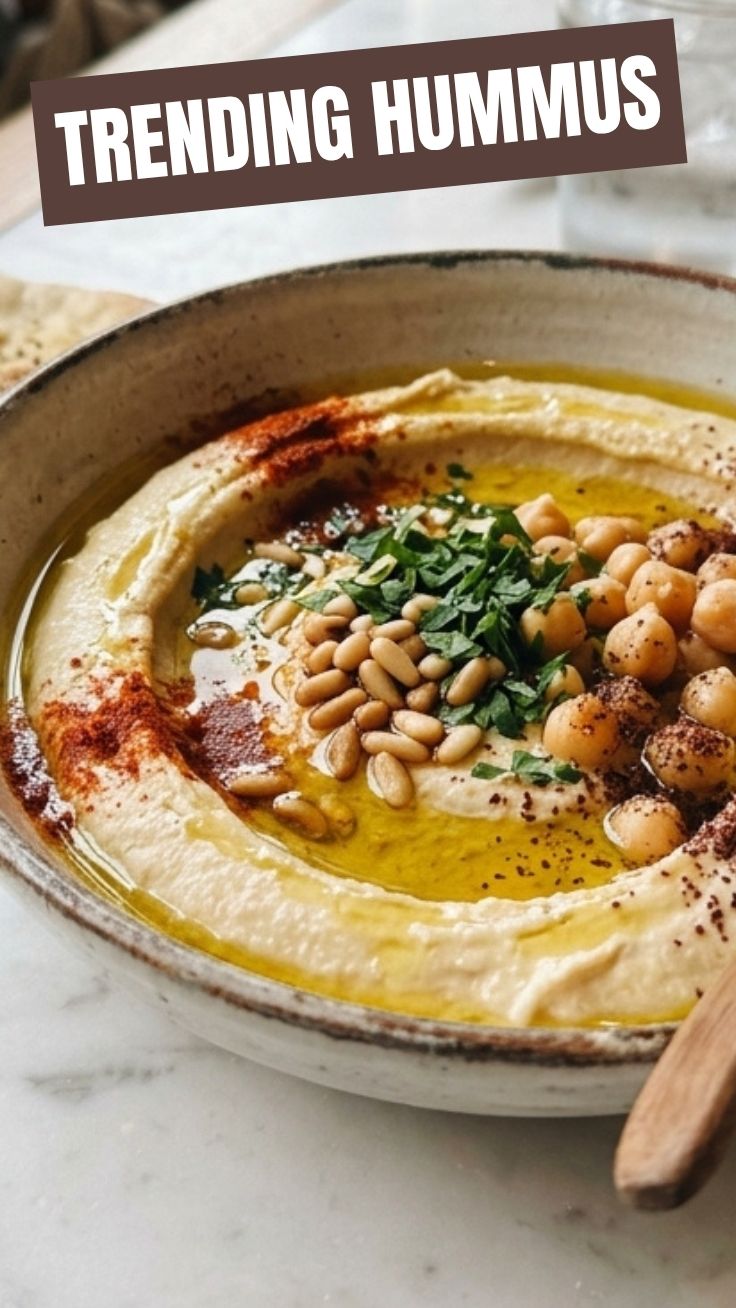
Transfer the smooth Hummus to a serving bowl. Use the back of a spoon to create a shallow well in the center, then drizzle with additional olive oil, sprinkle paprika or sumac, and add a few whole chickpeas for visual contrast. Cover and let rest at room temperature for 10 minutes before serving to allow the flavors to meld properly.
Nutritional Benefits & Advantages
This legume-based dip delivers impressive nutritional density. A single ¼-cup serving provides approximately 6 grams of plant protein, 4 grams of dietary fiber, and significant amounts of iron, folate, and manganese. The tahini contributes calcium and healthy unsaturated fats, while the olive oil adds antioxidant polyphenols. Unlike many processed dips, homemade versions contain no preservatives, stabilizers, or hydrogenated oils. The combination of fiber and protein creates steady energy release, making it an excellent pre-workout snack or satiating addition to vegetable platters. For those following Mediterranean diets, this dish aligns perfectly with heart-healthy eating patterns.
Tips Variations & Cooking Advice
Flavor Explorations
– Roasted red pepper hummus: Blend ½ cup fire-roasted peppers with the chickpeas
– Spicy harissa version: Add 2 tablespoons harissa paste with the garlic
– Herbed garden hummus: Fold in ¼ cup fresh parsley, cilantro, or dill after processing
Texture Adjustments
– For dip consistency, add extra water gradually until it flows like thick yogurt
– For sandwich spread, reduce water by half and process until stiffer
– For sauce consistency, double the water and lemon juice
Dietary Adaptations
– Vegan-friendly as written
– Gluten-free by nature (verify tahini brand)
– Low-FODMAP: use garlic-infused olive oil instead of raw garlic
– Oil-free version: replace olive oil with additional aquafaba (chickpea water)
Alternative Methods
– Immersion blender works with patience—use a tall container and pulse
– Hand mashing produces rustic texture (authentic for some regional styles)
– Smoked paprika instead of sweet paprika adds unexpected depth
Common Mistakes to Avoid
Skipping the skin removal leads to grainy, dense hummus that separates during storage. Even 5 minutes of skin removal dramatically improves the final texture.
Adding garlic too early creates harsh, raw garlic flavor that intensifies overnight. Add garlic only after you’ve created the emulsion, or roast it first for milder results.
Using room-temperature chickpeas from the can yields dull flavor. For best results, warm canned chickpeas in their liquid for 2 minutes in the microwave, then drain. Warm legumes blend more smoothly.
Over-processing with hot liquids breaks the emulsion. Always use ice-cold water and process in short bursts once the oil has been added.
Skipping the resting period results in hummus that tastes sharp and unbalanced. The rest allows the lemon and tahini to marry with the chickpeas.
Storage & Meal Prep Tips
Refrigerate your finished hummus in an airtight container for up to 7 days. Press plastic wrap directly onto the surface before sealing to prevent a dry skin from forming. For freezing, portion into ice cube trays, freeze solid, then transfer to zip-top bags—individual cubes thaw in 10 minutes at room temperature. Frozen hummus keeps for 3 months.
To refresh cold hummus, stir in 1–2 teaspoons of warm water until it regains its original creaminess. Avoid microwaving directly, as this can separate the tahini emulsion. Instead, let it sit at room temperature for 20 minutes before serving. If you notice slight separation on top after a few days, simply stir vigorously for 30 seconds to re-emulsify.
Conclusion
Mastering homemade Hummus transforms a simple dip into a versatile staple that saves money and elevates your cooking. The key takeaways are simple: remove chickpea skins for smoothness, whip the tahini and lemon first for proper emulsion, and always let the final product rest before serving. Whether you’re dipping vegetables, spreading on sandwiches, or drizzling over grain bowls, this Hummus made from quality chickpea becomes a canvas for endless creativity. Try this recipe this weekend, adjust the garlic and lemon to your preference, and share your results with the community. Once you taste homemade, you’ll never reach for a store-bought tub again.
FAQs
Can I use dried chickpeas instead of canned?
Yes. Soak dried chickpeas overnight with 1 teaspoon baking soda (this softens them), then cook for 1–2 hours until very tender. Reserve the cooking liquid to use in place of water for extra flavor.
Why is my hummus bitter?
Bitterness typically comes from overcooked or stale tahini. Check your tahini’s flavor before using—it should be nutty, not sharp. Also ensure you’ve removed the green germ from each chickpea, as this adds bitterness.
How do I make hummus without a food processor?
Use a potato masher or fork for rustic texture, or run chickpeas through a meat grinder attachment. An immersion blender works in a tall container, but you’ll need to scrape sides frequently.
Can I reduce the oil content?
Absolutely. Replace the olive oil with aquafaba (chickpea can liquid) or more ice water. The texture will be slightly less luxurious but still delicious.
Why did my hummus separate in the fridge?
Tahini naturally separates over time. Stir vigorously with a fork when you remove it from the fridge. If it’s grainy after stirring, add 1 tablespoon warm water and blend again briefly.
Proven way to grow creamy Hummus in 3 steps Hummus
Ingredients
Equipment
Method
- In a food processor, combine the rinsed chickpeas, tahini, lemon juice, minced garlic, and ground cumin. Process these ingredients until a thick paste forms, scraping down the sides as needed to ensure even mixing.
- With the food processor running, gradually add 2 to 4 tablespoons of cold water, one tablespoon at a time, until the hummus reaches your desired smooth and creamy consistency. This slow addition helps emulsify the ingredients.
- Season the hummus with salt to taste and pulse a few more times to combine everything thoroughly. Transfer the creamy hummus to a serving bowl, drizzle with olive oil, sprinkle with paprika and fresh parsley if desired, and serve immediately with pita bread or fresh vegetables.