The Ultimate Guide to Making Perfect Candy Apples at Home
Have you ever bitten into a glossy, ruby-red candy apple only to have the sugary shell shatter with a satisfying crunch, revealing the sweet-tart fruit beneath? There’s something magical about this classic fall treat, but making it at home can feel intimidating. The truth is, with the right technique and a few insider tips, you can create professional-quality Candy Apples and caramel apples in your own kitchen—no candy thermometer required if you know what to look for. Whether you’re planning a Halloween party, a harvest festival, or simply craving a nostalgic snack, homemade versions taste infinitely better than store-bought and allow you to control the quality of ingredients.
Ingredients & Kitchen Tools
For the Candy Apples:
– 6–8 medium apples (Granny Smith or Honeycrisp work best for their tartness and firm texture)
– 2 cups granulated sugar (provides the glass-like shell)
– 1/2 cup light corn syrup (prevents crystallization)
– 3/4 cup water
– 1/2 teaspoon red food coloring (gel-based preferred for vibrant color)
– 1/2 teaspoon cinnamon oil or 1 teaspoon vanilla extract (for flavor, not extract if using oil—it can seize the candy)
For Caramel Apples Variation:
– 14 oz soft caramel candies (unwrapped)
– 2 tablespoons heavy cream or milk
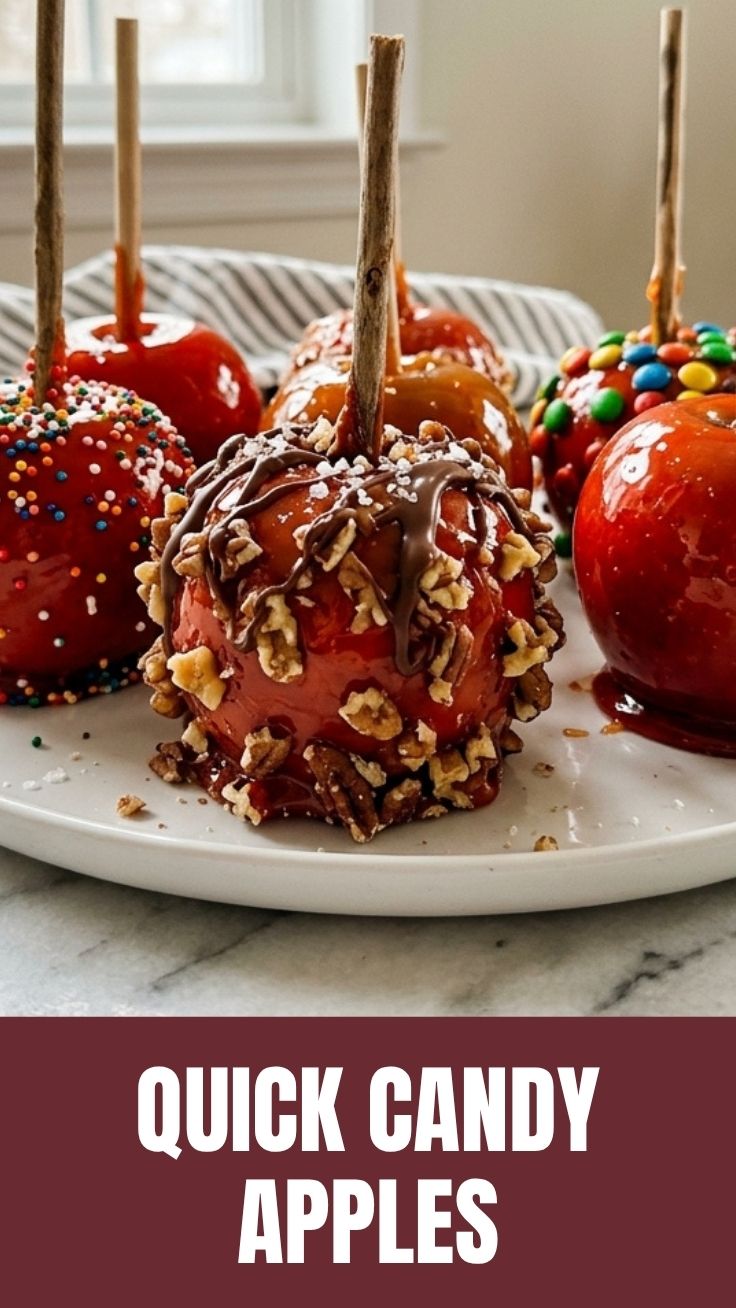
– Optional: sea salt flakes, chopped nuts, or drizzled chocolate
Essential Kitchen Tools:
– Candy thermometer (digital preferred for accuracy)
– Heavy-bottomed saucepan (stainless steel or copper)
– Parchment paper or silicone baking mat
– Wooden craft sticks or lollipop sticks
– Pastry brush and bowl of cold water (for cleaning sugar crystals from pot sides)
Substitutions:
– Swap Granny Smith for Fuji or Braeburn if you prefer sweeter apples
– Use maple syrup instead of corn syrup for a deeper flavor (adjust sugar accordingly)
– Skip food coloring entirely for a natural golden hue
Prep Time & Cooking Schedule
– Prep time: 15 minutes (washing, drying, and inserting sticks)
– Cook time: 20–25 minutes (candy reaches 300°F–310°F)
– Resting time: 30 minutes (important for shell to harden completely)
– Total time: Approximately 1 hour
Plan your timing carefully—once the candy syrup reaches temperature, you only have about 5–7 minutes of working time before it begins to set. Have your apples ready, sticks inserted, and workspace prepped before you start boiling. For best results, make these on a dry, low-humidity day; humidity causes the candy shell to become sticky rather than crisp.
Step-by-Step Instructions
1. Prepare the apples: Wash apples thoroughly to remove any wax coating (this is critical—wax prevents candy from sticking). Dry completely, then insert a wooden stick into the stem end of each apple, pushing about halfway through.
2. Combine ingredients: In a heavy-bottomed saucepan, stir together sugar, corn syrup, and water. Place over medium heat and stir until sugar dissolves completely. Attach your candy thermometer to the side, ensuring the bulb doesn’t touch the bottom.
3. Boil without stirring: Once the mixture reaches a boil, stop stirring. Use a wet pastry brush to wash down any sugar crystals that form on the sides of the pot—this prevents grainy candy. Continue boiling until the temperature reaches 300°F–310°F (hard crack stage).
4. Add color and flavor: Remove from heat immediately. Let bubbles subside for 30 seconds, then gently stir in food coloring and flavoring. Work quickly but carefully—the mixture is extremely hot.
5. Dip the apples: Holding each apple by the stick, tilt the pot and dip the apple into the candy, rotating to coat evenly. Let excess drip off, then place on parchment paper. For those who prefer a softer treat, caramel apples follow the same dipping process but use melted caramel instead of hard candy.
6. Allow to set: Let apples rest undisturbed for at least 30 minutes until the shell is hard and glossy. Avoid refrigerating immediately—rapid temperature changes can cause cracking.
Nutritional Benefits & Advantages
While candy apples are undeniably a sweet indulgence, they do offer some surprising nutritional advantages when made with quality ingredients. The whole apples provide dietary fiber, vitamin C, and antioxidants like quercetin, which supports heart health. By making them at home, you avoid artificial preservatives and high-fructose corn syrup often found in commercial versions. The candy apples and caramel apples you create yourself allow you to customize sweetness levels and even use organic apples for added nutritional value. Moderation is key, but enjoying one of these treats provides a fiber-rich fruit base that’s far better than processed candy bars.
Tips Variations & Cooking Advice
– Flavor variations: Add 1/2 teaspoon of almond extract or orange zest to the candy syrup for a unique twist
– Texture experiment: Roll freshly dipped apples in crushed peanuts, sprinkles, or crushed graham crackers before the coating sets
– Dietary adaptations: Use dairy-free caramels for vegan caramel apples; for gluten-free, ensure your flavorings are certified gluten-free
– Alternative methods: Bake caramel apples at 350°F for 10 minutes after dipping to soften the caramel slightly
– Portion control: Make mini candy apples using lady apples or cut large apples into wedges on sticks
Common Mistakes to Avoid
– Skipping the wax removal: Even “wax-free” apples may have a thin layer—soak in hot water or use vinegar solution to remove it
– Stirring after boiling: Agitation causes crystallization; let the mixture boil undisturbed
– Using old apples: Soft or mealy apples won’t hold up; always choose crisp, fresh fruit
– Dipping cold apples straight from the fridge: Temperature shock causes the candy to crack; let apples come to room temperature first
– Overcooking the candy: If it reaches 320°F+, the sugar will burn and taste bitter—watch the thermometer carefully
– For caramel apples: Overheating caramel makes it grainy; melt slowly on low heat or use a double boiler
Storage & Meal Prep Tips
– Refrigeration: Store uneaten candy apples in the refrigerator for up to 5 days, but note that condensation can make the shell sticky. Rinse with cold water and pat dry before eating to restore crispness.
– Freezing: Not recommended for candy apples—the shell cracks. However, caramel apples freeze well for up to 2 months wrapped individually in plastic wrap and foil.
– Reheating: For caramel apples, microwave briefly (15–20 seconds) to soften the caramel or let sit at room temperature for 10 minutes before serving.
– Meal prep: Prepare apples with sticks inserted and caramel melted up to 2 days in advance; dip and finish just before serving for best texture.
Conclusion
Mastering homemade candy apples is one of those skills that feels like kitchen magic—transforming simple sugar and fruit into glossy, celebratory treats. Remember, the secret lies in proper preparation, temperature control, and working quickly once the candy reaches the hard crack stage. Whether you create classic candy apples or opt for the chewy indulgence of caramel apples, these homemade versions taste far superior to anything you’ll find pre-packaged. The crisp apple crunch combined with the sweet shell or smooth caramel creates a perfect balance that’s worth every minute of effort. I encourage you to try this recipe this weekend, experiment with your favorite toppings, and share your results with friends—they’ll be amazed you made them yourself.
FAQs
1. Why is my candy apple coating grainy instead of smooth?
Grainy texture occurs when sugar crystallizes during cooking. To prevent this, avoid stirring after the sugar dissolves, and use a wet pastry brush to wash down crystals from the pot sides. Adding corn syrup also helps inhibit crystallization.
2. Can I use regular food coloring instead of gel?
Yes, but gel-based coloring provides more vibrant results without thinning the syrup. Liquid food coloring can cause the candy to bubble excessively or dilute the sugar concentration.
3. How do I make caramel apples without a candy thermometer?
Simply melt soft caramels with cream in a saucepan over low heat, stirring constantly until smooth. The caramel is ready when it’s fluid enough to coat the apple but thick enough to cling—typically around 225°F if using a thermometer.
4. Why did my candy apples turn sticky after refrigeration?
Moisture is the culprit. The hard candy shell absorbs humidity from the refrigerator, becoming sticky. Store them at room temperature in a dry environment for up to 2 days, or refrigerate in an airtight container with a desiccant packet.
5. Can I make these ahead for a party?
Absolutely! Prepare candy apples up to 2 days in advance and store at room temperature in a cool, dry place away from direct sunlight. For caramel apples, make them the day before and refrigerate; remove 30 minutes before serving.
Best way to grow 5 Candy Apples
Ingredients
Equipment
Method
- Wash and thoroughly dry the apples, then remove stems and insert a wooden skewer into the stem end of each apple.
- Prepare a baking sheet by lining it with parchment paper or a silicone mat and lightly greasing it.
- Combine sugar, corn syrup, and water in a heavy-bottomed saucepan over medium-high heat, stirring until sugar dissolves.
- Once boiling, stop stirring and insert a candy thermometer; continue cooking until the mixture reaches 300-310°F (149-154°C) without stirring.
- Remove the saucepan from heat, immediately stir in food coloring and vanilla extract carefully.
- Quickly dip each apple into the hot candy mixture, tilting the pan and rotating the apple to ensure even coating, then let excess drip off.
- Place coated apples on the prepared baking sheet and allow them to cool completely until the candy shell hardens.