Here is a comprehensive, SEO-optimized, and engaging blog post tailored to your exact specifications.
—
The Ultimate Guide to the Perfect Tuna Salad: A Protein-Packed Masterpiece
Have you ever taken a bite of a Tuna Salad that was so bland, dry, or soupy it made you wonder why you didn’t just order takeout? The secret to a truly exceptional Tuna Salad lies not in a secret ingredient, but in mastering texture, balance, and technique. When you prepare this dish at home, you control the quality of the ingredients, the level of creaminess, and the crunch factor. This is not just about mixing canned fish with mayo; it is about building a versatile, high-protein staple that can transform your lunches. Whether you pile it high on toasted bread as a Tuna Sandwich or serve it over a bed of greens, understanding the methodology behind the perfect batch will save you money, reduce food waste, and elevate your everyday cooking.
Ingredients & Kitchen Tools
To build a balanced and flavorful salad, you need the right tools and components. Precise preparation ensures every bite is consistent.
Ingredients:
– Canned Tuna (2 cans, 5 oz each): Use albacore for a firmer, milder flavor or skipjack for a stronger, more traditional taste. Substitution: Canned salmon or chickpeas (mashed) for a vegetarian option.
– Mayonnaise (1/3 cup): The binding agent. Use full-fat for richness. Substitution: Greek yogurt or mashed avocado for a lighter, dairy-free version.
– Celery (1 rib, finely diced): Provides essential crunch and moisture.
– Red Onion (1/4 cup, minced): Adds sharpness. Soak in cold water for 5 minutes to mellow the bite.
– Fresh Lemon Juice (1 tbsp): Cuts the richness and brightens the flavor.
– Dijon Mustard (1 tsp): Adds depth and emulsifies the dressing.
– Fresh Dill or Parsley (2 tbsp, chopped): Boosts freshness.
– Salt and Black Pepper (to taste): Essential for seasoning.
Kitchen Tools:
– Mixing Bowl: A medium to large bowl to allow room for tossing.
– Fork or Potato Masher: For flaking the tuna to your desired consistency.
– Sharp Knife & Cutting Board: For precise dicing of vegetables.
– Fine-Mesh Strainer: To drain the tuna thoroughly.
– Measuring Spoons: For accuracy in seasoning.
Prep Time & Cooking Schedule
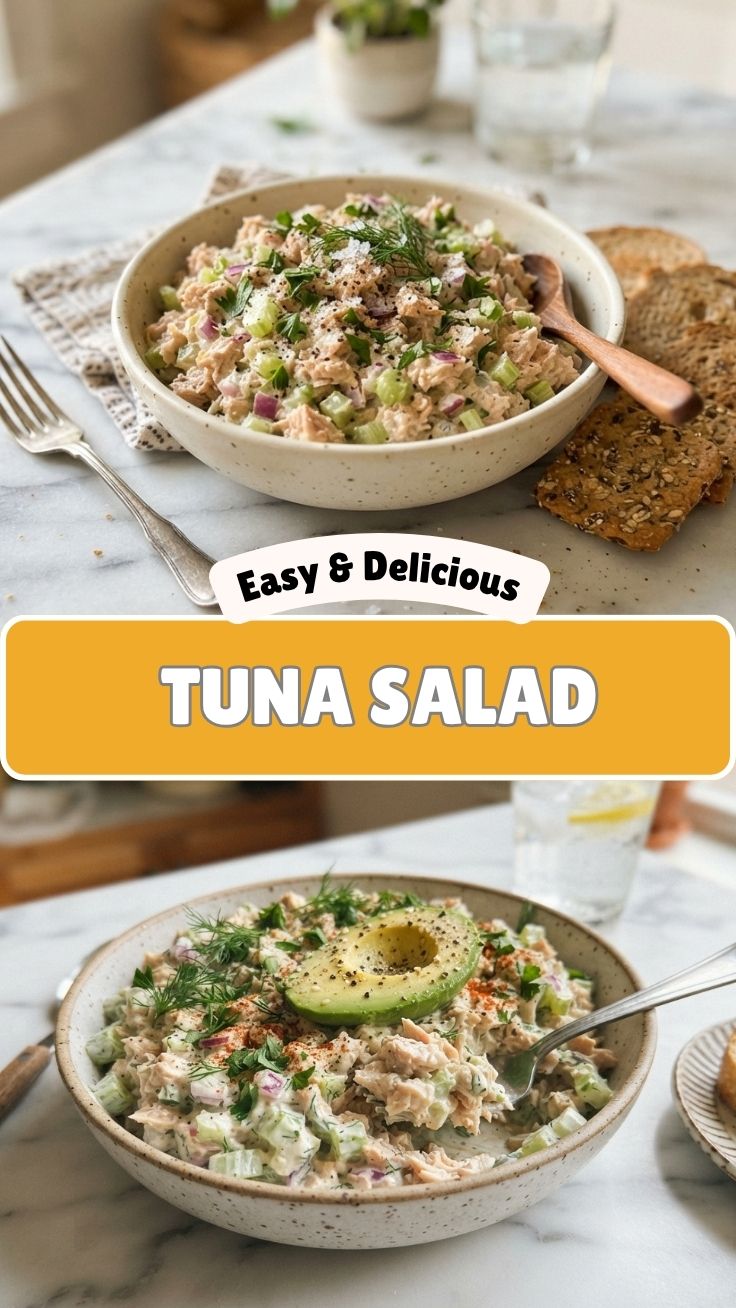
Planning your time is crucial for maximizing flavor. This is a no-cook recipe, but patience is required for the best results.
– Prep Time: 10 minutes (draining, chopping, mixing).
– Chilling/Marinating Time: 30 minutes (minimum) to 2 hours (optimal). This allows the flavors to meld and the texture to stabilize.
– Total Time: 40 minutes to 2 hours 10 minutes.
Context: While you can eat the salad immediately, it will taste watery and one-dimensional. The chilling phase is where the magic happens. The onion’s sharpness fades, the celery softens slightly, and the mayo absorbs the tuna’s natural oils.
Step-by-Step Instructions
Follow these steps to guarantee a creamy, crunchy, and flavorful bowl every time.
1. Drain and Press the Tuna: Open the cans and pour the contents into a fine-mesh strainer. Use the back of a spoon to press firmly on the tuna to extract as much liquid as possible. Pro Tip: Dry tuna is the number one rule for a non-soggy salad. Transfer the drained tuna to a mixing bowl.
2. Flake the Protein: Use a fork or a potato masher to break the tuna into small, uniform pieces. Avoid over-mashing, as you want small flakes, not a paste. This is the foundational step for any Tuna Salad.
3. Build the Creamy Base: In a separate small bowl, whisk together the mayonnaise, lemon juice, Dijon mustard, and a pinch of salt and pepper. This ensures the seasoning is evenly distributed before it hits the protein.
4. Combine the Crunch: Add the finely diced celery and minced red onion to the flaked tuna. Toss gently to distribute the vegetables.
5. Fold in the Dressing: Pour the mayonnaise mixture over the tuna and vegetables. Use a rubber spatula to fold gently until everything is evenly coated. Texture Cue: The mixture should be moist but not soupy. If it looks dry, add a teaspoon of mayo or lemon juice.
6. Season and Finish: Fold in the fresh dill or parsley. Taste and adjust seasoning with salt, pepper, or extra lemon juice. For a finishing touch, consider how this mix will elevate a Tuna Sandwich—the bread should be toasted to contrast the creamy filling.
7. Chill (Crucial Step): Cover the bowl with plastic wrap and refrigerate for at least 30 minutes. This allows the flavors to marry.
Nutritional Benefits & Advantages
This dish is a powerhouse of lean nutrition and dietary flexibility.
– High-Quality Protein: Tuna is a complete protein source, providing all essential amino acids needed for muscle repair and satiety. A single serving (approx. 1/2 cup) contains about 20-25 grams of protein.
– Healthy Fats: Using avocado or Greek yogurt instead of mayonnaise reduces saturated fat while increasing monounsaturated fats and probiotics.
– Omega-3 Fatty Acids: Tuna is rich in DHA and EPA, which support brain health, reduce inflammation, and improve cardiovascular function.
– Low-Carb & Keto-Friendly: This recipe is naturally low in carbohydrates, making it an excellent choice for a ketogenic or low-carb lifestyle.
– Vitamins and Minerals: Celery provides vitamin K and antioxidants, while onions offer prebiotic fiber for gut health.
Tips Variations & Cooking Advice
Adapt this recipe to your taste preferences or dietary needs without losing the core methodology.
– Flavor Variations:
– Mediterranean: Add chopped Kalamata olives, sun-dried tomatoes, and crumbled feta cheese.
– Spicy: Mix in 1 tsp of sriracha or a pinch of cayenne pepper and diced jalapeños.
– Curry: Add 1 tsp of curry powder, golden raisins, and toasted almonds.
– Ingredient Swaps:
– Creaminess: Swap half the mayo for plain Greek yogurt or mashed avocado.
– Crunch: Replace celery with diced apple, water chestnuts, or jicama for a sweeter crunch.
– Herbs: Use tarragon or chives if dill is unavailable.
– Dietary Adaptations:
– Gluten-Free: Ensure the mayonnaise is certified gluten-free. Serve on lettuce wraps or gluten-free crackers.
– Dairy-Free: This recipe is naturally dairy-free if using a vegan or standard mayonnaise.
– Cooking Method: For a warm version, gently sauté the drained tuna with onions and garlic in olive oil for 2 minutes, then let it cool slightly before mixing with the dressing.
Common Mistakes to Avoid
Even simple recipes have pitfalls. Here is how to avoid them.
– Mistake: Not Draining the Tuna Properly. Liquid from the can will ruin the texture. Solution: Press the tuna with a spoon after draining.
– Mistake: Over-Mixing the Salad. Excessive stirring breaks down the tuna into a mushy paste. Solution: Fold gently until just combined.
– Mistake: Adding Too Much Mayonnaise. The salad becomes greasy and heavy. Solution: Start with half the amount and add more if needed after chilling.
– Mistake: Skipping the Chill Time. The flavors will be flat and separate. Solution: Always rest the salad for at least 30 minutes.
– Mistake: Using Pre-Diced Vegetables. They are often dry or over-processed. Solution: Dice your own celery and onion for the best texture and moisture.
Storage & Meal Prep Tips
Proper storage ensures your salad stays fresh and safe to eat throughout the week.
– Refrigeration: Store the tuna salad in an airtight container. It will stay fresh for 3 to 4 days. Place a paper towel on top of the salad before sealing the lid to absorb excess moisture.
– Freezing: Do not freeze. Mayonnaise-based dressings separate and become watery upon thawing, ruining the texture. If you must freeze, omit the mayo and vegetables, freeze the tuna plain, and mix fresh ingredients when ready.
– Reheating Instructions: This is a cold dish. Do not microwave it. If you want a warm sandwich, assemble the salad cold on bread and toast it in a panini press or oven.
Conclusion
Mastering the art of a creamy, crunchy Tuna Salad is a fundamental kitchen skill that pays dividends in meal prep and convenience. By focusing on draining the tuna, building a balanced dressing, and respecting the chilling time, you transform a simple pantry staple into a gourmet meal. Whether you enjoy it as a classic Tuna Sandwich on toasted sourdough or scooped onto a bed of fresh spinach, this recipe provides a reliable, healthy, and delicious foundation. I encourage you to make a batch this weekend, experiment with the variations, and share your creation in the comments below. Your lunch routine will never be the same.
FAQs
1. Can I use oil-packed tuna instead of water-packed?
Yes, but you will need to adjust the mayonnaise. Oil-packed tuna is richer, so reduce the mayo by 1-2 tablespoons. Be sure to drain the oil well, though you can reserve a teaspoon to mix into the dressing for extra flavor.
2. How do I fix a tuna salad that is too dry?
Add a tablespoon of plain Greek yogurt, a splash of pickle juice, or a teaspoon of olive oil. Mix gently and let it rest for 5 minutes. The acid or fat will rehydrate the mixture.
3. What is the best bread for a tuna sandwich?
For a sturdy Tuna Sandwich, use a bread that can hold the filling without getting soggy. Toasted sourdough, a ciabatta roll, or a hearty whole-grain bread are excellent choices. Avoid soft white bread unless you toast it heavily.
4. Can I make this recipe without mayonnaise?
Absolutely. For a creamy yet mayo-free version, mash one ripe avocado and mix it with lemon juice, salt, and pepper. This creates a “green goddess” style tuna salad that is dairy-free and packed with healthy fats.
5. How long can I leave tuna salad out at room temperature?
Food safety guidelines state that tuna salad should not be left out for more than 2 hours. If the temperature is above 90°F (32°C), reduce this time to 1 hour. Always return leftovers to the refrigerator promptly.
Quick way to grow Tuna Salad in 15 minutes.
Ingredients
Equipment
Method
- Drain the canned tuna thoroughly and place it in a medium-sized mixing bowl.
- Add mayonnaise, finely chopped celery, and finely chopped red onion to the bowl with the tuna.
- Stir in Dijon mustard and fresh lemon juice.
- Season the mixture with salt and black pepper to taste.
- Mix all ingredients until well combined; serve immediately or chill for later.