Why This Hatch Green Chile Recipe Will Transform Your Cooking
Have you ever wondered what makes restaurant-quality enchiladas taste so remarkably different from homemade versions? The secret often lies in one extraordinary ingredient. Preparing this Hatch Green Chile recipe at home rewards you with a depth of smoky, slightly spicy flavor that canned alternatives simply cannot replicate. Roasting fresh Hatch chiles unlocks their unique sweetness, and having a batch ready means you can elevate everything from enchiladas to soups with minimal effort. Discover why mastering this technique is a game-changer for your kitchen, and explore how these Green Chile Recipes can become the cornerstone of your weekly meal planning.
Ingredients & Kitchen Tools
For the Hatch Green Chile Base:
– Fresh Hatch green chiles (2 lbs): Look for vibrant, firm pods with a slight give. Hatch chiles are essential for authentic flavor; Anaheim peppers are the closest substitute.
– White onion (1 large, diced): Adds a sweet, savory foundation. Yellow onion works but has a stronger bite.
– Garlic cloves (4-5, minced): Fresh garlic is non-negotiable for the best aromatic depth.
– Chicken or vegetable broth (2 cups): Use low-sodium to control salt levels. Homemade broth adds umami.
– All-purpose flour (2 tablespoons): Thickens the sauce naturally. For a gluten-free option, use cornstarch slurry (1 tbsp cornstarch + 2 tbsp cold water).
Kitchen Tools:
– Baking sheet & aluminum foil: For roasting chiles. No foil? A grill or gas burner works directly.
– Large heavy-bottomed pot or Dutch oven: Ensures even heat distribution and prevents burning.
– Immersion blender or standard blender: To puree the chiles. A potato masher works for a chunkier texture.
– Sharp knife & cutting board: For safely handling chiles and vegetables.
Prep Time & Cooking Schedule
Total Active Time: 45 minutes | Total Inactive Time: 1 hour (including roasting and cooling)
– Prep Time: 15 minutes – washing, stemming, and seeding the chiles (wear gloves to avoid capsaicin burns).
– Roasting Time: 20-25 minutes – under a broiler or on a grill, turning every 5-7 minutes until all skins are blackened and bubbled.
– Resting Time: 15 minutes – in a covered bowl or paper bag to steam off the skins.
– Simmering Time: 25-30 minutes – allowing flavors to meld and the sauce to thicken.
Plan to start this early on a weekend, or make it a day ahead – the flavor actually improves overnight.
Step-by-Step Instructions
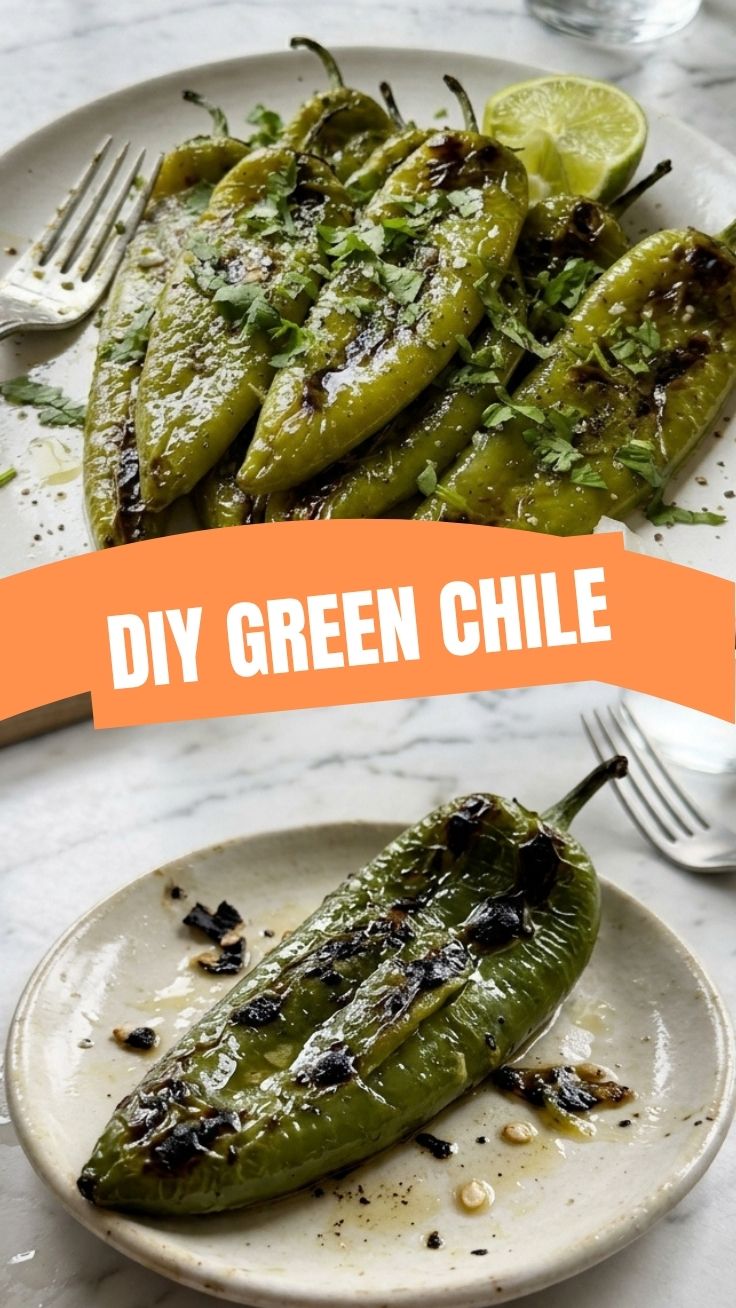
1. Roast the Chiles: Place clean, dry chiles on a foil-lined baking sheet under a hot broiler. Turn every 5-7 minutes until the skins are completely blistered and charred black. The flesh underneath should feel tender. Pro tip: Do not skip this step; the charring is what creates the signature smokiness in your Hatch Green Chile.
2. Steam and Peel: Immediately transfer the roasted chiles to a bowl, cover tightly with plastic wrap, or place them in a paper bag. Let them steam for 15 minutes. This loosens the skin. Once cool enough to handle, rub off the blackened skins under running water. Remove stems and seeds (leave some seeds for extra heat).
3. Sauté the Aromatics: In a large pot over medium heat, add 1 tablespoon of oil. Sauté the diced onion until translucent (5-6 minutes). Add the minced garlic and cook until fragrant (30 seconds). This is a critical point for your Green Chile Recipes: do not burn the garlic, or it will turn bitter.
4. Blend and Simmer: Add the peeled chiles and 1 cup of broth to a blender. Blend until smooth (or leave chunky as preferred). Pour the chile puree into the pot with the onions. Add the remaining broth and bring to a gentle simmer.
5. Thicken and Season: Stir in the flour (or cornstarch slurry). Cook over low heat for 20-25 minutes, stirring occasionally, until the sauce coats the back of a spoon. Season with salt, a pinch of cumin (optional), and a dash of Mexican oregano. Adjust heat with a tiny pinch of cayenne if desired.
Nutritional Benefits & Advantages
This Hatch Green Chile is packed with surprising health perks. Green chiles are exceptionally rich in Vitamin C – in fact, a single serving can provide more than 100% of your daily needs – along with Vitamin A, which supports eye health. The capsaicin responsible for the gentle heat has been linked to boosting metabolism and reducing inflammation. Because this recipe uses minimal oil and no dairy, it is naturally low in fat and calories. The high water and fiber content in the chiles also aid digestion, making this a guilt-free way to add bold flavor to any dish.
Tips Variations & Cooking Advice
– Flavor Variations: Add a tablespoon of brown sugar or honey to balance the heat. For a smoky twist, incorporate a chipotle pepper in adobo sauce while blending.
– Alternative Cooking Methods:
– Crock Pot: Follow steps 1-3, then combine all ingredients in a slow cooker. Cook on low for 4-6 hours. This method creates a beautifully mellow flavor.
– Instant Pot: Sauté onions and garlic using the Sauté function, then add the puree and broth. Pressure cook on High for 5 minutes, then natural release.
– Dietary Adaptations: This recipe is naturally vegan and dairy-free. For a gluten-free version, simply swap the all-purpose flour for masa harina (corn flour) – it adds a wonderful authentic corn flavor.
– Portion Changes: This recipe yields about 4 cups, perfect for a family meal or a week of enchiladas. Halve the recipe for a quick weeknight batch, or double it for winter meal prep.
Common Mistakes to Avoid
1. Not Wearing Gloves: Hatch chiles’ oils can linger on your skin for hours. Touching your eyes or face after handling them is incredibly painful. Always wear kitchen gloves.
2. Skipping the Roast: Broiling or grilling is non-negotiable. Steaming or boiling the chiles before peeling produces a watery, flat sauce. The charring is what gives the chile its soul.
3. Rushing the Simmer: A quick 10-minute simmer won’t develop the deep, layered complexity. Give it at least 20 minutes to marry the flavors and thicken properly.
4. Over-Seasoning Too Early: Chiles vary wildly in heat and sweetness. Always taste after simmering, then adjust salt and spices. It’s easier to add than to fix an oversalted pot.
Storage & Meal Prep Tips
– Refrigeration: Store in an airtight container for up to 5 days. The flavor will continue to deepen over the first 48 hours, making it even more delicious.
– Freezing: This sauce freezes beautifully for up to 6 months. Pour into freezer-safe bags or silicone molds and lay flat to save space. Thaw overnight in the refrigerator or on a low stovetop.
– Reheating: To maintain the silky texture, reheat gently in a saucepan over medium-low heat, adding a splash of broth or water if it has thickened too much. Avoid microwaving, as it can cause the sauce to separate.
Conclusion
Mastering this Hatch Green Chile sauce is your ticket to consistently impressive, flavor-packed meals. The roasted, smoky sweetness it brings is unmatched by any store-bought option. Whether you use it for enchiladas, smother burritos, or stir it into a warming soup, this versatile base saves time and money. Dive into these Green Chile Recipes to see what other dishes you can reinvent. Share your results in the comments – I’d love to see how you made it your own!
FAQs
Q: Can I use frozen Hatch chiles instead of fresh?
A: Yes! Frozen chiles (typically already roasted and peeled) are a fantastic time-saver. Thaw them, drain any excess liquid, and proceed directly to the blending step. However, the flavor may be slightly less intense than freshly roasted.
Q: Why is my sauce bitter?
A: Bitterness often comes from over-roasting the chiles (burning the flesh, not just the skin) or from not removing the stems and seeds thoroughly. Always peel completely and taste a small piece of raw chile before proceeding.
Q: How can I make it less spicy?
A: The heat is primarily in the seeds and white membranes (placenta). Remove them thoroughly before roasting. If your sauce is still too hot, add a tablespoon of heavy cream or coconut milk to neutralize the heat, or stir in a diced potato while simmering (remove the potato before serving).
Q: Can I substitute the broth with water?
A: You can, but the flavor will be noticeably flat. Broth adds depth. For a vegetarian version, use vegetable broth; for a richer taste, use chicken broth or even a splash of beer.
Q: My sauce is too thick. Can I fix it?
A: Absolutely. Thin it with additional broth, water, or even a splash of vinegar (which also brightens the flavor) until it reaches your desired consistency. Remember that the sauce will thicken further as it cools.
Roasted Hatch Green Chile
Ingredients
Equipment
Method
- Preheat your oven to 400°F (200°C) and line a baking sheet with parchment paper for easy cleanup.
- Wash and dry the Hatch Green Chiles, then toss them with olive oil and salt on the prepared baking sheet, ensuring they are evenly coated.
- Roast the chiles for 15-20 minutes, flipping them halfway through, until their skins are blistered and charred.
- Once roasted, transfer the hot chiles to a bowl and cover tightly with plastic wrap or a lid, allowing them to steam for 10-15 minutes to loosen their skins.
- Carefully peel off the loosened skins, remove stems and seeds, then chop or slice the chiles as desired for your recipes.