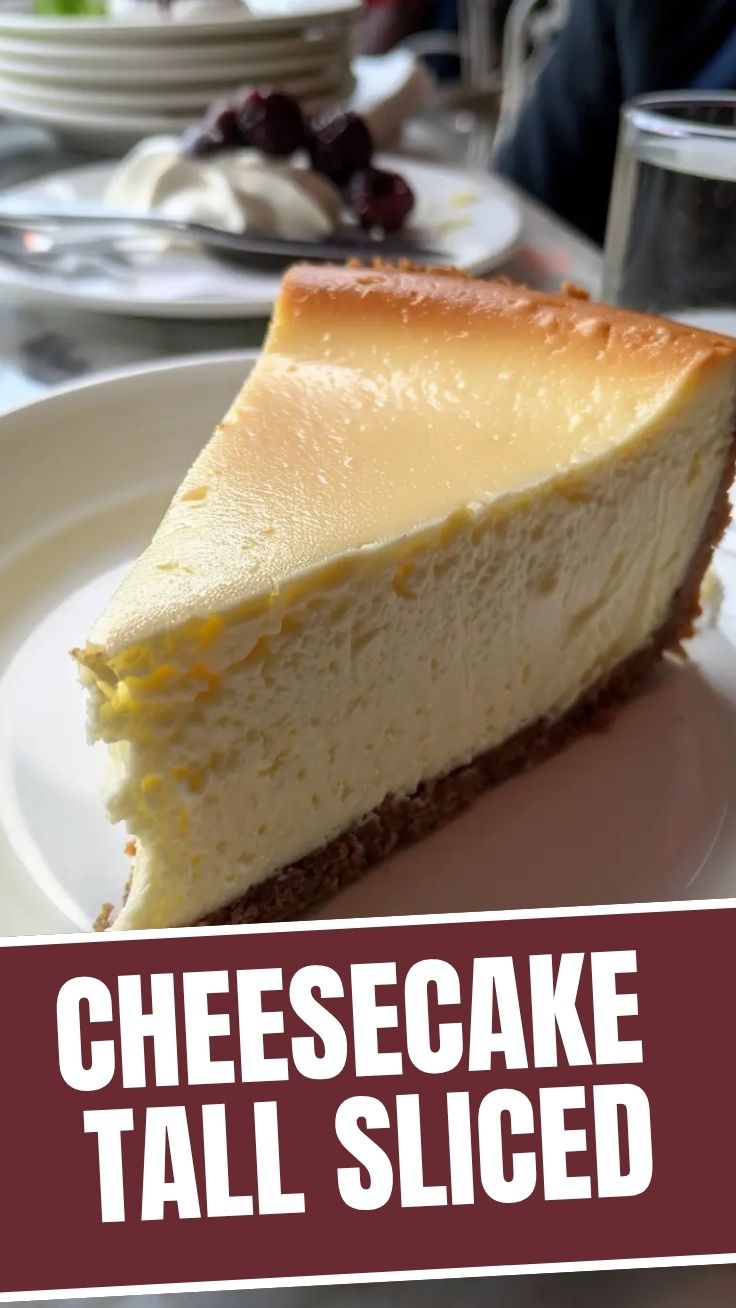
Master the Silky Smooth New York Cheesecake at Home
Ever dreamt of baking that quintessential, impossibly creamy New York Cheesecake that rivals your favorite bakery’s? The kind with a perfectly golden crust and a filling so smooth it practically melts in your mouth? While the thought of making such a masterpiece at home might seem daunting, it’s incredibly rewarding. Beyond the sheer satisfaction of creating something so delectable, preparing your own cheesecake ensures you control the quality of ingredients, customize flavors, and avoid the hefty price tag often associated with gourmet desserts. This comprehensive guide will walk you through every step to achieve cheesecake perfection, ensuring your homemade creation becomes an instant classic among your Cheesecake recipes.
Ingredients & Kitchen Tools
To embark on this culinary journey, gather the following:
For the Crust:
- 1 ½ cups crushed graham cracker crumbs: Approximately 10-12 full graham crackers. Adds a classic texture and buttery flavor.
- ¼ cup granulated sugar: Sweetens the crust and aids in browning.
- 6 tablespoons unsalted butter, melted: Binds the crumbs together for a sturdy base.
For the Filling:
- 32 ounces (four 8-ounce blocks) full-fat cream cheese, softened: Crucial for the creamy texture. Ensure it’s at room temperature for a lump-free filling.
- 1 ½ cups granulated sugar: Provides sweetness and balances the tang of the cream cheese.
- ¼ cup all-purpose flour: A small amount helps stabilize the filling and prevents cracks.
- 1 teaspoon vanilla extract: Enhances the overall flavor profile.
- ½ teaspoon lemon zest (optional): Brightens the flavor without making it overtly lemony.
- 4 large eggs, at room temperature: Essential for achieving the rich, custardy texture.
- ½ cup sour cream, at room temperature: Adds extra tanginess, moisture, and a silky smoothness.
Kitchen Tools & Utensils:
- 9-inch springform pan: Allows for easy removal of the cheesecake without damaging the sides.
- Aluminum foil (heavy-duty): For creating a water bath barrier.
- Large roasting pan: To hold the springform pan for the water bath.
- Electric mixer (stand or hand-held): For thoroughly combining ingredients.
- Rubber spatula: For scraping down bowls and gentle mixing.
- Measuring cups and spoons: For accurate ingredient quantities.
- Parchment paper (optional): For lining the bottom of the springform pan for easier release.
Prep Time & Cooking Schedule
Dedicating time to each stage is key for a flawless cheesecake.
- Prep Time: 25-30 minutes (includes crust preparation and filling mixing)
- Bake Time: 60-75 minutes (or until the edges are set and the center jiggles slightly)
- Cooling Time: 1 hour in the oven (door ajar), then 2-3 hours at room temperature, followed by at least 6-8 hours (preferably overnight) in the refrigerator.
This dessert requires patience, starting well in advance of when you plan to serve it. The extensive cooling period is crucial for setting the cheesecake and preventing cracks.
Step-by-Step Instructions
1. Preheat and Prepare: Preheat your oven to 350°F (175°C). Wrap the outside of your 9-inch springform pan with two layers of heavy-duty aluminum foil, ensuring it extends all the way to the top. This prevents water from seeping in during the water bath. Lightly grease the bottom of the pan.
2. Make the Crust: In a medium bowl, combine the graham cracker crumbs, granulated sugar, and melted butter. Mix until well combined and the crumbs resemble wet sand. Press the mixture firmly and evenly into the bottom of the prepared springform pan. Bake for 10 minutes, then remove from the oven and let cool slightly while you prepare the filling.
3. Prepare the Filling: In a large bowl with an electric mixer, beat the softened cream cheese on medium speed until smooth and creamy, about 2-3 minutes. Gradually add the 1 ½ cups granulated sugar and flour, beating until just combined and no lumps remain. Scrape down the sides of the bowl.
4. Add Flavorings and Eggs: Beat in the vanilla extract and lemon zest (if using). Add the eggs one at a time, beating on low speed until just incorporated after each addition. Do not overmix once the eggs are added, as this can incorporate too much air, leading to cracks. Gently fold in the sour cream until combined.
5. Assemble and Bake: Pour the New York Cheesecake filling over the pre-baked crust in the springform pan. Place the springform pan inside the larger roasting pan. Carefully pour hot water into the roasting pan until it reaches halfway up the side of the springform pan.
6. The Water Bath: Carefully transfer the roasting pan with the cheesecake to the preheated oven. Bake for 60-75 minutes. The cheesecake is done when the edges are set, but the center 2-3 inches still jiggles slightly when gently shaken.
7. Cooling is Key: Turn off the oven, prop the door open slightly, and let the cheesecake cool in the oven for 1 hour. This gradual cooling prevents sudden temperature changes that can cause cracks. Remove from the oven, remove the foil, and let it cool completely on a wire rack at room temperature for 2-3 hours. Finally, cover and refrigerate for at least 6-8 hours, or preferably overnight. A well-chilled cheesecake is easier to slice and has the best texture, making it one of the most delightful Cheesecake recipes.
Nutritional Benefits & Advantages
A moderate slice of New York Cheesecake, while indulgent, offers certain benefits. Full-fat dairy, like cream cheese and sour cream, provides essential fat-soluble vitamins (A, D, E, K) and calcium for bone health. Eggs contribute high-quality protein and choline, important for brain function. While rich in calories and fats, homemade versions allow you to control sugar content compared to many store-bought options. Enjoyed as an occasional treat, it can be a satisfying part of a balanced diet.
Tips Variations & Cooking Advice
- Flavor Boosts: Swirl in fruit purees (raspberry, blueberry), caramel, or chocolate ganache on top. Add a touch of almond extract for a delicate nutty note.
- Crust Variations: Experiment with different cookie crumbs—Oreos, shortbread, or even ginger snaps for a spicy crunch.
- Dietary Adaptations: For a gluten-free crust, use gluten-free graham crackers or crushed gluten-free cookies. For a slightly lighter version, you can try using Neufchâtel cheese for part of the cream cheese, though it will alter the classic texture slightly.
- Preventing Water Bath Woes: Ensure your foil is securely wrapped around the springform pan. If water does seep in, the crust will become soggy.
Common Mistakes to Avoid
- Overmixing the Filling: This incorporates too much air, leading to a “soufflé-like” texture that rises too high and then cracks as it cools. Mix only until just combined.
- Baking at Too High a Temperature: High heat will cause the cheesecake to bake too quickly, resulting in a rubbery texture and cracks.
- Opening the Oven Door Too Often: This causes temperature fluctuations, also a major culprit for cracks.
- Skipping the Water Bath: A water bath provides a moist, even heat environment, ensuring a creamy texture and preventing cracking.
- Impatience with Cooling: Rushing the cooling process almost guarantees cracks. Allow ample time for gradual cooling and chilling.
Storage & Meal Prep Tips
Your homemade New York Cheesecake is best stored in the refrigerator, covered loosely with plastic wrap or in an airtight container. It will stay fresh for up to 5-7 days. For longer storage, slices can be individually wrapped in plastic wrap and then foil, and frozen for up to 1-2 months. Thaw frozen slices in the refrigerator overnight before serving. Do not refreeze thawed cheesecake.
Conclusion
Mastering the New York Cheesecake at home is a culinary achievement that will impress friends and family alike. With patience, precision, and this detailed guide, you can create a dessert that embodies creamy perfection and rich flavor. Don’t be afraid to experiment with toppings or crust variations to make it uniquely yours. We encourage you to try this quintessential dessert and add it to your repertoire of impressive Cheesecake recipes. Share your creations and tips in the comments below!
FAQs
Q1: Why did my cheesecake crack?
A1: Cracks are often due to overmixing, baking at too high a temperature, opening the oven too frequently, or not allowing the cheesecake to cool gradually. Ensure ingredients are at room temperature and do not overmix, especially after adding eggs.
Q2: What if I don’t have a springform pan?
A2: While a springform pan is ideal, you can use a regular 9-inch round cake pan lined with parchment paper that extends above the rim to create “sling” handles for lifting. However, be cautious with the water bath.
Q3: Can I make this cheesecake ahead of time?
A3: Absolutely! Cheesecake benefits greatly from chilling overnight, making it an excellent dessert for meal prepping or preparing for events days in advance.
Q4: How do I know when the cheesecake is fully baked?
A4: The edges should be set and slightly puffed, while the center 2-3 inches will still have a slight jiggle when you gently shake the pan. It will continue to set as it cools.
Q5: What are some good toppings for New York Cheesecake?
A5: Classic options include fresh berries, cherry pie filling, chocolate ganache, caramel sauce, or a simple dollop of whipped cream.
Best way to grow 3 New York CheesecakeNew York Cheesecake
Ingredients
Equipment
Method
- Preheat oven to 350°F (175°C). Combine graham cracker crumbs, sugar, and melted butter, then press into the bottom of a 9-inch springform pan.
- Beat softened cream cheese and sugar until smooth, then mix in sour cream and vanilla extract.
- Add eggs one at a time, mixing well after each addition until just combined. Pour the filling over the crust.
- Bake for 15 minutes at 350°F (175°C), then reduce oven temperature to 250°F (120°C) and bake for an additional 60-70 minutes.
- Turn off the oven and let the cheesecake cool in the oven with the door slightly ajar for 1 hour, then chill in the refrigerator for at least 4 hours or overnight.