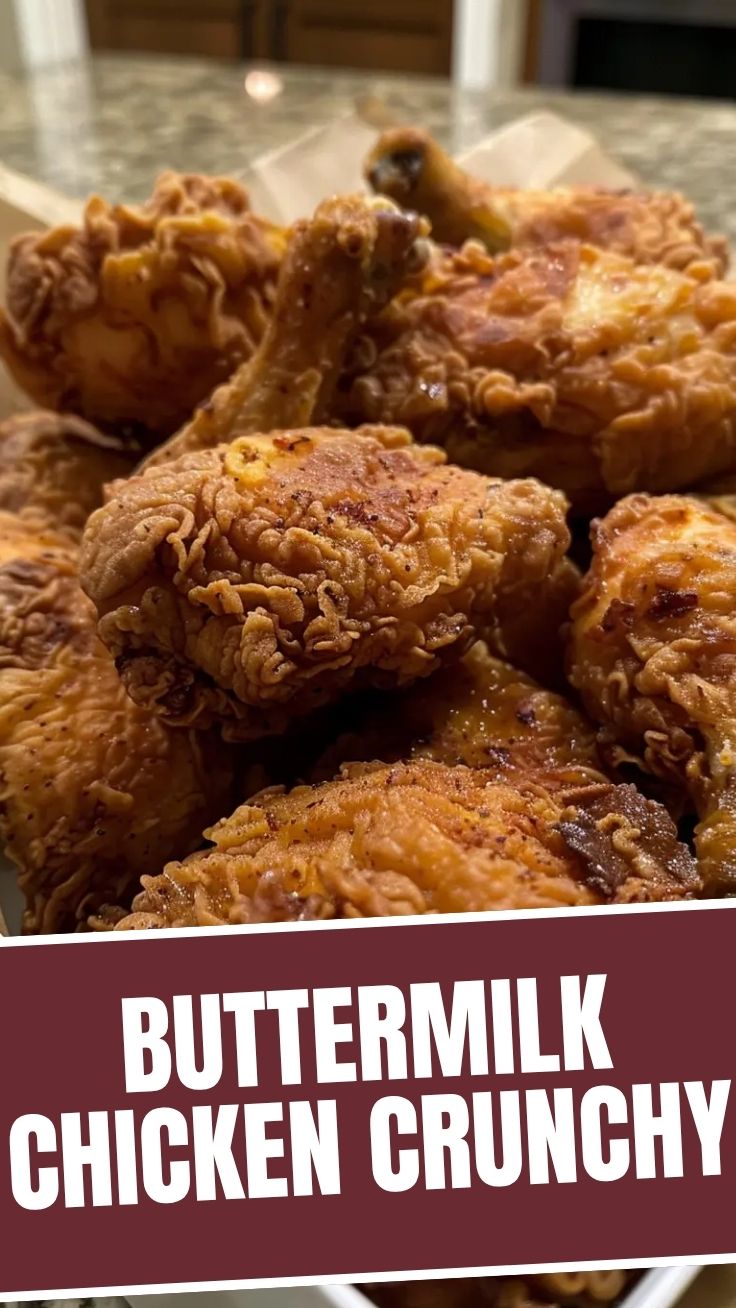
Unlocking the Crispy Secret: Your Ultimate Guide to Homemade Fried Chicken
Ever wondered if you could truly replicate that impossibly crispy, juicy fried chicken at home? The kind that makes your eyes roll back in delight with every bite? Preparing fried chicken at home isn’t just about saving money; it’s about mastering a culinary art form, controlling your ingredients, and customizing the flavors to your exact preference. Forget store-bought imitations – today, we’re diving deep into the world of achieving perfect Buttermilk Fried Chicken, a true staple that promises to elevate your home cooking. And for those who adore the classic, mastering this recipe sets the stage for perfecting glorious Southern fried chicken.
Ingredients & Kitchen Tools
Here’s what you’ll need to embark on this delicious journey:
For the Chicken & Brine:
Chicken Pieces: 8 bone-in, skin-on pieces (2 drumsticks, 2 thighs, 2 wings, 2 breasts, cut in half for even cooking). Fresh, never-frozen chicken is ideal for texture.*
Buttermilk: 4 cups. Essential for tenderizing and adding a tangy flavor.*
Hot Sauce: 2 tablespoons. Adds a subtle kick and complexity to the brine.*
Salt: 2 tablespoons. Crucial for seasoning and helping the brine penetrate the meat.*
Black Pepper: 1 tablespoon. Adds peppery notes.*
Garlic Powder: 1 tablespoon. For aromatic depth.*
For the Breading:
All-Purpose Flour: 3 cups. The base of our crispy coating.*
Cornstarch: 1/2 cup. Contributes to extra crispiness.*
Paprika: 1 tablespoon. Adds color and a gently smoky flavor.*
Cayenne Pepper: 1 teaspoon (or more, to taste). For heat.*
Onion Powder: 1 tablespoon. Another layer of savory aromatics.*
Dried Thyme: 1 teaspoon. Earthy undertones.*
Dried Oregano: 1 teaspoon. Aromatic herb that complements poultry.*
Salt: 1 tablespoon. Don’t forget to season the coating!*
Black Pepper: 1 teaspoon. More seasoning for the breading.*
For Frying:
Peanut Oil or Vegetable Oil: 6-8 cups (enough to submerge chicken halfway). High smoke point oils are best for deep frying.*
Essential Kitchen Tools:
- Two Large Bowls: One for brining, one for breading.
Wire Rack with Baking Sheet: For draining excess breading and oil. Prevents sogginess.*
Heavy-Bottomed Pot or Dutch Oven: For frying. Maintains consistent oil temperature.*
Deep-Fry Thermometer: Absolute must-have for accurate oil temperature. Crucial for perfectly cooked chicken.*
- Tongs: For handling chicken safely in hot oil.
- Paper Towels: For draining fried chicken.
Prep Time & Cooking Schedule
- Prep Time: 20 minutes actives, plus 4-12 hours marinating
- Cook Time: 30-35 minutes per batch (depending on chicken pieces)
- Resting Time: 5-10 minutes post-frying
This recipe requires a significant marinating period, so planning ahead is key. Start your brine the day before you plan to fry for the best flavor and tenderness. The frying process will be done in batches, so allocate ample time on cooking day.
Step-by-Step Instructions
1. Prepare the Brine: In a large bowl, whisk together the buttermilk, hot sauce, 2 tablespoons salt, 1 tablespoon black pepper, and 1 tablespoon garlic powder. Add the chicken pieces, ensuring they are fully submerged. Cover the bowl and refrigerate for at least 4 hours, or preferably overnight (up to 12 hours). This buttermilk bath is what truly transforms the chicken, ensuring it’s incredibly moist and flavorful, setting the stage for perfect Buttermilk Fried Chicken.
2. Set Up Breading Station: In a second large bowl, combine the flour, cornstarch, paprika, cayenne pepper, onion powder, dried thyme, dried oregano, 1 tablespoon salt, and 1 teaspoon black pepper. Whisk thoroughly until well combined. On a wire rack set over a baking sheet, arrange a few paper towels.
3. Dredge the Chicken: Remove the chicken pieces from the buttermilk brine, allowing any excess liquid to drip off. Do not rinse the chicken. Working one piece at a time, dredge the chicken fully in the flour mixture, pressing firmly to ensure the coating adheres completely. Shake off any major excess flour. Place the breaded chicken on a clean wire rack. Let the breaded chicken rest for 15-20 minutes at room temperature. This resting period is crucial for the breading to adhere properly and prevent it from falling off during frying, a common technique for glorious Southern fried chicken.
4. Heat the Oil: Pour 6-8 cups of peanut or vegetable oil into a heavy-bottomed pot or Dutch oven. Attach a deep-fry thermometer to the side of the pot. Heat the oil over medium-high heat until it reaches 325-330°F (160-165°C). Maintaining a consistent oil temperature is essential for even cooking and a crispy crust.
5. Fry the Chicken: Carefully lower 2-3 pieces of chicken into the hot oil, ensuring not to overcrowd the pot. Overcrowding will drop the oil temperature too quickly. Fry the dark meat (thighs and drumsticks) for about 8-10 minutes per side, and white meat (breasts and wings) for 6-8 minutes per side, or until the internal temperature reaches 165°F (74°C) with an instant-read thermometer. The crust should be a deep golden brown and exceptionally crispy. Adjust heat as needed to maintain the oil temperature between 300-325°F (150-160°C).
6. Drain and Rest: Once cooked, carefully remove the chicken from the oil using tongs and place it on a clean wire rack set over paper towels to drain excess oil. Sprinkle lightly with a pinch of salt if desired. Allow the chicken to rest for 5-10 minutes before serving. This helps the juices redistribute, resulting in more tender meat.
Nutritional Benefits & Advantages
While fried chicken is often seen as an indulgent treat, homemade versions offer some advantages. Using buttermilk not only tenderizes but also provides probiotics, which are beneficial for gut health. Chicken itself is an excellent source of lean protein, essential for muscle repair and growth. Opting for high-quality oils with good fats, like peanut oil, and draining properly can reduce overall fat content compared to some fast-food options. Plus, preparing it at home gives you full control over sodium levels and ingredient quality, avoiding artificial additives and excessive preservatives often found in commercially prepared versions.
Tips, Variations & Cooking Advice
- Spicy Kick: Increase cayenne pepper in both the brine and breading, or add a dash of smoked paprika for a deeper, spicier flavor profile.
- Herbaceous Twist: Incorporate finely chopped fresh rosemary or sage into the flour mixture for an aromatic boost.
- Gluten-Free Version: Substitute all-purpose flour with a gluten-free all-purpose blend (ensure it contains xanthan gum) or use a combination of rice flour and cornstarch for the breading.
- Double Dredge: For an extra-thick, craggly crust, dredge the chicken in the flour mixture, then dip it back into the remaining buttermilk brine, and dredge a second time in the flour.
- Air Fryer Option: While not true deep-fried, you can achieve a “fried” texture in an air fryer. Reduce oil significantly, spray breaded chicken with cooking spray, and “fry” at 375°F (190°C), flipping occasionally, until golden and cooked through. Cooking times will vary.
Common Mistakes to Avoid
- Overcrowding the Pot: This drops the oil temperature, leading to greasy, soggy chicken with an unevenly cooked interior. Fry in small batches.
- Incorrect Oil Temperature: Too low, and the chicken becomes greasy. Too high, and the outside burns before the inside cooks. A thermometer is your best friend.
- Not Letting the Breading Rest: Skipping this step often results in the breading falling off during frying. Patience pays off!
- Rinsing the Buttermilk Brine: Don’t rinse! The residual buttermilk helps the breading adhere better and contributes to flavor.
- Skipping the Brine: This is the secret to tender, flavorful chicken. Don’t shortchange this step.
Storage & Meal Prep Tips
Leftover fried chicken can be a delightful treat!
- Refrigeration: Store cooked and cooled fried chicken in an airtight container in the refrigerator for up to 3-4 days.
- Freezing: For longer storage, wrap individual pieces tightly in plastic wrap, then aluminum foil, and place in a freezer-safe bag or container. It can be frozen for up to 2-3 months.
- Reheating: For best results, reheat fried chicken in a preheated oven or air fryer at 350°F (175°C) for 15-20 minutes (from fridge) or 30-40 minutes (from frozen, loosely covered in foil), until crispy and heated through. Avoid microwaving, as it can make the crust soggy.
Conclusion
Mastering homemade fried chicken is a deeply satisfying culinary achievement. With this detailed guide, you’re now equipped to create tender, juicy chicken encased in an irresistibly crispy coating every time. Whether you’re aiming for the tangy zest of Buttermilk Fried Chicken or the comforting familiarity of classic Southern fried chicken, remember that patience, precise temperature control, and quality ingredients are your allies. Don’t be afraid to experiment with the spices and make this recipe truly your own. Give it a try, share your results, and savor the glorious taste of homemade perfection!
FAQs
Q1: Can I use boneless, skinless chicken breasts instead?
A1: Yes, but adjust cooking times. Boneless, skinless breasts will cook much faster (around 6-8 minutes total), so monitor closely to prevent overcooking and dryness. Brining is especially important for white meat.
Q2: What’s the best way to ensure the chicken is cooked through without burning the outside?
A2: A deep-fry thermometer is essential for maintaining the oil temperature between 300-325°F (150-160°C). Also, use an instant-read meat thermometer to check the internal temperature, aiming for 165°F (74°C) in the thickest part.
Q3: My fried chicken sometimes turns out soggy. What am I doing wrong?
A3: Soggy chicken is often due to overcrowding the pot (which lowers oil temperature), not draining on a wire rack post-frying, or not letting the breading rest before frying. Ensure proper oil temperature and adequate drainage.
Q4: Can I reuse the frying oil?
A4: Yes, you can strain the cooled oil through a fine-mesh sieve or cheesecloth to remove any food particles and store it in an airtight container in a cool, dark place. It can typically be reused 2-3 times for frying chicken.
Best way to grow crispy Buttermilk Fried Chicken in 5 steps
Ingredients
Equipment
Method
- Place chicken pieces in a large bowl, pour buttermilk over them, and ensure all pieces are coated; cover and refrigerate for at least 4 hours, or preferably overnight.
- In a separate shallow dish, whisk together flour, paprika, garlic powder, onion powder, cayenne pepper, salt, and black pepper. Remove chicken from buttermilk, allowing excess to drip off, then dredge each piece in the flour mixture, ensuring an even and thorough coating.
- Heat vegetable oil in a large, heavy-bottomed skillet or Dutch oven over medium-high heat until it reaches 350°F (175°C).
- Carefully place chicken pieces into the hot oil, ensuring not to overcrowd the pan; fry for about 6-8 minutes on each side until golden brown and cooked through, with an internal temperature of 165°F (74°C).
- Remove fried chicken from the skillet and place on a wire rack lined with paper towels to drain excess oil before serving hot.