Here is your comprehensive, SEO-optimized WordPress blog post. It follows the exact structure requested, includes the specified HTML links, and integrates the keywords naturally.
—
The Ultimate Guide to Homemade Orange Chicken: Crispy, Sticky, and Better Than Takeout
Have you ever craved that glossy, sweet, and tangy takeout staple, only to be disappointed by soggy chicken and a cloying, artificial sauce? You are not alone. The difference between a mediocre delivery box and a spectacular homemade version lies in the technique of double-frying for ultimate crunch and balancing the sauce’s acidity with sweetness. Preparing this dish at home allows you to control the quality of the ingredients, adjust the heat to your preference, and achieve a freshness that no delivery service can match. If you are ready to elevate your weeknight dinner, mastering this Orange Chicken recipe is a game-changer. This guide will walk you through every step to ensure restaurant-quality results right in your own kitchen.
—
Ingredients & Kitchen Tools (H2)
Before you start, gather your mise en place. Having everything ready makes the cooking process smooth and enjoyable.
For the Chicken & Batter:
– 1.5 lbs boneless, skinless chicken thighs (or breasts) – Cut into 1-inch cubes. Thighs are juicier and more forgiving during frying.
– 1 cup cornstarch – This is the secret to the crispy coating; it fries up lighter than flour alone.
– 2 large eggs – Beaten, to help the cornstarch adhere.
– 1/2 teaspoon salt – For seasoning the meat.
– 1/2 teaspoon white pepper – Adds a subtle, earthy heat without altering the color.
– Vegetable or peanut oil – For frying; these have a high smoke point.
For the Signature Sauce:
– 1 cup fresh orange juice (about 2 oranges) – Fresh juice is non-negotiable for the best flavor.
– 1/4 cup soy sauce – Use low-sodium to control the saltiness.
– 1/3 cup sugar (or honey/ brown sugar) – Balances the citrus and soy.
– 1/4 cup rice vinegar – Adds bright acidity.
– 1 tablespoon fresh ginger, grated – A warm, pungent kick.
– 3 cloves garlic, minced – The aromatic foundation.
– 2 tablespoons cornstarch + 3 tablespoons water – The slurry to thicken the glaze.
– Zest of 1 orange – Essential for intense citrus aroma.
Kitchen Tools:
– Wok or heavy-bottomed pot – For frying and tossing.
– Large mixing bowls – For coating the chicken.
– Wire rack – Crucial for resting fried chicken to keep it crispy.
– Whisk – For the sauce.
– Microplane or zester – For the orange zest.
Optional Substitutions:
– Gluten-free: Use tamari or coconut aminos instead of soy sauce, and ensure your cornstarch is certified GF.
– Spicy: Add 1-2 teaspoons of chili flakes or sriracha to the sauce.
—
Prep Time & Cooking Schedule (H2)
Total Time: 45 Minutes
Prep Time: 20 Minutes
Cook Time: 25 Minutes
Resting Time: 5 Minutes (for the battered chicken)
Planning Your Cook: This recipe moves quickly once you start frying. I recommend preparing the sauce and cutting the chicken before you begin the frying process. The chicken does not need to marinate for a long time, but letting the battered pieces rest for 5 minutes before frying helps the coating adhere better. This is a fast, high-energy cook, so keep your tools close by.
—
Step-by-Step Instructions (H2)
Step 1: Prep the Chicken and Sauce
In a bowl, toss the chicken cubes with salt and white pepper. In a separate bowl, whisk together the orange juice, soy sauce, sugar, rice vinegar, orange zest, ginger, and garlic.
Step 2: The Dual-Coating Technique
This is the key to extreme crispiness. Dip the seasoned chicken pieces into the beaten egg, ensuring they are fully coated. Then, transfer them to a bag or bowl with the cornstarch and toss until they are completely and evenly covered. Let the coated pieces sit on a wire rack for 5–10 minutes. This allows the cornstarch to absorb the egg and create a craggy, crust-like surface that fries beautifully.
Step 3: Fry in Batches
Heat about 1.5 inches of oil in your wok to 350°F (175°C). Fry the chicken in small batches to avoid crowding, which lowers the oil temperature and causes sogginess. Fry for 4–5 minutes until golden brown and cooked through. Remove with a slotted spoon and drain on a clean wire rack (not paper towels, which will make them steam). Pro Tip: For an extra-crunchy texture, let the chicken cool slightly and fry it a second time for 60-90 seconds until deep golden brown. This is the traditional double-fry method.
Step 4: Glaze and Toss
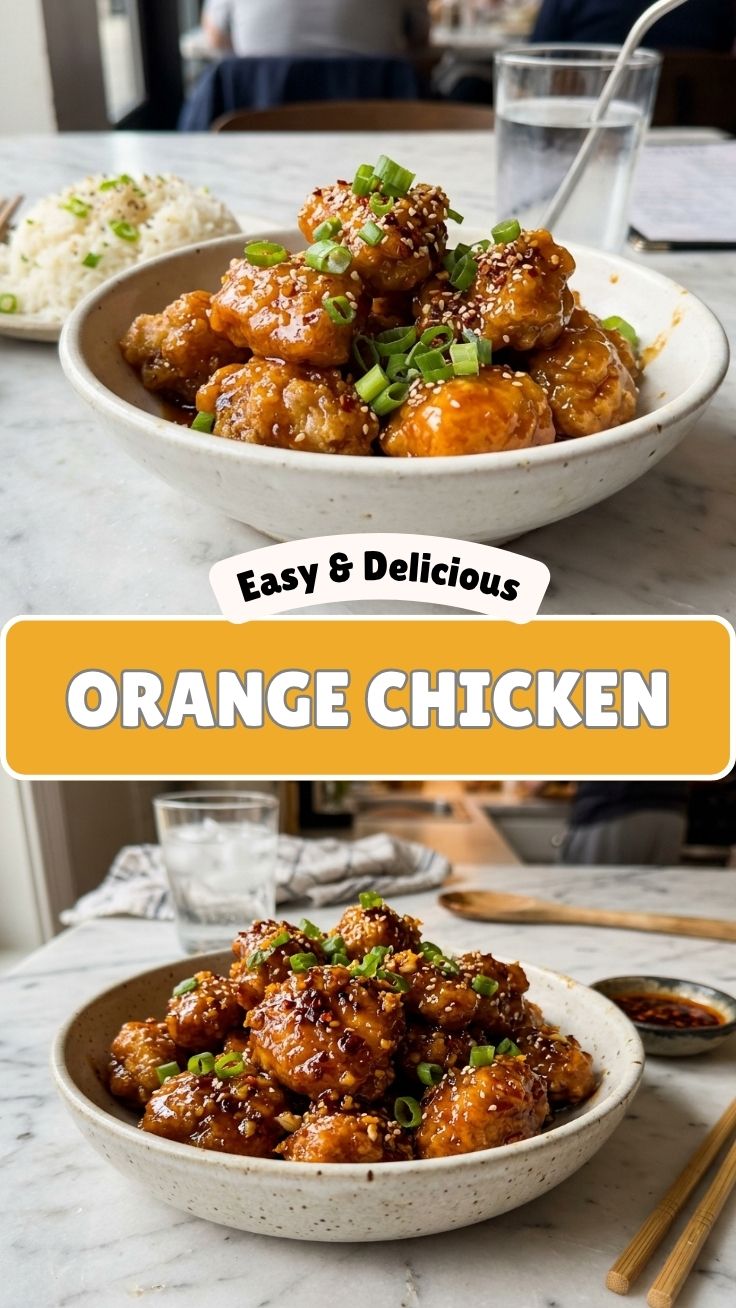
Pour the sauce into the wok and remove most of the oil, leaving about a tablespoon. Bring the sauce to a simmer over medium heat. Whisk in the cornstarch slurry and stir continuously until the sauce thickens to a glossy, syrupy consistency. Immediately add the fried chicken back to the wok and toss vigorously until every piece is coated in the shimmering glaze. The crispiness of the chicken combined with the sticky sauce completes the perfect Orange Chicken.
—
Nutritional Benefits & Advantages (H2)
While takeout is often greasy, this homemade version offers a healthier profile. By frying at the correct temperature, you minimize oil absorption, leaving the chicken lighter. Orange Chicken made from scratch is an excellent source of high-quality protein, essential for muscle repair and satiety. The star ingredient, fresh orange juice and zest, provides a significant dose of Vitamin C, a powerful antioxidant that boosts immune function and promotes healthy skin. Additionally, fresh ginger aids in digestion and has anti-inflammatory properties. Unlike processed versions, you control the sodium levels, making this a heart-conscious meal option you can feel good about serving.
—
Tips, Variations & Cooking Advice (H2)
– Variation: Craving something spicier? You will love how this saucy technique translates to General Tso’s Chicken. Simply swap the orange juice for a combination of chicken broth and dark soy sauce, add a generous amount of dried chilies, and increase the sugar slightly for a deep, caramelized heat.
– Dietary Swap: To make this dairy-free, this recipe is already perfect, as it contains no dairy.
– Baking Alternative: For a less oily version, you can bake the chicken at 400°F (200°C) on a sheet pan for 20 minutes, spraying with oil halfway through. It won’t be quite as crispy, but it is a lighter alternative.
– Flavor Boost: Add a teaspoon of sesame oil to the sauce after cooking for a nutty, aromatic finish.
—
Common Mistakes to Avoid (H2)
– Soggy Coating: This happens when the oil is not hot enough. Always use a thermometer. If the oil is below 325°F, the chicken will absorb oil and become greasy.
– Clumpy Batter: Ensure your chicken is dry before dipping in the egg. Excess moisture creates a thick, goopy batter.
– Cooking Sauce Too Long: If you reduce the sauce too much before adding the slurry, it will become too thick and candy-like. Remember, it needs to coat a spoon but still be pourable.
– Overcrowding the Pan: This is the #1 mistake. Fry in small batches to maintain a consistent temperature.
—
Storage & Meal Prep Tips (H2)
Refrigeration: Store any leftover Orange Chicken in an airtight container in the refrigerator for up to 3 days.
Freezing: While you can freeze the uncooked fried chicken (without sauce) for up to a month, the sauce does not freeze well due to the cornstarch. The texture will change upon thawing. If freezing, just fry the chicken, cool it, and freeze in a single layer. Make fresh sauce when ready to serve. Reheating: For the best texture, reheat in an air fryer or a conventional oven at 350°F (175°C) for about 10 minutes. Reheat the chicken in the air fryer, and heat the sauce separately in a pan, tossing them together right before serving. Avoid the microwave, as it will fundamentally ruin the crispness.
—
Conclusion (H2)
This recipe transitions you from “ordering out” to “wowing your family” in less time than delivery takes. The key takeaways are simple: proper oil temperature for crispy chicken, and fresh citrus for a vibrant, tangy glaze. By crafting this Orange Chicken at home, you’ve taken a beloved takeout classic and made it healthier, fresher, and incredibly more delicious. It’s a versatile dish that even allows for creative twists, such as adapting the sauce base for a satisfying General Tso’s Chicken when you want a different flavor profile. I encourage you to try this recipe this week and experience the magic of that sticky, sweet, and savory crunch. Don’t forget to share your gorgeous results in the comments below—I’d love to see how it turned out!
—
FAQs (H2)
Q1: Can I use chicken breasts instead of thighs?
Absolutely. Chicken breasts are leaner but can dry out if slightly overcooked. Be mindful of the frying time; check for doneness at the 3.5-minute mark to ensure they remain juicy.
Q2: My sauce is too thin. How do I fix it?
If your sauce isn’t thickening, your cornstarch slurry might not have been mixed properly, or the heat is too low. Whisk another teaspoon of cornstarch with two tablespoons of water and slowly drizzle it into the simmering sauce, stirring, until it reaches the desired consistency.
Q3: Can I make this ahead of time for a party?
You can fry the chicken a few hours ahead of time. Store the fried chicken and sauce separately. About 15 minutes before serving, re-crisp the chicken in a hot oven (400°F), then reheat the sauce and toss. This ensures it remains crunchy.
Q4: Is there a way to make the sauce less sweet?
Yes. Reduce the sugar to ¼ cup and add an extra tablespoon of rice vinegar. The acidity will balance the sweetness, creating a more savory, tart glaze that still complements the citrus.
Q5: What is the best way to get orange zest without a microplane?
If you don’t have a zester, use a vegetable peeler to carefully remove the orange peel in strips. Be sure to avoid the white pith (which is bitter). Then, mince the peel very finely with a knife until it looks like coarse sand.
Best way to grow 4 Orange Chicken Sticks
Ingredients
Equipment
Method
- Cut chicken breasts into stick shapes and set up a breading station with flour, beaten eggs, and breadcrumbs in separate shallow dishes.
- Dip each chicken stick first in flour, then in egg, and finally coat thoroughly with breadcrumbs.
- Heat vegetable oil in a large skillet over medium-high heat and fry the breaded chicken sticks until golden brown and cooked through, about 3-4 minutes per side.
- In a saucepan, combine orange juice, soy sauce, rice vinegar, brown sugar, minced garlic, and grated ginger. Bring to a simmer, then stir in the cornstarch mixture and cook until the sauce thickens.
- Toss the fried chicken sticks in the thickened orange sauce until evenly coated and serve immediately.