Why Homemade Is Always Better: The Ultimate Guide to Perfecting Your Favorite Party Blend
Have you ever opened a store-bought bag of seasoned cereal, only to be disappointed by stale pieces and uneven flavor? That’s the exact problem that drives so many home cooks back to their own kitchens. When you prepare a batch of this beloved treat yourself, you control the crunch, the seasoning balance, and the freshness. There’s truly no comparison. Making your own Chex Mix from scratch isn’t just about saving money—it’s about crafting a snack mix that tastes precisely how you want it, batch after batch. The aroma alone as it bakes will fill your home with irresistible comfort. Let’s dive into the details that will elevate your next batch from good to absolutely unforgettable.
—
Ingredients & Kitchen Tools
Before you begin, gather these essentials. Each ingredient plays a specific role in building that signature crunch and savory depth.
Core Ingredients:
– Rice Chex cereal (4 cups) – provides the light, crispy base that absorbs seasoning perfectly.
– Corn Chex cereal (4 cups) – adds a slightly heartier texture and corn flavor.
– Wheat Chex cereal (3 cups) – brings a nutty, sturdy crunch that holds up well.
– Pretzel twists (2 cups) – contribute saltiness and a satisfying snap.
– Mixed nuts (1.5 cups) – add richness and protein; salted or unsalted both work depending on your sodium preference.
– Unsalted butter (6 tablespoons) – the fat that carries the seasoning and ensures even coating.
– Worcestershire sauce (2 tablespoons) – the umami backbone that defines the classic savory profile.
– Seasoned salt (1 teaspoon) – amplifies the savory flavor; avoid iodized table salt, which can taste harsh.
– Garlic powder (½ teaspoon) – adds depth without the burn of raw garlic.
– Onion powder (½ teaspoon) – rounds out the savory notes.
Kitchen Tools:
– Large roasting pan or baking sheet with sides – prevents spillage and allows easy stirring.
– Large mixing bowl – for initial tossing of ingredients.
– Wooden spoon or silicone spatula – gentle enough not to break the cereal.
– Measuring cups and spoons – accuracy matters for seasoning balance.
Optional Substitutions:
– Gluten-free: Use gluten-free pretzels and double-check Worcestershire sauce labels.
– Dairy-free: Substitute vegan butter or a high-smoke-point oil like avocado oil.
– Low-sodium: Choose unsalted nuts and reduce or omit seasoned salt.
—
Prep Time & Cooking Schedule
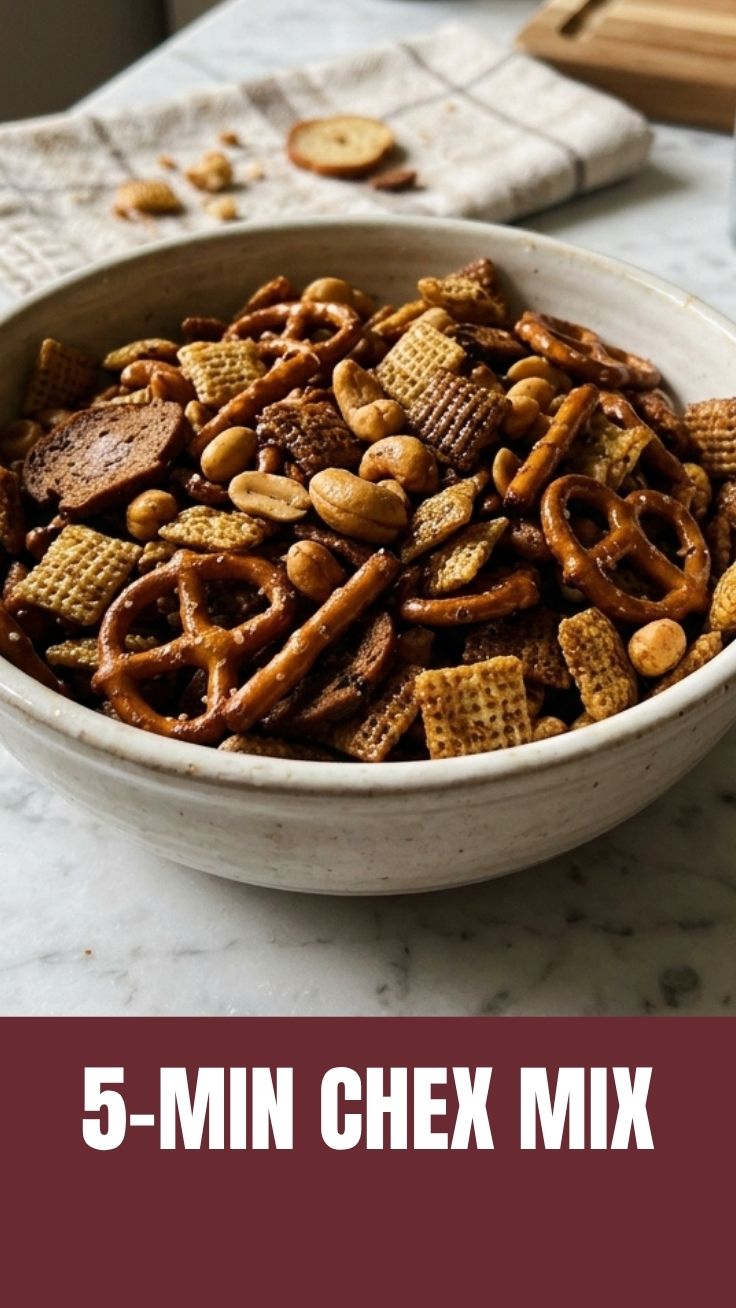
– Prep time: 10 minutes – measuring and mixing is quick and straightforward.
– Bake time: 60 minutes – low-and-slow baking at 250°F (120°C) ensures everything dries evenly without burning.
– Resting time: 15 minutes – cooling on the pan allows the coating to set fully.
This schedule works beautifully because the total hands-on time is minimal. While the oven does its work, you can prep other dishes or simply enjoy the comforting aroma spreading through your kitchen. Plan to stir every 15 minutes for best results.
—
Step-by-Step Instructions
1. Preheat your oven to 250°F (120°C) and position the rack in the center. This gentle temperature is critical—it dries the moisture from the butter and seasoning without toasting the cereal too quickly.
2. In your large roasting pan, combine the three Chex cereals, pretzel twists, and mixed nuts. Toss gently with your hands or a wooden spoon to distribute evenly.
3. In a small saucepan over low heat, melt the butter. Once melted, remove from heat and stir in the Worcestershire sauce, seasoned salt, garlic powder, and onion powder. Whisk until fully combined.
4. Drizzle the butter mixture slowly over the dry ingredients while tossing continuously. The goal is even coverage—no dry spots and no soggy clumps. Use a folding motion with your spatula to coat every piece.
5. Spread the mixture into an even layer in the pan. Place in the preheated oven and bake for 1 hour, stirring well every 15 minutes. This stirring step is non-negotiable—it ensures the seasoning doesn’t pool in one spot and prevents edges from over-toasting.
6. After 60 minutes, remove the pan from the oven. The mixture will still feel slightly soft but will crisp as it cools. Let it rest in the pan for 15 minutes without stirring. During this time, the residual heat finishes the drying process, locking in that signature crunch for your homemade Chex Mix.
7. Transfer to a large bowl or serving dish once cooled. This is where your personal snack mix truly shines—even coating, every piece perfectly crisp, no stale surprises.
—
Nutritional Benefits & Advantages
While this treat is certainly an indulgence, it offers some nutritional high points worth noting.
– Whole grain base: Chex cereals are made from whole grains, providing fiber and essential B vitamins.
– Healthy fats: Nuts deliver monounsaturated and polyunsaturated fats, which support heart health when consumed in moderation.
– Moderate protein: The combination of nuts and wheat Chex contributes about 5 grams of protein per serving, helping with satiety.
– Portion control friendly: Because the texture is so satisfying, a smaller handful often feels more fulfilling than potato chips or other less complex snacks.
– Customizable nutrition: You can easily increase the nut-to-cereal ratio for more protein and healthy fats, or reduce the butter for fewer calories.
—
Tips Variations & Cooking Advice
Flavor Variations:
– Sweet & Salty: Add 1 cup of dark chocolate chips after baking and toss gently until melted.
– Spicy Kick: Increase Worcestershire to 3 tablespoons and add 1 teaspoon of cayenne pepper or hot sauce.
– Smoky BBQ: Replace seasoned salt with smoked paprika and add 2 tablespoons of your favorite BBQ rub.
Cooking Advice:
– Use an oven thermometer—250°F is lower than many ovens read accurately, and even 25 degrees higher can burn the cereal.
– For a microwave version (in a pinch), microwave in 2-minute intervals on high, stirring between each, for about 8–10 minutes total. The texture will be less crunchy but still delicious.
– Double the batch easily—just use two pans and rotate them top to bottom and front to back at each stirring interval.
Dietary Adaptations:
– Gluten-free: as noted, use certified gluten-free pretzels.
– Dairy-free: vegan butter works well; just ensure it has a high enough smoke point (most do).
– Low-fat: reduce butter to 3 tablespoons and use a non-stick spray on the pan; texture will be lighter but still crisp.
—
Common Mistakes to Avoid
– Skipping the stirring intervals – This is the #1 mistake that leads to burnt edges and under-seasoned centers. Set a timer for every 15 minutes.
– Using too high a temperature – 250°F is not a typo. Higher heat cooks the butter too fast, leaving the coating greasy and the cereal soggy.
– Overcrowding the pan – If your layers are more than 1 inch deep, moisture gets trapped. Use two pans if needed.
– Adding seasoning too early – Always melt the butter first and mix it with seasonings before drizzling. Pouring dry seasonings directly onto cereal leads to bitter, concentrated pockets.
– Not cooling completely before storing – Warm moisture will soften everything. Be patient—let it cool fully in the pan before transferring to an airtight container.
—
Storage & Meal Prep Tips
Refrigeration: Store fully cooled Chex Mix in an airtight container at room temperature for up to 2 weeks. Do not refrigerate—the moisture in the fridge will soften the crispness.
Freezing: This snack mix freezes exceptionally well for up to 3 months. Place in a zip-top freezer bag, press out all air, and seal. Thaw at room temperature for 30 minutes before serving—crispness returns fully.
Reheating: If you notice softening after storage, spread a thin layer on a baking sheet and warm at 300°F (150°C) for 5 minutes. Let cool completely before returning to the container.
Meal Prep Tip: This recipe is perfect for batch cooking. Double or triple it and portion into small bags for easy grab-and-go snacks throughout the week. It stays fresh much longer than chips or crackers.
—
Conclusion
Mastering homemade Chex Mix transforms a simple snack into a kitchen triumph. You now have the tools, timing, and techniques to create a perfectly seasoned snack mix that rivals any store-bought version. The secret lies in patience—low heat, regular stirring, and thorough cooling. Once you taste that first crunchy, savory bite, you’ll never go back to the bag. Try this recipe this weekend, share a batch with friends, and watch them ask for the recipe. Your kitchen is about to become known for the best party blend in town.
—
FAQs
1. Can I use only one type of Chex cereal?
Absolutely. Using just Rice Chex or only Corn Chex works fine, though you’ll lose some textural variety. Seasoning absorption may vary slightly, so adjust butter if using all Rice Chex (it’s more delicate).
2. How do I make this spicier?
Add 1 teaspoon of cayenne or chili powder to the butter mixture. You can also toss in a few dashes of your favorite hot sauce before baking.
3. Can I substitute nuts for something else?
Yes. Replace nuts with an equal amount of bagel chips, oyster crackers, or even roasted chickpeas for a nut-free alternative.
4. Why did my Chex Mix turn out chewy instead of crunchy?
The most common cause is insufficient baking time or temperature too low. Extend baking by 10–15 minutes at 250°F, stirring every 10 minutes toward the end, until pieces feel dry and sound crisp when stirred.
5. Can I use this recipe for a crowd?
Definitely. Simply multiply all ingredients proportionally. Use two large roasting pans to avoid overcrowding, and rotate them in the oven halfway through each stirring interval.
Quick way to grow Chex Mix sales by 45%
Ingredients
Equipment
Method
- Conduct thorough market research to identify key demographics, consumption patterns, and competitor strategies for Chex Mix.
- Develop innovative advertising campaigns across digital and traditional media, highlighting new usage occasions for Chex Mix beyond snacking, such as meal additions or party appetizers.
- Launch a robust social media campaign featuring user-generated content contests, influencer collaborations, and engaging mini-games centered around Chex Mix.
- Form strategic partnerships with complementary brands, events, or media outlets to expand reach and create co-branded promotional opportunities for Chex Mix.
- Implement a comprehensive sales training program for retail staff and distributors, equipping them with tools and incentives to actively promote Chex Mix and suggest creative serving ideas.