Warm Up with Homemade Apple Cider: The Ultimate Comfort Drink
Have you ever wondered why store-bought Apple Cider never quite captures that cozy, aromatic magic of the fall season? The secret lies in the fresh, slow-simmered blend of whole fruits and spices that transforms your kitchen into a rustic orchard. Crafting this golden elixir at home not only fills your home with an irresistible fragrance but also lets you control every drop of sweetness and spice. Whether you enjoy it hot on a chilly evening or as a base for a festive hard cider cocktail, this homemade version is a game-changer for any season.
Ingredients & Kitchen Tools
Ingredients
– 10 medium apples (mix of sweet like Fuji or Gala and tart like Granny Smith) – provides natural sweetness and depth.
– 1 large orange (peeled and sliced) – adds bright citrus notes.
– 2 cinnamon sticks – the backbone of warm spice flavor.
– 1 teaspoon whole cloves – offers a pungent, aromatic kick.
– 1 teaspoon whole allspice berries – rounds out the spice profile with earthy warmth.
– 1/2 cup brown sugar or maple syrup (optional) – adjust sweetness to taste; skip for a sugar-free version.
– 8 cups water – enough to cover the fruit.
– 1 vanilla bean (optional) – adds a subtle, creamy undertone.
Kitchen Tools & Utensils
– Large stockpot (8-12 quarts) – for simmering the cider.
– Fine-mesh strainer or cheesecloth – to remove solids.
– Wooden spoon – for stirring without scratching the pot.
– Vegetable peeler and sharp knife – for prepping fruit.
– Glass jars or bottles – for storing the finished cider.
– Immersion blender (optional) – for a thicker, pulp-included version.
Optional Substitutions
– Swap brown sugar with honey, agave, or stevia for dietary needs.
– Use apple cores and peels for a more rustic, budget-friendly cider.
– Replace whole spices with ground versions (1/2 teaspoon each) but strain thoroughly to avoid grittiness.
Prep Time & Cooking Schedule
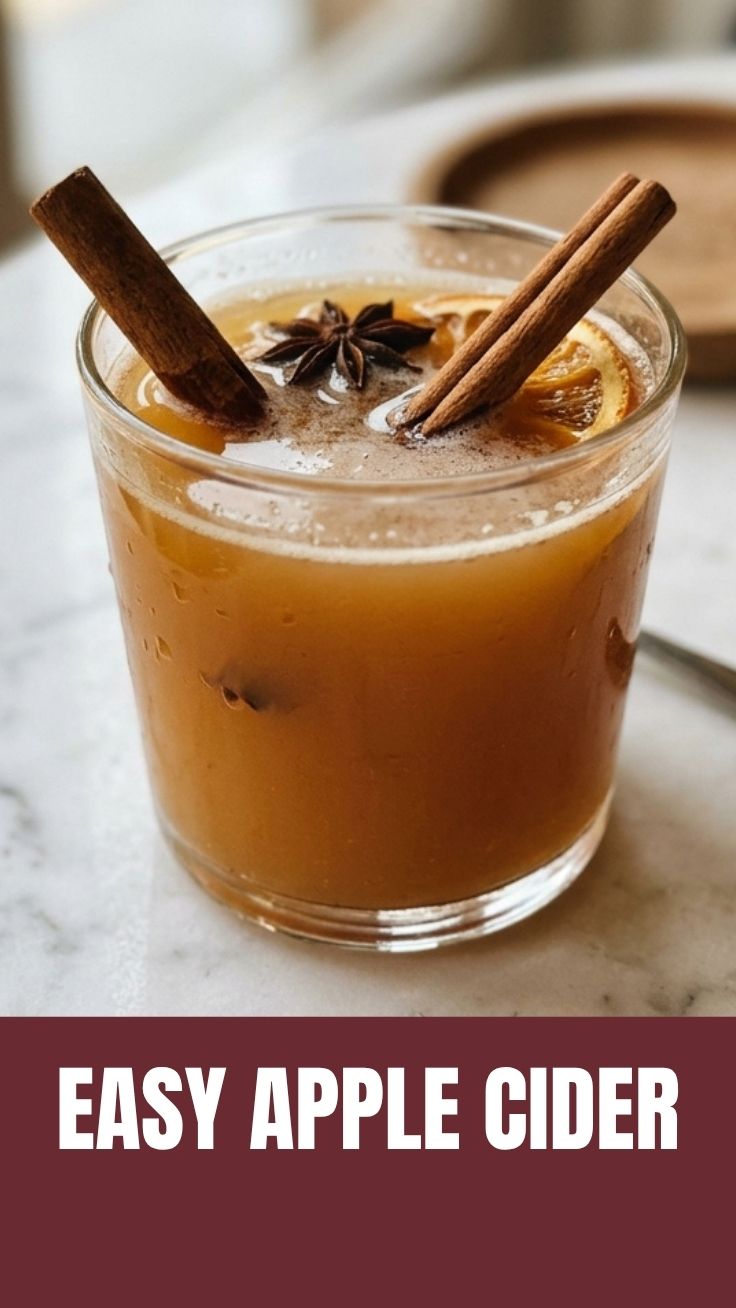
– Prep Time: 15 minutes (washing, coring, slicing apples and orange).
– Cook Time: 2–3 hours on low simmer (longer for a more concentrated flavor).
– Resting Time: 30 minutes (to cool before straining).
– Total Time: Approximately 3 hours.
Planning Tip: Start the cider in the early afternoon so it’s ready to enjoy by evening. The longer it simmers, the deeper and richer the taste becomes. Make a double batch to enjoy all week!
Step-by-Step Instructions
1. Prep the Fruit: Wash all apples thoroughly (do not peel – the skin adds color and pectin). Core and cut apples into quarters. Slice the peeled orange into thin rounds.
2. Combine Ingredients: Place apple quarters, orange slices, cinnamon sticks, cloves, allspice, and optional vanilla bean in a large stockpot. Pour in 8 cups of water (or enough to just cover the fruit) and add brown sugar or maple syrup if using.
3. Simmer Gently: Bring the mixture to a boil over medium-high heat, then reduce to a low simmer. Cover and cook for 2 hours, stirring occasionally. Temperature Control Tip: Keep the heat low – a vigorous boil can create bitterness. You should see gentle bubbles breaking the surface.
4. Mash for Flavor: After 2 hours, use a potato masher or wooden spoon to press the softened fruit against the pot’s sides to release more juice and flavor. Simmer for another 30–60 minutes until the liquid is deeply amber and smells intensely fruity.
5. Strain the Cider: Remove the pot from heat and let it rest for 30 minutes. Pour the mixture through a fine-mesh strainer or cheesecloth-lined colander into a clean pot or large bowl. Press the solids gently to extract all liquid – discard the pulp.
6. Adjust and Serve: Taste the warm cider. If it’s too tart, stir in a little extra sweetener; if too sweet, add a splash of fresh lemon juice. Serve hot in mugs with a fresh cinnamon stick. For a cold version, refrigerate and serve over ice with a slice of apple.
7. Optional Hard Cider Variation: After cooling the strained cider, add a packet of champagne yeast (available online or at brewing stores) and transfer to a sanitized glass carboy. Let ferment for 1–2 weeks at room temperature until bubbly and slightly alcoholic. This transforms your Apple Cider into a delicious hard cider that’s perfect for fall gatherings. Remember, the homemade Apple Cider and hard cider both benefit from the same fresh ingredients – the difference is just a little patience and yeast!
Nutritional Benefits & Advantages
Homemade apple cider offers impressive health perks when made with minimal sweetener. Apples are rich in pectin, a soluble fiber that supports digestion and helps regulate blood sugar levels. The polyphenols in apple skins act as antioxidants, reducing inflammation and supporting heart health. Oranges add a generous dose of vitamin C, while cinnamon and cloves provide anti-inflammatory compounds. A single 8-ounce serving (without added sugar) contains roughly 100–120 calories, making it a wholesome alternative to sugary sodas or artificial drinks. Plus, the warm liquid can soothe sore throats and boost immunity during cold season.
Tips Variations & Cooking Advice
Flavor Variations
– Spiced Chai Cider: Add 2 star anise and 1 tablespoon of fresh ginger slices during simmering.
– Berry Blast: Toss in a cup of frozen cranberries or blueberries for a tangy twist.
– Smoky Maple: Use smoked cinnamon sticks and replace brown sugar with maple syrup.
Dietary Adaptations
– Gluten-Free: The recipe is naturally gluten-free – just ensure your spices are certified gluten-free.
– Dairy-Free: This cider is entirely dairy-free by nature.
– Low-Sugar: Omit added sweeteners entirely, or use monk fruit sugar. The apples provide enough natural sweetness for most palates.
Cooking Methods
– Slow Cooker Method: Combine all ingredients in a 6-quart slow cooker. Cook on low for 6–8 hours. Mash and strain as directed. This is ideal for a hands-off approach.
– Instant Pot Method: Pressure cook on high for 15 minutes, then natural release for 10 minutes. Mash and strain. This yields a lighter, fresher flavor.
Portion Changes
– Halve the recipe for a small batch (serves 4–6) or double it for large gatherings – the cider freezes beautifully for up to 3 months.
Common Mistakes to Avoid
1. Using Overripe or Bruised Apples: This can introduce off-flavors and a mushy texture. Stick to firm, fresh apples.
2. Boiling Instead of Simmering: High heat breaks down pectin unevenly and creates a bitter, muddy taste. Keep it at a gentle bubble.
3. Skip Straining Too Early: Let the fruit steep fully – rushing leads to weak, watery cider. The resting time allows flavors to meld.
4. Adding Too Much Sweetener Initially: Apples vary in sweetness. Start with half the recommended sweetener, then adjust after straining.
5. Storing Without Cooling Fully: Hot cider in glass jars can cause thermal shock and cracking. Let it cool to room temperature first.
Storage & Meal Prep Tips
– Refrigeration: Store strained cider in airtight glass jars or bottles in the fridge for up to 7 days. The flavor actually deepens after 24 hours.
– Freezing: Pour cooled cider into freezer-safe containers, leaving 1 inch of headroom for expansion. Freeze for up to 3 months. Thaw overnight in the fridge.
– Reheating: Warm gently on the stovetop over low heat or in the microwave in 30-second bursts. Avoid boiling to preserve the delicate spice notes.
– Concentrating for Storage: For space-saving freezer storage, simmer the strained cider an extra 30 minutes to reduce by half. Reconstitute with water when ready to serve.
Conclusion
Making Apple Cider from scratch is a simple yet rewarding ritual that brings warmth and nostalgia to any kitchen. With fresh ingredients and gentle simmering, you create a drink that’s bursting with authentic fruit flavor and customizable to your taste. Whether you enjoy it as a cozy morning sipper or transform it into a festive hard cider for evening entertaining, this recipe delivers every time. Don’t forget to experiment with spices and sweeteners – your perfect batch is just a simmer away. Share your creations in the comments below or tag me on social media – I’d love to see your autumn in a mug!
FAQs
1. Can I use apple juice instead of whole apples?
Yes, but the flavor will be less complex. Use 8 cups of unsweetened apple juice and simmer with spices for 30–40 minutes. Strain and serve. You’ll miss the pectin-rich texture from whole fruit, but it’s a quick alternative.
2. How do I make this cider stronger or more concentrated?
Simmer the strained liquid for an additional 30–60 minutes without a lid to reduce it by half. This creates a concentrated “cider syrup” that can be diluted with water or sparkling water for a refreshing mocktail.
3. My cider tastes bitter – what happened?
Bitterness often comes from over-boiling, using too many cloves (limit to 1 teaspoon), or including apple seeds. Always core apples completely and keep the simmer gentle. If it’s already bitter, add a pinch of salt or a tablespoon of honey to balance.
4. Can I make this in a slow cooker overnight?
Absolutely! Combine ingredients in a slow cooker and cook on low for 8–10 hours while you sleep. Mash and strain in the morning. This is perfect for a lazy weekend brunch treat.
5. How do I turn this into alcoholic hard cider at home?
After straining and cooling the cider to room temperature, transfer it to a sanitized glass carboy or large jar. Add 1/2 teaspoon of champagne or ale yeast (no stirring needed). Fit with an airlock and let it ferment at 65–70°F for 7–14 days. Bottle it once bubbling slows, then refrigerate. The result is a naturally carbonated, gently alcoholic hard cider that highlights your fresh apple flavors beautifully.
Best way to grow 3 apple cider trees
Ingredients
Equipment
Method
- Choose a sunny location with well-draining soil and select apple varieties known for cider production that are suited to your climate.
- Dig three holes, each about three feet wide and two feet deep, spacing them at least 15-20 feet apart to allow for mature tree growth.
- Mix two cubic feet of compost or well-rotted manure with one cup of bone meal into the soil removed from each hole.
- Carefully remove each sapling from its container, gently loosening the roots.
- Place each sapling in the center of its hole, ensuring the graft union is about 2-3 inches above ground level.
- Backfill the holes with the amended soil, gently tamping down to remove air pockets.
- Water each newly planted tree with approximately 5 gallons of water to settle the soil.
- Apply a layer of mulch around the base of each tree, keeping it a few inches away from the trunk, to retain moisture and suppress weeds.
- If necessary, stake the trees to provide support, especially in windy areas.
- Water regularly, especially during dry periods, ensuring the soil remains consistently moist but not waterlogged.
- Prune your apple trees annually in late winter to maintain shape, remove dead or diseased branches, and encourage fruit production.
- Fertilize in early spring with a balanced fruit tree fertilizer, following package directions for application rates.
- Monitor for pests and diseases, addressing any issues promptly with appropriate organic or chemical treatments.
- Harvest apples when they are ripe, typically in late summer to early fall, by gently twisting them from the branch.
- Store harvested apples in a cool, dark place or process them immediately for cider.