The Ultimate Guide to Baking the Perfect Apple Pie
Have you ever bitten into a store-bought pie and felt that something was missing—that depth of flavor, that buttery, flaky crust, and the tender, cinnamon-spiced apples that only come from a homemade creation? Preparing an Apple Pie from scratch is not just about following steps; it’s about crafting a dessert that fills your home with warmth and creates lasting memories. Whether you’re a seasoned baker or a curious beginner, making your own pie ensures you control the quality of ingredients—no preservatives, just pure, honest flavor. And when you’re looking for reliable dessert recipes, this classic apple pie stands out as a must-try favorite. In this guide, we’ll walk you through every detail, from selecting the best apples to mastering the lattice crust, so you can serve a pie that rivals any bakery.
—
Ingredients & Kitchen Tools
For the Crust (makes 2 discs)
– 2 ½ cups all-purpose flour – Spoon and level for accuracy; don’t scoop directly.
– 1 teaspoon salt – Enhances flavor and structure.
– 1 tablespoon granulated sugar – Adds a hint of sweetness and helps browning.
– 1 cup (2 sticks) cold unsalted butter – Cut into small cubes; keep very cold for flakiness.
– 6–8 tablespoons ice water – Add gradually; too much water makes dough tough.
For the Apple Filling
– 6–7 medium apples (mix of Granny Smith, Honeycrisp, or Braeburn) – Tart and sweet varieties give complexity.
– ¾ cup granulated sugar – Adjust based on apple sweetness.
– 2 tablespoons all-purpose flour – Thickens the juices.
– 1 tablespoon lemon juice – Prevents browning and brightens flavor.
– 1 ½ teaspoons ground cinnamon – The star spice.
– ¼ teaspoon ground nutmeg – Optional but adds warmth.
– Pinch of salt – Balances sweetness.
Kitchen Tools
– 9-inch pie dish (glass or metal)
– Rolling pin
– Pastry cutter or food processor
– Mixing bowls
– Measuring cups and spoons
– Sharp knife or apple peeler
– Pastry brush (for egg wash)
– Aluminum foil or pie shield (to prevent over-browning)
Optional Substitutions: Use gluten-free all-purpose flour blend for crust (add 1 tsp xanthan gum if not included). Substitute butter with vegan butter for a dairy-free version.
—
Prep Time & Cooking Schedule
| Stage | Time |
|——-|——|
| Prep Time | 30 minutes |
| Chill Dough | 1 hour minimum |
| Assemble & Bake | 50–60 minutes |
| Cooling | 2 hours minimum |
Why this schedule matters: The dough must rest in the refrigerator to relax gluten and keep butter solid—this ensures a tender, flaky crust. While the dough chills, you can prepare the filling. After baking, the pie needs to cool completely so the filling sets; slicing too early leads to a runny mess. Plan ahead: start at least 3 hours before serving.
—
Step-by-Step Instructions
1. Make the crust: In a large bowl, whisk flour, salt, and sugar. Cut in cold butter using a pastry cutter or pulse in a food processor until mixture resembles coarse meal with pea-sized butter pieces. Drizzle ice water, 1 tablespoon at a time, tossing with a fork until dough just holds together. Divide into two discs, wrap in plastic, and refrigerate for at least 1 hour.
2. Prepare the filling: Peel, core, and slice apples into ¼-inch thick wedges. In a large bowl, toss apples with sugar, flour, lemon juice, cinnamon, nutmeg, and salt. Let sit for 15 minutes to release juices.
3. Roll out dough: On a lightly floured surface, roll one disc to a 12-inch circle. Transfer to pie dish, gently pressing into bottom and sides. Refrigerate while rolling top crust.
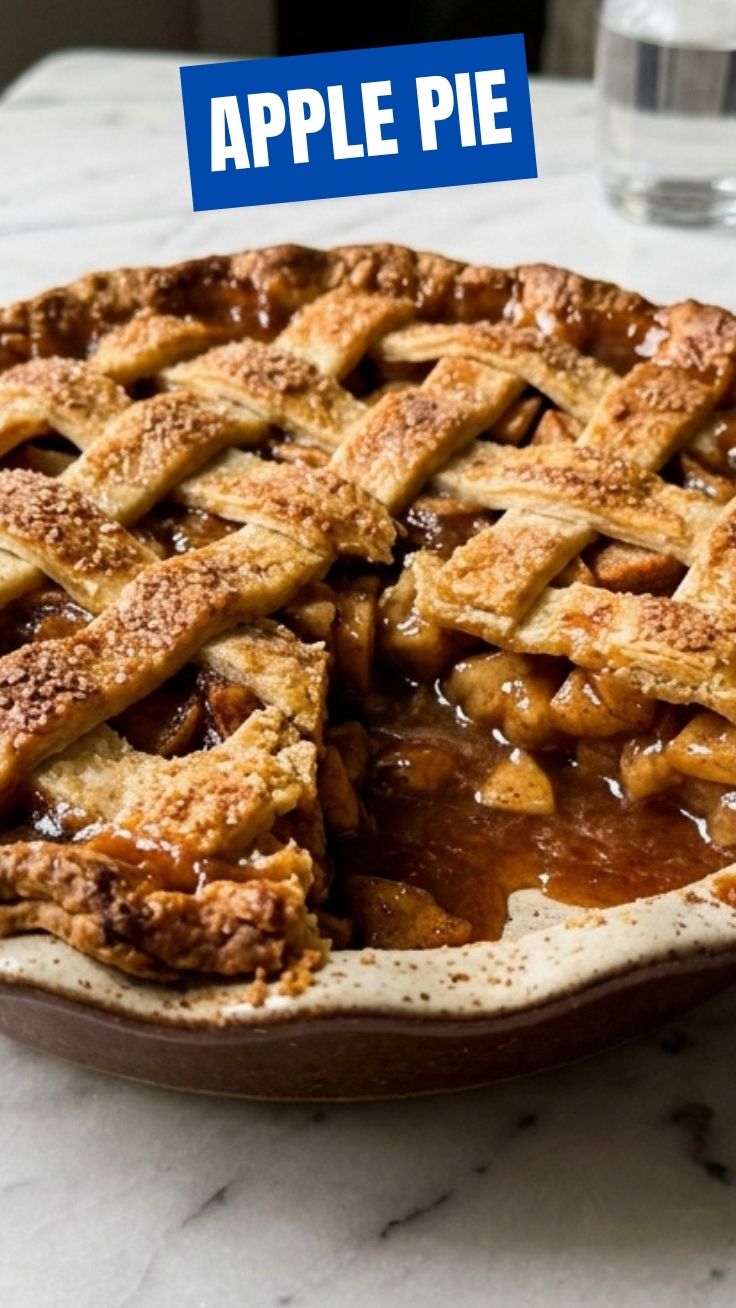
4. Assemble the pie: Pour apple filling into the crust, mounding slightly in the center. Dot with 1 tablespoon butter (optional). Roll out second disc and place on top. Trim excess, crimp edges, and cut several steam vents. Brush with egg wash (1 egg beaten with 1 tablespoon milk) and sprinkle with coarse sugar.
5. Bake: Place pie on a baking sheet to catch drips. Bake at 425°F for 20 minutes, then reduce to 375°F and bake 30–40 minutes more, until crust is golden and filling bubbles. If edges brown too fast, cover with foil shield.
6. Cool: Transfer to a wire rack and cool for at least 2 hours before slicing. This step is crucial for a clean slice.
Temperature control tip: An instant-read thermometer inserted into the filling should read at least 200°F when done. If you’re exploring other Apple Pie variations, consider adding raisins or a crumb topping. And if you’re building a collection of reliable dessert recipes, this one deserves a permanent spot in your binder.
—
Nutritional Benefits & Advantages
Apples are a powerhouse of dietary fiber (especially pectin) and vitamin C. A slice of homemade pie (1/8 of a 9-inch pie) contains roughly 350–400 calories, depending on butter and sugar. The fiber from apples helps slow sugar absorption, making this a more balanced indulgence than many processed desserts. You can also reduce sugar by 25% without sacrificing sweetness if your apples are naturally sweet. The cinnamon offers anti-inflammatory properties and may help regulate blood sugar. By baking at home, you avoid high-fructose corn syrup and hydrogenated fats found in many commercial pies.
—
Tips, Variations & Cooking Advice
– Flavor twist: Add 1 tablespoon of bourbon or calvados to the filling for depth.
– Crust upgrade: Replace ¼ cup flour with almond flour for a nutty flavor.
– Gluten-free: Use a 1:1 gluten-free flour blend and chill dough thoroughly.
– Dairy-free: Substitute coconut oil or vegan butter for butter; use plant-based milk for egg wash.
– Portion change: Make mini hand pies using a 4-inch cutter (bake time reduced to 15–18 minutes).
– Spice blend: Swap cinnamon for apple pie spice or pumpkin pie spice.
Pro tip: For a glossy top, brush with apricot jam after baking.
—
Common Mistakes to Avoid
| Mistake | Solution |
|———|———-|
| Soggy bottom crust | Blind-bake the bottom crust for 10 minutes at 400°F before adding filling. Or bake on a preheated baking sheet. |
| Tough, chewy crust | Don’t overwork the dough; handle as little as possible. Keep butter cold. |
| Filling too runny | Let the filling sit after tossing; drain excess liquid. Also bake until filling visibly bubbles. |
| Burnt crust edges | Use a pie shield or strips of foil after the first 25 minutes of baking. |
| Apples mushy | Use firm apples like Granny Smith. Avoid over-softening by not pre-cooking the filling. |
—
Storage & Meal Prep Tips
– Refrigeration: Cover leftover pie with foil or plastic wrap and refrigerate for up to 4 days. The crust will soften slightly.
– Freezing: Wrap the unbaked pie tightly in plastic wrap and foil; freeze for up to 3 months. Bake directly from frozen, adding 20 minutes to the baking time.
– Reheating: To restore crispness, warm slices in a 350°F oven for 10–15 minutes. Avoid microwaving—it makes the crust soggy.
– Meal prep: Make the dough and filling up to 2 days ahead. Assemble and bake on the day of serving.
—
Conclusion
Mastering this Apple Pie is a rewarding journey that pays off with every warm, cinnamon-scented bite. By following the techniques outlined here—from choosing the right apples to chilling the dough—you’ll consistently produce a pie with a flaky crust and a perfectly set, flavorful filling. Whether you’re serving it for a holiday gathering or a simple Sunday dinner, it’s one of the most cherished dessert recipes you can add to your repertoire. We encourage you to bake this pie, share it with loved ones, and tell us how it turned out in the comments below. For more timeless baking inspiration, explore our other seasonal treats.
—
FAQs
1. Can I use pre-made pie crust to save time?
Absolutely. If you’re short on time, a high-quality refrigerated or frozen crust works well. Just blind-bake the bottom to prevent sogginess.
2. My pie filling is always too watery. What can I do?
After slicing apples, toss with sugar and let sit for 15 minutes. Drain the released liquid before adding the flour mixture. Alternatively, cook the filling on the stovetop for 5 minutes to thicken before adding to the crust.
3. How do I prevent the crust from shrinking?
Chill the rolled-out dough for at least 15 minutes before baking. Also, avoid stretching the dough when placing it in the dish—press it gently into the corners.
4. Can I make this apple pie vegan?
Yes! Use vegan butter for the crust and a plant-based egg wash (like oat milk with a pinch of turmeric for color). The filling is naturally vegan except for the optional butter dot—skip it or use vegan butter.
5. Why did my apples turn brown?
Toss them immediately with lemon juice after slicing. The acid prevents oxidation. If you’re not baking right away, you can also soak them in cold water with a splash of lemon juice.