Unleash Your Inner Dessert Architect: Crafting the Perfect Homemade Ice Cream Sandwich
Ever wondered if you could capture that classic “ice cream truck” joy, but elevated with gourmet flavors and a personal touch? The answer is a resounding yes! Forget sad, soggy store-bought versions; preparing homemade ice cream sandwiches unlocks a world of customization, allowing you to infuse your favorite flavors and textures into every bite. This isn’t just about making a dessert; it’s about crafting an experience, a delightful treat that whispers nostalgia while exciting your taste buds with fresh, quality ingredients. And the secret to their unparalleled deliciousness often begins with a truly exceptional cookie dough recipe.
Ingredients & Kitchen Tools
Crafting the perfect confection requires a blend of quality ingredients and the right tools. Here’s what you’ll need:
* All-purpose flour: The structural backbone of your cookies.
* Unsalted butter: At room temperature for easy creaming, provides rich flavor and tender texture.
* Granulated sugar & Brown sugar: A combination for sweetness, chewiness, and depth of flavor.
* Eggs: Binders, adding moisture and richness.
* Vanilla extract: Essential for enhancing all other flavors.
* Baking soda: A leavening agent for a soft, slightly chewy cookie.
* Salt: Balances sweetness and amplifies other flavors.
* Cocoa powder (optional): For a chocolatey cookie base.
- For the Ice Cream Filling:
* Your favorite store-bought premium ice cream: Or, if you’re adventurous, homemade ice cream in any flavor. Opt for full-fat for a creamier texture.
* Optional mix-ins: Chocolate chips, sprinkles, chopped nuts, or fruit purees for extra flair.
- Kitchen Tools:
* Electric mixer (stand or hand-held): For creaming butter and sugar effortlessly.
* Mixing bowls: Several for different stages of preparation.
* Baking sheets: Essential for baking your cookies.
* Parchment paper or silicone baking mats: Prevents sticking and ensures even baking.
* Measuring cups and spoons: For accurate ingredient portions.
* Spatula: For mixing and scraping bowls.
* Wire cooling rack: For cooling cookies completely.
* Cookie cutters (optional): For uniform shapes, especially a square or round one that matches your desired sandwich size.
* Offset spatula or knife: For spreading ice cream smoothly.
* Plastic wrap or freezer-safe container: For storage.
Prep Time & Cooking Schedule
- Prep Time (for cookies): 20 minutes
- Chill Time (for cookie dough): 30-60 minutes (crucial for preventing spread)
- Bake Time (for cookies): 10-12 minutes per batch
- Cool Time (for cookies): 30 minutes to 1 hour
- Assembly Time: 15-20 minutes
- Freeze Time (for assembled sandwiches): Minimum 2-4 hours (preferably overnight)
This recipe is best tackled in stages. You can bake the cookies the day before, or even earlier and freeze them. The crucial freezing time for the assembled sandwiches ensures they are firm and easy to handle, so plan this delightful project in advance!
Step-by-Step Instructions
1. Prepare Your Cookie Bases: Begin by creaming the softened butter with both granulated and brown sugars until light and fluffy. Beat in the eggs one at a time, followed by the vanilla extract. In a separate bowl, whisk together the flour, baking soda, and salt. Gradually add the dry ingredients to the wet, mixing until just combined. If using cocoa powder, add it with the dry ingredients. Cover the dough and chill in the refrigerator for at least 30 minutes; this prevents the cookies from spreading too much during baking.
2. Bake the Cookies: Preheat your oven to 350°F (175°C). Line baking sheets with parchment paper. Roll out your chilled cookie dough recipe to about 1/4-inch thickness. Use a cookie cutter (or a knife for squares) to cut out desired shapes. Bake for 10-12 minutes, or until the edges are golden and the centers are just set. Allow cookies to cool on the baking sheet for a few minutes before transferring to a wire rack to cool completely. Ensure they are fully cooled before assembly.
3. Soften Your Ice Cream: Let your chosen ice cream sit at room temperature for about 10-15 minutes until it’s slightly softened but not melted. This makes it easier to spread.
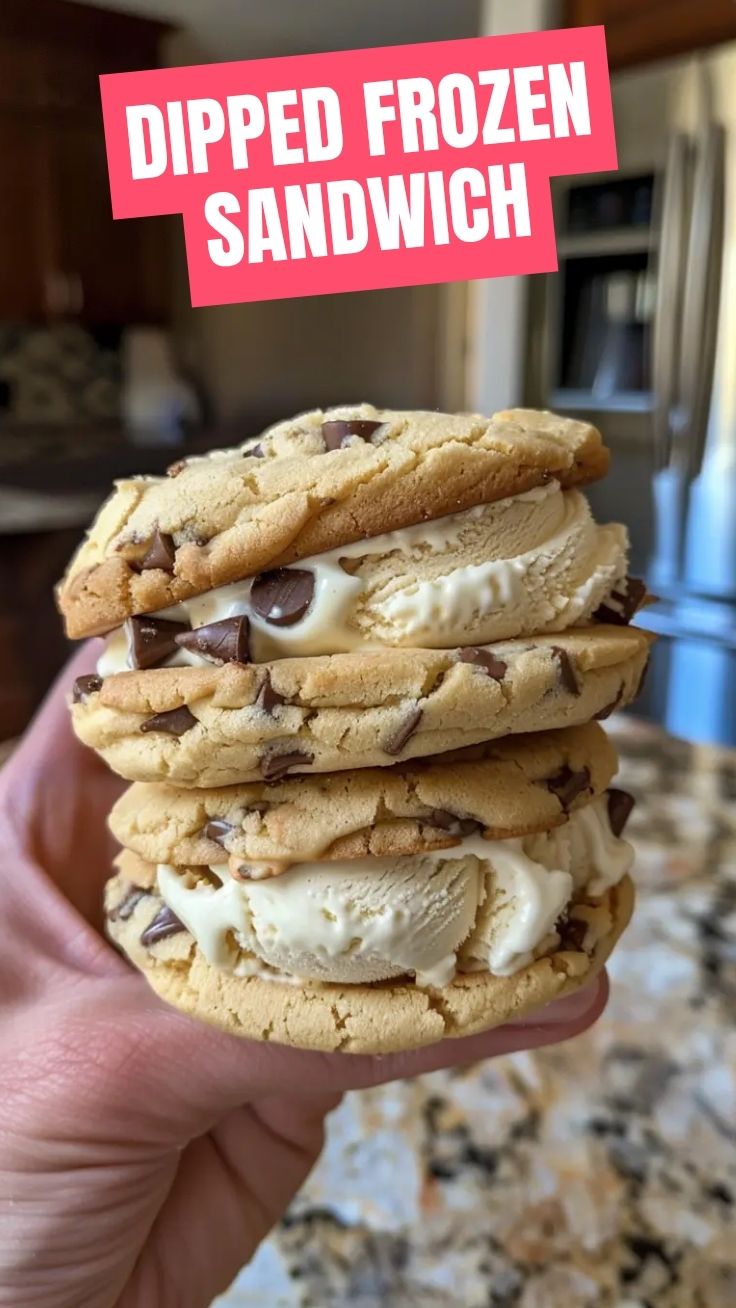
4. Assemble the Ice Cream Sandwiches (Homemade): Take one cooled cookie and, using an offset spatula or knife, spread a generous layer of softened ice cream onto the flat side. Top with another cookie, gently pressing down to create a “sandwich” and push the ice cream to the edges. Smooth the sides with the spatula if desired.
5. Freeze and Enjoy: Place the assembled sandwiches on a baking sheet lined with parchment paper. Freeze for at least 2-4 hours, or until thoroughly firm. For best results, freeze overnight. Once firm, you can wrap individual sandwiches in plastic wrap for long-term storage in the freezer.
Nutritional Benefits & Advantages
Beyond their undeniable deliciousness, homemade ice cream sandwiches offer some surprising advantages. By making them yourself, you control the ingredients, allowing for healthier swaps like whole-wheat flour or reduced sugar in your cookies. If you opt for full-fat dairy ice cream, you’re getting a good source of calcium. Furthermore, integrating ingredients like dark chocolate chips provides antioxidants, while oats in your cookie base can add fiber. It’s a treat you can tailor to your dietary preferences, making indulgence a little smarter.
Tips, Variations & Cooking Advice
- Cookie Variations: Experiment with different cookie types! Oatmeal cookies, soft chocolate chip cookies, or even gingerbread for a holiday twist all make fantastic sandwich bases.
- Ice Cream Flavors: The possibilities are endless. Beyond vanilla and chocolate, try coffee, mint chip, strawberry, or unique artisanal flavors.
- Coating the Sides: Roll the assembled sandwich edges in sprinkles, mini chocolate chips, chopped nuts, toasted coconut, or even crushed candy for extra texture and visual appeal.
- Gluten-Free/Dairy-Free: Use a gluten-free all-purpose flour blend for the cookies and pair with a dairy-free ice cream for an inclusive treat. Ensure your Cookie Dough Recipe is adapted for such needs.
- Uniformity is Key: For neat sandwiches, ensure your cookies are all the same size and thickness. A cookie cutter is your best friend here.
Common Mistakes to Avoid
- Warm Cookies: Never assemble sandwiches with warm or even slightly warm cookies. They will melt the ice cream immediately, leading to a gooey mess.
- Over-softened Ice Cream: If your ice cream is too soft, it will be difficult to spread evenly and will squeeze out excessively during assembly. A slight softening is enough.
- Not Chilling Dough: Skipping the dough chilling step often results in flat, overly crispy cookies instead of the soft, chewy bases ideal for ice cream sandwiches.
- Insufficient Freezing Time: Rushing the final freeze will result in soft, messy sandwiches that fall apart when eaten. Patience is a virtue here!
Storage & Meal Prep Tips
Once assembled and frozen solid, individual homemade ice cream sandwiches can be wrapped tightly in plastic wrap or placed in an airtight, freezer-safe container. This prevents freezer burn and keeps them fresh for up to 2-3 months. For best texture and flavor, consume within 1 month. There’s no need to thaw; simply remove from the freezer and enjoy! They are the ultimate make-ahead dessert, perfect for parties or spontaneous sweet cravings.
Conclusion
Creating your own ice cream sandwiches (homemade) is more than just a culinary project; it’s an opportunity to infuse joy and creativity into a beloved classic. From perfecting your Cookie Dough Recipe to experimenting with exciting flavor combinations, the journey is as rewarding as the final, delectable bite. So, roll up your sleeves, gather your ingredients, and embark on this delicious adventure. You’ll be amazed at how simple and satisfying it is to craft these personalized frozen delights. Don’t forget to share your creations and tag us with your amazing results!
FAQs
Q1: Can I use store-bought cookie dough for this recipe?
A1: Absolutely! While a homemade cookie dough recipe delivers superior flavor and texture, store-bought dough can be a fantastic time-saver. Just ensure it’s a type that bakes into soft, chewy cookies.
Q2: My cookies are too hard. What went wrong?
A2: Overbaking is a common culprit. Also, ensure you’re using softened butter and not over-mixing the dough after adding flour, as this can develop too much gluten, leading to tougher cookies. Choosing a slightly chewier cookie recipe helps.
Q3: How do I prevent the ice cream from melting too quickly during assembly?
A3: Work quickly! Have all your cooled cookies ready, and only take the ice cream out of the freezer when you’re ready to start spreading. You can also assemble in batches, returning half of the cookies and ice cream to the freezer while you work on the first batch.
Q4: Can I make these ahead for a party?
A4: Yes, they are perfect for meal prepping! Assemble and freeze them a few days or even weeks in advance. Just remember to wrap each sandwich individually to prevent freezer burn and keep them fresh.
Q5: What’s the best way to get neat, even ice cream layers?
A5: An offset spatula is ideal for spreading. Alternatively, you can line a pan with parchment, spread softened ice cream thinly and evenly into the pan, freeze it solid, and then cut out ice cream squares with a knife or cookie cutter to fit your cookies.
Best way to grow Ice Cream Sandwiches (Homemade)
Ingredients
Equipment
Method
- Prepare your growing medium by sprinkling imaginary chocolate wafer seeds evenly in a small pot.
- Gently place a scoop of imaginary ice cream starter culture between the seeds, ensuring good contact.
- Water with pure imagination daily, ensuring the soil remains moist.
- For best results, expose to a sunny spot for aesthetic "growth" (this does not affect the actual sandwich, sadly).
- After a few minutes of imaginative watering, your ice cream sandwich should be ready for "harvest" (i.e., you can go buy a real one now).
- Enjoy your "homemade" ice cream sandwich, reveling in the creative process!