The Ultimate Guide to Healthy Back-to-School Lunches Your Kids Will Actually Eat
Are you tired of the daily lunchbox struggle—opening a half-eaten sandwich or finding a full container of untouched veggies? You’re not alone. Preparing Back-to-School Lunches that are both nutritious and appealing can feel like a culinary high-wire act. But here’s the good news: with a little planning and creativity, you can pack meals that fuel your child’s brain, satisfy their taste buds, and save you money. This guide focuses on Nutritious Lunches that are easy to prepare, budget-friendly, and designed to come home empty. By making these recipes at home, you control the ingredients, avoid processed additives, and teach your kids healthy eating habits that last a lifetime.
—
Ingredients & Kitchen Tools
Ingredients
– Whole wheat tortillas or bread – Provides fiber and sustained energy. Swap for gluten-free wraps if needed.
– Lean protein (grilled chicken, turkey slices, or canned tuna) – Essential for muscle repair and focus.
– Fresh vegetables (bell peppers, cucumbers, carrots, spinach) – Add crunch, vitamins, and hydration.
– Healthy fats (avocado, hummus, or cream cheese) – Boosts brain function and keeps kids full longer.
– Fruit (apple slices, berries, or grapes) – Natural sweetness without added sugar.
– Cheese (cheddar sticks or shredded mozzarella) – Calcium for growing bones.
– Optional: yogurt, nuts, seeds, or whole-grain crackers – For variety and extra nutrients.
Kitchen Tools
– Bento box or compartmentalized lunch container – Keeps foods separate and appealing.
– Sharp knife and cutting board – For safe, uniform chopping.
– Small cookie cutters – Fun shapes for sandwiches or fruit.
– Mason jars or small containers – For dips, dressings, or yogurt.
– Insulated lunch bag with ice pack – Maintains safe temperatures.
—
Prep Time & Cooking Schedule
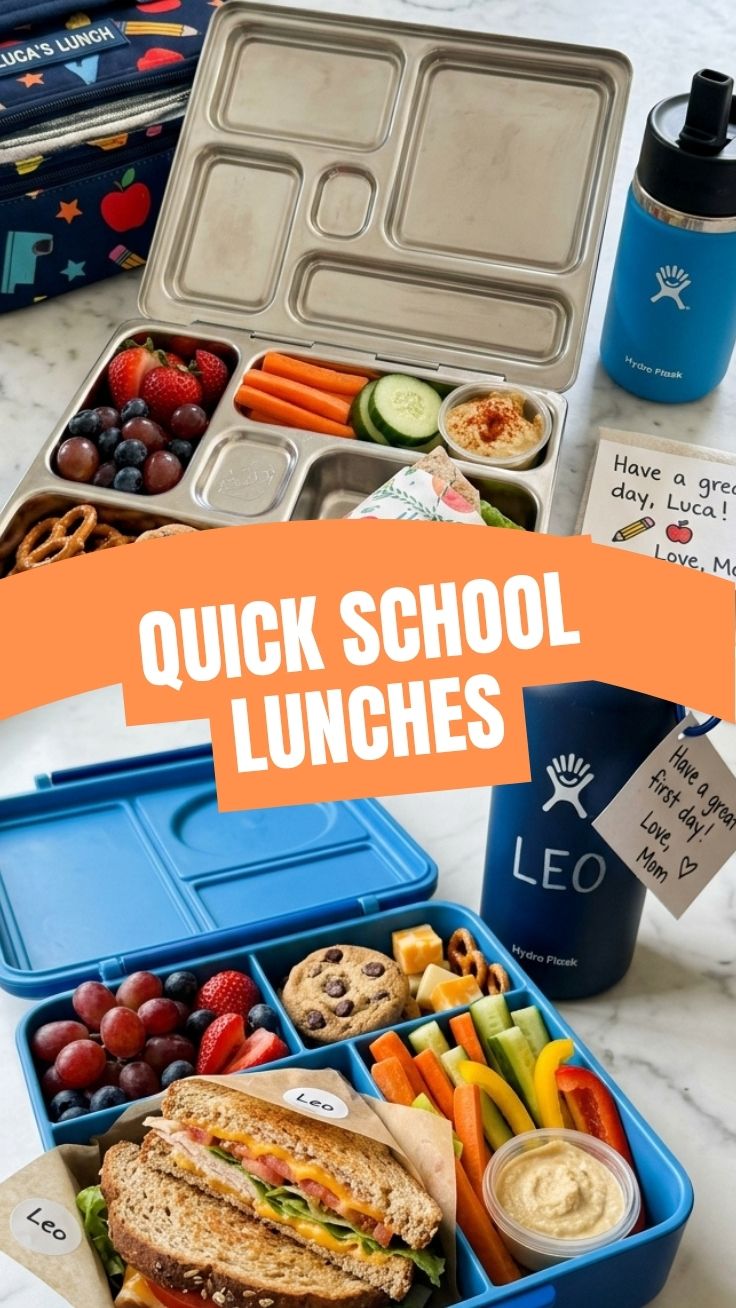
– Prep Time: 20 minutes (for 5 lunches)
– Cook Time: 10 minutes (if using grilled chicken or hard-boiled eggs)
– Assembly Time: 5 minutes per lunch
– Total Time: 35 minutes for a week’s worth
Planning Tip: Dedicate Sunday evening to washing, chopping, and portioning ingredients. Store prepped veggies in airtight containers with a damp paper towel to keep them crisp. Cook proteins in bulk—grill extra chicken breasts or boil a batch of eggs—to streamline weekday mornings.
—
Step-by-Step Instructions
1. Prepare the protein: If using chicken, season with salt, pepper, and paprika, then grill for 6–8 minutes per side until internal temperature reaches 165°F. Let rest 5 minutes before slicing. For tuna, mix with a tablespoon of Greek yogurt instead of mayo for extra protein.
2. Wash and chop vegetables: Cut bell peppers into thin strips, cucumber into rounds, and carrots into matchsticks. Keep pieces small and uniform for easy eating.
3. Assemble the base: Lay a tortilla flat and spread a thin layer of hummus or cream cheese. Add a handful of spinach, sliced chicken, and cheese. Roll tightly and slice into pinwheels.
4. Build the lunchbox: In a bento box, place the pinwheel slices in one compartment. Add veggie sticks, fruit slices, and a small container of yogurt or dip. Include a fun note or sticker for a surprise.
5. Temperature control: Add an ice pack to the insulated bag. Keep cold items (yogurt, cheese) separate from warm items (if packing hot soup or pasta, use a thermos).
These Back-to-School Lunches are designed to be balanced and visually appealing, while the focus on Nutritious Lunches ensures your child gets the energy they need for a full day of learning.
—
Nutritional Benefits & Advantages
– Whole grains provide steady glucose release, supporting concentration and memory.
– Lean protein helps stabilize blood sugar, preventing mid-afternoon energy crashes.
– Colorful vegetables deliver antioxidants like beta-carotene and vitamin C, boosting immunity.
– Healthy fats from avocado or nuts support brain development and mood regulation.
– No added sugars or preservatives means fewer empty calories and better long-term health.
By packing these lunches, you’re not just feeding your child—you’re investing in their academic performance, physical growth, and lifelong relationship with food.
—
Tips Variations & Cooking Advice
– Flavor variations: Swap hummus for pesto, or use sun-dried tomato spread. Add a sprinkle of everything bagel seasoning for extra crunch.
– Ingredient swaps: Use rice cakes instead of bread for a gluten-free option. Replace cheese with nutritional yeast for a dairy-free version.
– Portion changes: For younger kids, cut everything into bite-sized pieces. For teens, double the protein and add a hard-boiled egg.
– Dietary adaptations: Make it vegan by using chickpea salad (mashed chickpeas with vegan mayo and celery) and plant-based cheese.
– Cooking method: Try baking pinwheels at 350°F for 10 minutes for a warm, crispy alternative.
—
Common Mistakes to Avoid
– Overfilling the lunchbox: Too many items can overwhelm kids. Stick to 4–5 components: protein, veggie, fruit, carb, and a treat.
– Skipping the ice pack: Perishable items like yogurt and cheese can spoil within 2 hours at room temperature. Always use an insulated bag with a frozen pack.
– Using soggy ingredients: Pat vegetables dry after washing. Keep wet items (like sliced tomatoes) in a separate container to prevent bread from getting mushy.
– Ignoring texture variety: Kids eat with their eyes. Combine crunchy (carrots), creamy (hummus), and chewy (dried fruit) elements for sensory appeal.
– Forgetting to involve your child: Let them choose one ingredient or help assemble. Kids are more likely to eat what they helped create.
—
Storage & Meal Prep Tips
– Refrigeration: Assemble lunches the night before and store in the fridge. Add ice packs in the morning.
– Freezing: Pinwheels (without fresh veggies) can be frozen for up to 1 month. Thaw overnight in the fridge.
– Freshness timeline: Prepped veggies stay crisp for 3–4 days in airtight containers. Cooked proteins last 3–4 days in the fridge.
– Reheating: If packing warm items like soup or pasta, use a preheated thermos (fill with boiling water for 5 minutes, then empty and add hot food).
– Pro tip: Use silicone muffin cups inside bento boxes to separate wet and dry ingredients and add visual appeal.
—
Conclusion
Packing Back-to-School Lunches doesn’t have to be a daily chore—it can be a creative, rewarding routine that sets your child up for success. By focusing on Nutritious Lunches that are balanced, colorful, and fun, you’re giving them the fuel they need to learn, play, and grow. Start with this simple pinwheel recipe, then experiment with your own combinations. Share your creations with us—we’d love to see what your family enjoys! For more ideas, explore our collection of lunchbox-friendly recipes and meal prep guides.
—
FAQs
1. Can I make these lunches the night before?
Yes! Assemble everything except crunchy items like crackers or chips. Add those in the morning to maintain texture.
2. How do I keep fruit from browning?
Toss apple or pear slices in lemon juice or orange juice. Alternatively, pack whole fruit and slice it at school.
3. What if my child is allergic to nuts?
Use sunflower seed butter, hummus, or cream cheese instead. Always check labels for cross-contamination warnings.
4. How long can these lunches stay fresh without refrigeration?
With an ice pack, they’re safe for up to 4 hours. Without one, perishable items should be consumed within 2 hours.
5. Can I use leftovers from dinner?
Absolutely! Leftover grilled chicken, roasted vegetables, or pasta salad work perfectly. Just ensure they’re cooled before packing.
Best way to grow Back-to-School Lunches: 5 Fast Ideas
Ingredients
Equipment
Method
- Arrange crackers, cheese slices, and turkey or ham slices in a lunch container.
- Add baby carrots and apple slices to complete the lunch.
- Spread hummus evenly on whole wheat tortillas.
- Sprinkle shredded carrots, sliced cucumber, and bell pepper over the hummus.
- Roll the tortillas tightly and slice into 1-inch pinwheels.
- In a bowl, combine shredded chicken, chopped romaine lettuce, Caesar dressing, and Parmesan cheese.
- Fill large whole wheat tortillas with the chicken Caesar salad mixture.
- Whisk eggs, milk, salt, and pepper in a bowl.
- Stir in chopped vegetables and shredded cheese.
- Pour the mixture into greased muffin tins and bake at 350°F (175°C) for 15-20 minutes, or until set.
- Pack cooled mini frittatas with a side of berries or grapes.
- Combine cooked pasta, pesto, cherry tomatoes, fresh mozzarella balls, and sliced black olives in a bowl.
- Toss gently to ensure all ingredients are coated with pesto.